
Moving an object in Unity can be very straightforward.
It typically involves modifying the properties of an object’s Transform component, which is used to manage a game object’s scale, rotation and, importantly, its position in the world.
However, there are many different ways that you can do that, such as by modifying the values directly, using built-in movement functions, or by using physics, which avoids using the transform component at all. The exact method you use will depend on the type of movement it is that you want to create.
For example, you might modify an object’s transform position to create movement that’s directly attached to player input. Or, to move an object to a specific position, you might use the Move Towards function, or Lerp.
Alternatively, if you don’t want to move an object manually, you can also apply force to it with a rigidbody, moving it using simulated physics instead.
In this article, you’ll learn how and when to use each of the different methods for moving an object in Unity, so that you can choose the one that’s right for your project.
Here’s what you’ll find on this page:
- How to move an object in Unity
- How to move an object to a position in Unity
- How to move an object using physics
Related Articles:
Let’s get started.
Video overview
For a general overview of how to move objects in Unity try my YouTube video, or continue to the full article below.
How to move an object in Unity
The most straightforward method of changing an object’s position in Unity is to set it directly, which will instantly move it to a new vector 3 position in the world.
This works by setting the Position property of an object’s Transform component to a new position.
Like this:
// Moves an object to the set position
transform.position = new Vector3(10, 0, 5);
Or you can add a vector to an object’s position, to move it by a set amount in a specific direction.
Like this:
// Moves an object up 2 units
transform.position += new Vector3(0, 2, 0);
Which looks like this:

Adding a vector to an object’s position moves it by that amount.
All this really does is change the object’s position in the game world using the transform component which, typically, all game objects have.
But, apart from when moving an object using physics, all movement in Unity involves modifying the object’s position value in some way, since movement is just a change in position that’s made frame by frame.
Meaning that you’ll normally always be working with the transform component to move an object.
As a result, you’re going to be working the transform component a lot. Luckily, it’s easy to get a reference to an object’s own transform, without having to set it up yourself.
This works by accessing the Transform Property for an object, which is the word transform, with a lowercase T.
Like this:
Transform myTransform = transform;The Transform Property allows you to reference the transform component of an object from a script that’s attached to it, without needing to get a reference to it first.
Which is useful, as it means that any script can easily get, or change, an object’s position through the transform shortcut.
Like this:
Vector3 myPosition = transform.position;Movement can then be created by changing the position of an object gradually, little by little every frame.
This works by adding a Vector 3 value, which is the distance and direction you want to move that frame, to the existing position of the object.
Like this:
void Update()
{
    // Moves the object forward one unit every frame.
    transform.position += new Vector3(0, 0, 1);
}
By default, this moves the object forward in world space.
It’s also possible to move an object relative to its local position, by changing the Local Position value instead.
Like this:
void Update()
{
    // Moves the object forward one unit every frame relative to its parent.
    transform.localPosition += new Vector3(0, 0, 1);
}
But what is an object’s local position?
Local position vs world position
Local position refers to an object’s position and orientation relative to its parent.
Meaning that an object’s local position value is the offset between a child object and the parent it’s attached to.
By default, if both objects are in the same place, the local position will be (0, 0, 0) and the child will adopt the position of its parent.
Changing the local position changes the offset, and moves the object relative to its parent’s position plus whatever offset is applied, which can be useful for moving an object when it’s attached to something else.
But only if it’s attached to something else.
If the object doesn’t have a parent, its local position is the same as its world position.
This can sometimes be confusing, as it’s easy to assume that local position refers to the movement of an object relative to itself, where adding a forward vector would move it along its own Z-Axis.
Instead, in order to move an object relative to its own orientation, such as to move it in the direction it’s facing, you’ll either need to use a relative direction vector (more on those later) or the Translate function.
How to use Transform Translate in Unity
The Translate function in Unity moves an object by a set amount, relative to its current position and orientation.
Like this:
void Start()
{
    // Moves the object forward two units in the direction it's facing.
    transform.Translate(0,0,2);
}
This is different to simply adding a vector to the object’s position, which would move it relative to world space, or its local position, which would move it relative to its parent if it has one.
Instead, Translate will, by default, move an object relative to its own local space.
This means that, when using Translate, passing in a forward vector will move the object in the direction of its blue Z-Axis.
When it’s called once, Translate moves an object by a set amount one time.
However, just like when changing an object’s position manually, it’s possible to create continuous movement by calling the function every frame.
Like this:
void Update()
{
    // Moves the object forward two units every frame.
    transform.Translate(0,0,2);
}
However, there’s a problem with this method.
Frame rates vary between devices and, because each frame often takes a different amount of time to process than the last one did, the speed of an object’s movement will change depending on the framerate.
This is because, right now, the object is always being moved two units every frame, even though every frame is different.
To avoid this, you’ll need to scale the object’s movement by Delta Time.
Delta Time explained
Delta time is a constantly updated value that measures how long the previous frame took to process.
Typically, when doing anything over time, such as movement, you’ll need to use delta time to scale the rate of change so that it’s consistent.
This works by multiplying the speed of the change, such as an object’s movement amount, by the delta time value.
Like this:
void Update()
{
    // Moves the object forward at two units per second.
    transform.position = new Vector3(0,0,2) * Time.deltaTime;
}
What this does is change the movement amount that’s applied from a units per frame value, to a units per second value.
This means that you can change the framerate, or it can dip up and down, as it’s likely to do, and the rate of movement will always be the same.
Which looks like this:

Adding a scaled vector over time creates movement.
This works fine, however, it can sometimes be more convenient to manage movement direction and speed separately, by using a Unit Vector to determine the direction that an object will move, and a separate float value to control the speed.
Like this:
public float speed = 2;

void Update()
{
    // Moves the object forward at two units per second.
    transform.Translate(Vector3.forward * speed * Time.deltaTime);
}
This has the same effect as manually typing out the vector, except that the speed is now separate and can easily be changed.
In this example, Vector3.forward is shorthand for (0,0,1) which is the forward direction in world space.
Multiplying Vector3.forward by the speed value, in this case 2, creates the vector (0,0,2) which, when multiplied by Delta Time, creates a forward movement of two units per second.
The result is the same as when manually typing out the vector, except that the speed is now separate and can be controlled much more easily.
Direction vectors in Unity
A normalised vector, or Unit Vector, is simply a vector that only describes a direction and always has a length of 1.
For example the unit vector (0,0,1) describes the forward direction in world space.
While (0,0,-1) would be backwards.
In Unity, you’ll find shorthand expressions for common directional vectors in the Vector 3 class.
For example:
Vector3.forward   // (0,  0,  1)
Vector3.back      // (0,  0,  -1)
Vector3.up        // (0,  1,  0)
Vector3.down      // (0,  -1, 0)
Vector3.right     // (1,  0,  0)
Vector3.left      // (-1, 0,  0)
These relate to basic directions in world space and are typically easier to use than creating a new Vector 3.
While the transform component also provides a number of direction vectors for forward, up and right.
While their opposites, the negative values of their directions, can be used to create directional vectors for back, down and left.
Like this:
transform.forward  // object forward
-transform.forward // object back
transform.up       // object up
-transform.up      // object down
transform.right    // object right
-transform.right   // object left
These relate to the local orientation of the object’s transform, and can be useful for getting an object’s forward direction, for example.
These ready-made directions can be extremely useful for creating object-relative movement.
Like this:
transform.position += transform.forward * speed * Time.deltaTime;Creating object-relative movement in this way can be useful for adding player controls, where the player can move an object forward, backwards or sideways using input axes, such as from the keyboard.
You’d usually use object-relative movement like this when allowing the player to control an object.
But how can you turn player input into object movement?
How to move an object with the keyboard in Unity
To move an object with the keyboard, or with any other input device, simply multiply the direction of movement you want to apply, such as forward, for example, by the Input Axis you want to use to control it.
In Unity, when using the default Input Manager, you’ll find an Input Axis for Horizontal and Vertical movement already set up and mapped to the WASD keys and arrow keys on the keyboard.
Each axis returns a value between -1 and 1, which means that you can use the value that’s returned to create a movement vector.
Like this:
public float speed = 2;

void Update()
{
    float x = Input.GetAxis("Horizontal");
    float z = Input.GetAxis("Vertical");

    Vector3 movement = new Vector3(x, 0, z);
    transform.Translate(movement * speed * Time.deltaTime);
}
This allows you to create object-relative movement controls using the keyboard or any other input device.
Which looks like this:

The Horizontal and Vertical input axes can be used to create movement control.
How to create even movement controls with Clamp Magnitude
When moving an object using horizontal and vertical axes it’s possible to create diagonal movement that is faster than the speed of movement of a single axis.
This is because the length of the vector that’s created from a forward vector of 1 and a sideways vector of 1 is longer than either one on their own, at around 1.4.
Which means that holding forward and right on a keyboard, for example, would move the player 1.4 times faster than just moving forwards or sideways alone, causing uneven 8-way movement.
So how can you fix it?
One option is to limit the length of the vector, using Clamp Magnitude.
Like this:
public float speed = 2;

void Update()
{
    float x = Input.GetAxis("Horizontal");
    float z = Input.GetAxis("Vertical");

    Vector3 movement = new Vector3(x, 0, z);
    movement = Vector3.ClampMagnitude(movement, 1);

    transform.Translate(movement * speed * Time.deltaTime);
}
This will limit the length of the vector to one, while leaving lower values intact, allowing you to create analogue 8-way movement that’s even in all directions.
The Translate function creates movement that’s relative to the Transform component that it’s called from.
However, you may not always want to create player-relative movement.
So how can you move an object in a direction that’s relative to a different object, such as the camera, for example?
How to move an object, relative to the camera
It’s possible to move an object relative to the position of the camera in Unity by using the camera’s forward vector in place of the object’s forward vector.
Like this:
public float speed = 2;

void Update()
{
    Transform camTransform = Camera.main.transform;

    Vector3 forwardMovement = camTransform.forward * Input.GetAxis("Vertical");
    Vector3 horizontalMovement = camTransform.right * Input.GetAxis("Horizontal");

    Vector3 movement = Vector3.ClampMagnitude(forwardMovement + horizontalMovement,1);
    transform.Translate(movement * speed * Time.deltaTime, Space.World);
}
Because the movement is relative to the camera’s position, the Relative To parameter in the Translate function needs to be set to World Space for this to work.
However, because the forward vector of the camera may, in some cases, be facing down at an angle, you’ll need to remove the height offset between the camera and the object and manually calculate the direction towards it.
Essentially, this is to stop the object moving down through the floor, instead of forwards.
To calculate the direction, subtract the position of the origin from the position of the target and then, normalise the result.
Then, to remove the height difference between the two objects, create a new Vector 3 that replaces the camera’s height with the object’s Y position instead.
This will return a direction that is looking towards the object, but isn’t looking up or down.
You can then use the corrected direction that’s created to calculate movement that’s relative to the camera on a flat plane.
Like this:
public float speed = 2;

void Update()
{
    Transform camTransform = Camera.main.transform;

    Vector3 camPosition = new Vector3(camTransform.position.x, transform.position.y, camTransform.position.z);
    Vector3 direction = (transform.position - camPosition).normalized;

    Vector3 forwardMovement = direction * Input.GetAxis("Vertical");
    Vector3 horizontalMovement = camTransform.right * Input.GetAxis("Horizontal");

    Vector3 movement = Vector3.ClampMagnitude(forwardMovement + horizontalMovement, 1);

    transform.Translate(movement * speed * Time.deltaTime, Space.World);
}
Which looks like this:

You can create camera relative movement by using the camera’s forward direction in place of the object’s.
By understanding the relative direction of an object, it’s possible to create any kind of movement control that you want.
However, a lot of the time, you may want to move an object in a different way, that’s not directly controlled by the player.
For example, moving an object to a set position or towards another object.
How to move an object to a position in Unity
Generally speaking, there are two different ways to move an object into a specific position.
- By Speed, where the object moves towards a target at a specific speed,
- By Time, where the movement between the two points takes a specific amount of time to complete.
The method you use to move the object will depend on how you want to control its movement, by time or by speed.
So how does it work?
How to move an object to a position at a set speed (using Move Towards)
It’s possible to move an object towards another object or a specific position in the scene using the Move Towards function.
Move Towards is a function of the Vector 3 Class that will modify a Vector 3 value to move towards a target at a set speed without overshooting.
Which works great for moving an object towards a position in the world at a speed you can control.
Like this:
public Vector3 targetPosition;
public float speed=10;

void Update()
{
    transform.position = Vector3.MoveTowards(transform.position, targetPosition, speed * Time.deltaTime);
}
The movement can also be smoothed, by using the Smooth Damp function, which eases the movement as it starts and ends.
Like this:
public Vector3 targetPosition;
public float smoothTime = 0.5f;
public float speed = 10;
Vector3 velocity;

void Update()
{
    transform.position = Vector3.SmoothDamp(transform.position, targetPosition, ref velocity, smoothTime, speed);
}
This works by setting the position of the object to the Vector 3 result of the Smooth Damp function, passing in a target, the current position and a reference Vector 3 value, which the function uses to process the velocity of the object between frames.
This can be useful for smoothed continuous movement, where the target position may change from one moment to the next such as when following the player with a camera.
Such as in this example of a smooth camera follow script using Smooth Damp:
public Transform player;
public float cameraDistance = 5;
public float cameraHeight = 3;
public float smoothTime = 0.5f;
public float speed = 10;
Vector3 velocity;

void Update()
{
    transform.LookAt(player.transform);
    Vector3 offset = (Camera.main.transform.position - player.position).normalized * cameraDistance;
    Vector3 targetPosition = player.position + offset;
    targetPosition.y = cameraHeight;
    transform.position = Vector3.SmoothDamp(transform.position, targetPosition, ref velocity, smoothTime, speed);
}
In this example, the camera will smoothly move towards the player and turn to face them, while keeping at a height of 3 units and trying to stay at a distance of 5 units away.
Move Towards works great as a way to move an object towards a position dynamically.
This is because the movement is speed-based, and can be easily controlled even if the target position moves while the object is moving towards it.
However, there may be times when you want to control the movement of an object using time, not speed.
Such as when moving a platform, or opening a door.
So how can you create time based movement in Unity?
How to move an object to a position in a set amount of time (using Lerp)
Lerp, or Linear Interpolation, is used to find a value between a minimum and maximum based on a position value, ‘t’, which is a float between zero and one.
The value that’s returned depends on the value of t where, if t is 0 the minimum value is returned, while 1 returns the maximum value.
Any other value in between 0 and 1 will return a representative value between the minimum and maximum ends of the scale.
float lerpedValue = Mathf.Lerp(float minValue, float maxValue, float t);Lerp is, actually, very simple, and all it really does is return a weighted value between two others.
However, in practice, Lerp is often used to change a value over a known period of time, by incrementing t every frame to return a new value on the scale that’s closer to a target.
This can be used to change a colour, fade an audio source or move an object between two points.
It works by passing in the amount of time that has elapsed during the Lerp, divided by the total duration. This returns a 0-1 float that can be used for the t value, and allows you to control the length of the Lerp movement by simply choosing how long you’d like it to take.
Like this:
float timeElapsed;
float lerpDuration = 3;

float lerpedValue;

void Update()
{
  if (timeElapsed < lerpDuration)
  {
    lerpedValue = Mathf.Lerp(0, 100, timeElapsed / lerpDuration);
    timeElapsed += Time.deltaTime;
  }
}
Vector3.Lerp works in the same way except that, instead of returning a float, it returns a point in the world between two others, based on the t value.
This can be useful for moving an object between two different positions, such as a door with an open and closed state.
Like this:
public float openHeight = 4.5f;
public float duration = 1;

bool doorOpen;
Vector3 closePosition;

void Start()
{
    // Sets the first position of the door as it's closed position.
    closePosition = transform.position;
}

void OperateDoor()
{
    StopAllCoroutines();

    if (!doorOpen)
    {
        Vector3 openPosition = closePosition + Vector3.up * openHeight;
        StartCoroutine(MoveDoor(openPosition));
    }
    else
    {
        StartCoroutine(MoveDoor(closePosition));
    }
    doorOpen = !doorOpen;
}

IEnumerator MoveDoor(Vector3 targetPosition)
{
    float timeElapsed = 0;
    Vector3 startPosition = transform.position;

    while (timeElapsed < duration)
    {
        transform.position = Vector3.Lerp(startPosition, targetPosition, timeElapsed / duration);
        timeElapsed += Time.deltaTime;
        yield return null;
    }
    transform.position = targetPosition;
}
In this example, I’ve used a coroutine to move the door object up by a set distance from the door’s starting position, whenever the Operate Door function is called.
Which looks like this:

Lerp can be used to move an object between two states, such as the open and closed positions of a door.
This creates a linear movement from one position to another, however, it’s also possible to smooth the Lerp’s movement using the Smooth Step function.
This works by modifying the t value with the Smooth Step function before passing it into Lerp.
Like this:
float t = Mathf.SmoothStep(0, 1, timeElapsed / moveDuration);This will ease the movement of the object at the beginning and end of the Lerp.
How to move an object to a position using animation
Depending on how you’d like to control the movement of objects in your game, it can sometimes be easier to simply animate the object you’d like to move.
This typically involves modifying properties of an object and storing them in Keyframes, which are then smoothly animated between over time.
For example, you could use animation to move an object between two points, such as a floating platform.
This would need three Keyframes to work, one for the starting position, another for the platform’s end position and a final Keyframe to return the platform to its original position, looping the animation.
To animate an object you’ll need to add an Animator and an Animation Clip, which you can do from the Animation window.

Next, select a position on the Animation Timeline, this will be the position of the 2nd Keyframe, when the platform is furthest away..
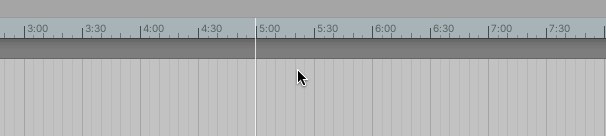
Assuming that, at zero seconds, the platform is at its starting position, this will be the halfway point of the animation which, in this case, is 5 seconds.
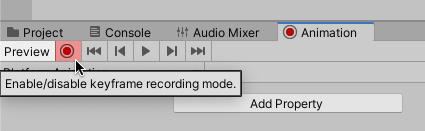
Next, enable Keyframe Recording by clicking the record button:
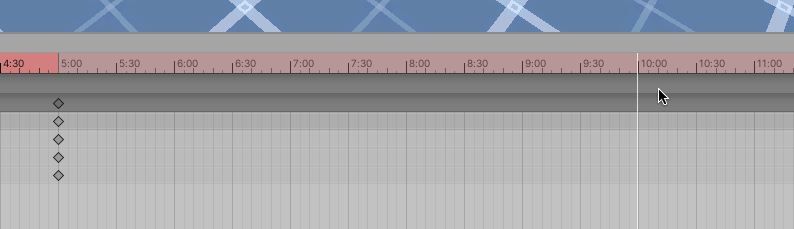
While Keyframe Recording is enabled, any changes you make to an object will be saved to a Keyframe at that timeline position, such as changing its position:

Create a final Keyframe at ten seconds, setting the object’s position to its original values to complete the animation (remembering to disable Keyframe Recording when you’re finished).
The end result is a platform that moves smoothly, and automatically, between its Keyframe positions.
These methods work well for creating controlled precise movements in Unity.
But, what if you don’t want to control an object’s movement precisely?
What if you’d rather push, pull or throw an object, to create movement using physical forces instead?
How to move an object using physics
Most rendered objects in Unity have a Collider component attached to them, which gives them a physical presence in the world.
However, an object with just a collider is considered, by Unity, to be Static, meaning that it’s not supposed to move.
To move an object under physics simulation, you’ll also need to add a Rigidbody component to it, which allows it to move, and be moved, by physical forces, such as gravity.
You can also move a physics object by applying force to its Rigidbody using the Add Force function.
Like this:
Rigidbody.AddForce(Vector3 force);This works in a similar way to the Translate function except that the vector you pass in is a physical force, not a movement amount.
How much the object moves as a result will depend on physical properties such as mass, drag and gravity.
There are two main ways to apply physical force on an object.
You can either apply force continuously, building momentum and speed over time, or all at once in an impulse, like hitting an object to move it.
By default, the Add Force function applies a continuous force, like a thruster gradually lifting a rocket.
Like this:
public Rigidbody rb;
public float forceAmount = 10;

void FixedUpdate()
{
    rb.AddForce(Vector3.up * forceAmount);
}
Notice that I’ve used Fixed Update, and not Update, to apply the force to the object.
This is because Fixed Update is called in sync with the physics system, which runs at a different frequency to Update, which is often faster and can vary from frame to frame.
Doing it this way means that the application of force is in sync with the physics system that it affects.
Alternatively, you can also apply force in a single burst, using the Impulse Force Mode.
Like this:
public Rigidbody rb;
public float forceAmount = 10;

void Start()
{
    rb.AddForce(Vector3.up * forceAmount, ForceMode.Impulse);
}
This will apply an amount of force to an object all at once:

Add Force can be used to push objects gradually, or apply force in a single hit, like this.
Which can be useful for faster, more explosive movements, such as making an object jump.
How to move a Rigidbody (without using force)
Normally, when you’re moving an object using physics, you might typically apply force to move it around in a realistic way.
But, what if you want to use the physics system but you want to move the object directly, in the same way as moving it using its transform component?
It’s possible to do this by using the Move Position function, which is a rigidbody method that will move an object to a precise position in a similar way to setting its transform position.
Like this:
public class MovePositionExample : MonoBehaviour
{
    public Rigidbody rb;
    public float speed = 1;

    Vector3 moveAxis;

    void Update()
    {
        moveAxis = new Vector3(Input.GetAxis("Horizontal"), 0, Input.GetAxis("Vertical"));
        moveAxis = Vector3.ClampMagnitude(moveAxis, 1);
    }

    private void FixedUpdate()
    {
        rb.MovePosition(rb.position + (moveAxis * speed * Time.fixedDeltaTime));
    }
}
This is slightly different to setting the rigidbody’s position value directly, which effectively teleports an object to a new position using its rigidbody.
The Move Position function, however, while it basically does the same thing, is assumed to be moving the object from one position to the next.
What this means is that, if you’ve enabled interpolation on the rigidbody, its visual position will still be smoothed between the, typically slower, fixed update calls, even though the object is being moved manually and not with forces.
As a result, if you want to change the position of a physics object immediately, to teleport it somewhere else, set its Rigidbody Position value, but if you want to move it, gradually, use the Move Position function instead.
Now it’s your turn
How are you moving objects in your game?
Are you moving them using their Transform components?
Or are you moving them with physics?
And what have you learned about moving objects in Unity that you know others will find helpful?
Whatever it is, let me know by leaving a comment.

John French writes all of the Unity tutorials for Game Dev Beginner, and specialises in deep-dive guides teaching game development basics.

Comments
Very good article, as always. If I got it when I started with Unity, it would have saved me a lot of time. Thanks for your efforts.
Btw I subscribe to newslleter but don’t get notifications of new articles. Just tips with links to older content. Is it supposed to work this way? I would like to get notifications of fresh articles 🙂
Thank you! The newsletter is ordered, so you’ll get a mix of topics including some content that’s not on the site, but if you’re getting content that you’ve already read about I’ll maybe change how that works. Thanks for the feedback.
Your Topics start becoming a references for me,thank you sir for the efforts and please keep posting
Glad it helped! Thank you.
That was very helpful, thank you so much
You’re welcome!
one frame == about .05 of a second.
transform.position == with an approx average of 3-5 1×1 tiles moved per frame.
transform.Translate == about the same as transform.position.
There is no instant move command with unity that I’m aware of. Unfortunately unity is notoriously well known for being “half baked” like this. However, unity is free, soooo you get what you pay for and shouldn’t complain IMO.
Every movement command just gives you the illusion of an “instant” movement by moving the object super fast and hoping that no one notices.
The best results I’ve been able to come up with is by sticking my transform.position command inside of a while loop. For whatever reason, this reduces the total frames that a GameObject is seen moving from posA to posB by 60% to 80%.
Example 1: Using a normal transform.position command
-If you have to move 300 1×1 tiles on the Y axis and 900 1×1 tiles on the X axis and you do the standard transform. position to move your object (you supposedly get a 1.4 speed boost because its a diagonal movement, i haven’t seen that to be true yet but who knows). Anyways, it will take somewhere around 351 frames to fully move your object that distance.
And during all 351 frames of that movement your GameObject will be teleporting all over and maybe acting goofy depending on what you’ve got going.
Example 2: Placing your transform.position command inside of a while Loop
– Take the same 300 by 900 map and while loop your transform.position and it will only expose your GameObject to the players eyes for somewhere around 15-50 total frames after fully moving your object that same distance. Meaning that players are 60% to 80% less likely to see your moving gameObject.
This is some dirty spaghetti code that i cooked up once as an example.
Although the code is dirty as sunflower seeds, the fact remains that while loops == much cleaner transform.positions. And there is no such thing as a truly bonafide
“instant move command” in Unity as far as I know at this time anyways.
private IEnumerator MovePlayer(Vector3 direction)
{
loopCounter = 0;
print(“START”);
isMoving = true;
float elapsedTime = 0;
origPos = transform.position;
targetPos = origPos + direction;
timeToMove = saveTimer;
while(elapsedTime = 900 || currentPosition.x <= 0 || currentPosition.y = 300)
{
cantClaim = true;
wrappedAround = true;
targetPos = detector.currentPosition;
currentPosition.z = 1;
transform.position = currentPosition;
if(currentPosition.x 0)
{
currentPosition.x = 900 -.1f;
transform.position = currentPosition;
}
else if(currentPosition.y 0)
{
currentPosition.y = 300 -.1f;
transform.position = currentPosition;
}
else if(currentPosition.x < 0 && currentPosition.y 300 && currentPosition.x 900 && currentPosition.y 300 && currentPosition.x > 900)
{
currentPosition.x = .1f;
currentPosition.y = .1f;
transform.position = currentPosition;
}
currentPosition = transform.position;
}
if(currentPosition.x 0)
{
cantClaim = false;
}
if(currentPosition.y > 0 && currentPosition.y < 300)
{
cantClaim = false;
}
print("AFTER = CURRENT POS = " + currentPosition + " / TARGET POS = " + targetPos);
loopCounter += 1;
print("LOOP COUNTING = " + loopCounter);
yield return null;
} //end of while statement
currentPosition.z = -1;
if(wrappedAround = false)
{
targetPos.z = -1;
transform.position = targetPos;
currentPosition = transform.position;
}
if(wrappedAround = true)
{
targetPos = detector.currentPosition;
targetPos.z = -1;
transform.position = targetPos;
currentPosition = transform.position;
wrappedAround = false;
}
wait = 1;
betweenMoves = true;
// isMoving = false;
print("END");
}//END OF move unit
Sorry, but what you’ve said isn’t correct. To address some of the points in your comment:
I feel like what you’ve done is made something very complicated when it really doesn’t need to be, the simplest way to move an object in Unity is to apply a movement amount, that’s scaled by delta time, every frame. However, if I’ve missed something and you’re having a problem with movement in Unity, then please tell me about it, describe what’s happening that shouldn’t be so that I can understand what you’re experiencing and why.
Please note, however, that this is, very deliberately, not a Unity forum and I have a strict comment policy regarding comments that could be confusing or unhelpful to others.
All the best,
John.
Hi John,
This is very interesting and informative. I am just starting a project where I need to move an object up and down, side ways and also diagonally and I was wondering which method is best to do this and I came across this article. You have explained everything beautifully and saved me a lot of time. I am just a little unsure about how to move diagonally but I think I will get if I read your article a couple of times.
Thank you.
Thank you, I’m so glad it helped. Normalizing a vector that’s made up of the two directions that will make the diagonal (e.g. (1,1,0) for example) should give you the diagonal movement you want. Like this: Vector3 movementAmount = new Vector3(1, 1, 0).normalized;
Thank you and I appreciate your quick reply 🙂
Hi John,
Sorry to butt in again.
I am able to get the movement diagonally. I need to move it at various speeds starting from 45 meters/second. Is a unit in Unity equals to 1 meter? So if I use 45 * Time.deltaTime do I get my speed as 45m/sec? What if I wanted to use, say, 300 deg/sec; can the units be changed in Unity?
Thank you.
Vasu
Yes, 1 unit in the world is meant to be 1m (more info) so 45 * delta time is 45m per second. It will also work with rotation, yes, so you can create degrees per second with the same technique.
Really Awesome Work John French. I read your about us and it feels like i am reading mine. but it motivates me a lot. Thank you for such a great contribution.
Thank you!
Excellent information. Thank you.
In my project, for the graphics part, I just need to move alphabets at high speeds from left to right in all directions. No collisions with anything. So I used 2D /sprites/square and put the alphabets on it.
I used every possible move method you have indicated above to move my alphabets (not animations, yet). The alphabets moved smoothly in all directions. No issues.
It works fine for low speeds but once I use speed 30 and above, instead of one alphabet moving across the screen, it doubles( I am sorry I don’t know the name for this: doubling, bunching, lagging or some such thing) and moves across the screen. For example, instead of just one image(in this case letter ‘C’) going from left to right, it goes as below in bunches, from left of the screen to the right.
CC CC CC CC
Thinking that it might be an issues with my monitor, I tried different devices but this behavior persists across all of them.
Much appreciated if you could show me a way to overcome this bizarre movement behavior.
It sounds like a visual problem but I don’t know that for sure. If you don’t mind sharing your code email [email protected] and I will take a look.
Thank you. I just emailed the code and a screenshot of the issue.
This is such an informative and clearly explained article, what an excellent overview.
I had become quite confused with all the different ways to move objects in Unity, and here it’s all made perfectly clear.
Thank you very much. I’ve bookmarked it and will subscribe to your newsletter!
Thank you! I’m so glad it helped.
Thank you.
Great article, found it really helpful thanks. One question, with the physics movement, is it possible to move an object to a target position as well?
Not that I know of, no. I don’t think there’s a Physics version of Move towards for example. One option might be to use Add force in the direction of a target position and while the position of the rigidbody is not close enough to the target point.
Brilliant. Fantastic article. Thanks a lot for this. Really helpful!
You’re welcome Cesar!
Hi John,
Thanks for an awesome article on the topic of moving objects!
Feel free to delete this if it confuses others, but somehow I still managed to not get the thing I wanted to do to work.
So I want to attach a script to any object in my scene and have it move towards the camera (in this case the player/first person view). I get the dreaded nullreference exception: Object reference not set to an instance of an object when running the code(it compiles, the target.position = ….. gets the nullreference). Why?
The code:
public class MoveTowardsPlayer : MonoBehaviour
{
// Adjust the speed at which object is moved towards the camera / player
public float speed = 10.0f;
// Initialize target with transform class
private Transform target;
// Start is called before the first frame update
void Start()
{
}
// Update is called once per frame
void Update()
{
var step = speed * Time.deltaTime;
target.position = Camera.main.transform.position;
transform.position = Vector3.MoveTowards(transform.position, target.position, step);
// Display positions to help with debugging
Debug.Log(“Camera target position is” + target.position);
}
}
Sorry for being a noob, perhaps this helps someone else too.
Best regards,
Ron
Hi Ron! From here it looks like you’re using an empty Transform component. Transform is a reference variable, not a value, so target in your script needs to relate to a real object, which doesn’t seem to be how you’re using it. You can probably remove the target alltogether, and just use the camera’s position directly, or change your target variable to a Vector 3 value instead of a transform. e.g. target = Camera.main.transform.position;
Hope that helps!
The article was great. I learned a lot. Thanks for this. However, I have one question. I want the Particles I created with Particle System to go from one point to another and I want it to do it at a certain speed. But it either doesn’t move to the position I gave it at all or it goes very fast, it seems like it’s teleporting.
public class PartCollecter : MonoBehaviour { public ParticleSystem ps; List Parts = new List(); public GameObject TargetObj; ParticleSystem m_System; ParticleSystem.Particle[] m_Particles; public float m_Drift = 800f; public float m_SmoothTime = 0.5f; public float m_Speed = 10; Vector3 m_Velocity; void Start() { ps = GetComponent(); Invoke("Move", 2f); } public void Move() { if (m_System == null) m_System = GetComponent(); if (m_Particles == null || m_Particles.Length < m_System.main.maxParticles) m_Particles = new ParticleSystem.Particle[m_System.main.maxParticles]; int numParticlesAlive = m_System.GetParticles(m_Particles); for (int i = 0; i < numParticlesAlive; i++) { m_Particles[i].position = Vector3.SmoothDamp(transform.position, TargetObj.transform.position, ref m_Velocity, m_SmoothTime, m_Speed * Time.deltaTime); } m_System.SetParticles(m_Particles, numParticlesAlive); } }Hello. I expected the command “.Move”, greetings.
This article helped me a lot. Thanks for a clear explanation.
you’re welcome!
I have a question, in Unity I have a flat Cube1 floor (100*0.1*100) with a 1*1*1 sized Cube2 placed on top of it, the Cube2 is a rigid body, it has 0 friction, and I’m applying a forward force to it, so why does it slide on the floor for a short distance and then stop? Newton’s law tells me that it should maintain uniform linear motion, is there any other resistance?
Is the friction you mentioned on the physics material? there is also a drag value on the rigidbody.
excellent blog and info, I will read it with more detail. On the other hand, I would like to ask or suggest and for other people can know too: how to know (scrip/code) if an object is moving left or right, just using a //Debug.Log(“left”); Debug.Log(“right”) to identify that. I have been working on that, but more time is needed. If possible to know, of course.
You could read the movement value before it’s used and if the X is above 0, the object is moving right, or below, left. THis would only recognise the input, not the actual movement, which could be blocked by a wall or something, in which case you’d need to keep the last position and compare against it.
yes, ..thanks.
Hello John,
Thank you for your article, it is well explained
I need to use physics actually, I will go using the MovePosition of the RigidBody
Thanks again
You’re welcome!