
When working with 2D in Unity, you may sometimes want to make an object interact with the mouse’s position in some way.
For example, perhaps you want to place a sprite under the cursor?
Maybe you want an object to follow the mouse’s position?
Or, what if you want an object to look towards the mouse, turning to face it wherever it is on screen?
Just like moving or rotating an object towards an object’s Transform position, the position of the mouse on the screen can also be used in the game, by converting it into a world position.
In this article, you’ll learn how to get the mouse’s position in the scene and how you can use it to move and rotate other objects towards the cursor.
Here’s what you’ll find on this page:
- How to get the mouse position in the world in 2D
- How to move an object to the mouse’s position in 2D
- How to make a 2D object move towards the mouse’s position
- Make a 2D object look at the mouse position
- Make a 2D projectile follow the mouse in Unity
Related Articles:
Let’s get started.
How to get the mouse position in the world in 2D
Getting the mouse position on the screen is relatively straightforward.
This works by getting the Mouse Position property of the Input Class, which returns the pixel coordinates of the cursor on the screen as a Vector 3 value.
Like this:
Vector3 mousePosition = Input.mousePosition;While the Mouse Position is returned as a Vector 3, it only includes X and Y values (which are the pixel coordinates on the screen).
It’s provided as a Vector 3 for compatibility reasons, allowing you to use it with functions that require a Vector 3 value. So, while there is a Z value in the Mouse Position property, it’s always zero.
Once you have the mouse’s screen coordinates, it’s possible to convert them to a real-world position, using the Screen to World Point function.
Like this:
Vector2 mousePosition = Camera.main.ScreenToWorldPoint(Input.mousePosition);Screen to World Point is a camera function, so you’ll need to call it from a specific camera or from the Main Camera, which is simply the first camera in the scene with a “Main Camera” tag.
The Screen to World Point function will then return a Vector 3 value, which you can use like any other position in the scene.
How to set the depth of the mouse position
While the X and Y values of the Vector 3 that’s returned will correspond with the screen position of the mouse, the Z value will be, by default, the same as the camera’s Z position.
Which, because the camera’s location is behind its Near Clip Plane, is outside of the visible area.
In many cases, this may not be a problem.
For example, when working in 2D, if you store the result of the Screen to World Point function as a Vector 2 value, the Z value that’s returned is simply not used.
However, if you use the Vector 3 that the Screen to World Point function returns to move an object to the mouse’s position, without offsetting the z value, it will be out of view of the camera.
So, if you’re trying to move an object to the mouse’s position, and it keeps disappearing, that could be why.
For this reason, if you’re working with Vector 3 values, you may wish to manually set the Z value of the position to a positive value, such as the camera’s Near Clip Plane, to make sure that, if you place an object there, that it’s always in view:
Vector3 mousePosition = Camera.main.ScreenToWorldPoint(Input.mousePosition);
mousePosition.z += Camera.main.nearClipPlane;
For more information about converting the mouse position to a world position in 2D and 3D, see my full guide here:
Getting the mouse position using the new Input System
The Mouse Position value is a property of the Input Class, which is Unity’s legacy system for detecting mouse, keyboard and controller input.
This means that, if you’re using Unity’s new Input System, this method of getting the mouse’s coordinates won’t work.
Instead, you’ll need to use the Mouse class, using the Input System namespace, to read the position of the cursor.
Like this:
using UnityEngine;
using UnityEngine.InputSystem;

public class GetMousePosition : MonoBehaviour
{
  void Update()
  {
    Vector2 mousePosition = Mouse.current.position.ReadValue();
  }
}
For more information on using Unity’s new Input System, try my complete getting started guide:
How to move an object to the mouse’s position in 2D
Once you have the mouse’s position in the world, using it to change the position of other objects can be very simple.
For example, I could use the mouse’s world position to place a sprite underneath the cursor.
Like this:
using UnityEngine;

public class FollowMouse : MonoBehaviour
{
    void Update()
    {
        Vector3 mousePosition = Camera.main.ScreenToWorldPoint(Input.mousePosition);
        mousePosition.z = Camera.main.transform.position.z + Camera.main.nearClipPlane;
        transform.position = mousePosition;
    }
}
By setting the position of the Transform that the script is attached to, the object, in this case, a 2D sprite, tightly follows the position of the mouse.
This can be useful for placing sprites and objects under the cursor, such as a crosshair:

Setting the position of an object, such as a sprite, to the mouse’s world position places it under the cursor.
How to move an object to the mouse’s position, without lag
While placing an object under the cursor by getting the mouse’s position in the world does work, you might notice that there’s a lag between the position of the pointer in your operating system and the object on the screen.
Generally speaking, there’s no getting around this.
While higher frame rates can reduce the amount of lag you experience, the mouse is controlled directly by the operating system, meaning it updates independently of the game’s framerate.
Because of this, you’ll always notice some difference between the operating system’s cursor and the in-game object, which can be a problem if you’re using this method to create a software cursor.
To fix it, Unity offers a solution to replace the system’s hardware cursor with a custom texture instead, using the Set Cursor method of the Cursor class.
Like this:
public Texture2D cursorTexture;

void Start()
{
    Cursor.SetCursor(cursorTexture, Vector2.zero, CursorMode.Auto);
}
While getting the mouse’s position in the scene can be useful for snapping objects to the cursor’s location, chances are, you’re more likely to use this method as a way to make objects respond to the cursor’s position in-game.
For example, moving an object towards the mouse.
How to make a 2D object move towards the mouse’s position
Once you’ve gotten the position of the mouse in the scene, it’s possible to make an object move towards it.
This works in the same way as it would with any other object, as the mouse position is now simply a position in a world that can be used as a target to move towards.
For example, using the Move Towards function.
Like this:
public float moveSpeed = 10;

void Update()
{
    Vector2 mousePosition = Camera.main.ScreenToWorldPoint(Input.mousePosition);
    transform.position = Vector2.MoveTowards(transform.position, mousePosition, moveSpeed * Time.deltaTime);
}
This will make the object that this script is attached to follow the mouse’s position on the screen at a constant speed (in this case 10 units per second) without overshooting.

The Move Towards function moves an object towards a target position at a consistent speed.
And, if you want to ease the movement of the object so that it follows the mouse smoothly, starting and stopping more slowly, you can do that by using Smooth Damp.
Smoothly move an object towards the mouse (using Smooth Damp)
Smooth Damp works like Move Towards except that it eases the object’s movement between its starting point and its target.
The object will start slowly, accelerate to an optional maximum speed, and slow down as it approaches the target position.
Which looks like this:

Smooth Damp can be used to create a more natural movement, where the object will start slow, come up to speed and slow again as it reaches its target.
Smooth Damp can be used to ease many different types of values. In this case, it’s a function of the Vector 2 class:
Vector2 newPosition = Vector2.SmoothDamp(Vector2 currentPosition,
    Vector2 targetPosition, ref Vector2 currentVelocity,
    float smoothTime, float maxMoveSpeed);
The Smooth Damp function takes a Smooth Time, which is, approximately, the amount of time that the movement should take and, optionally, a Max Move Speed, which is the maximum allowed speed of the object when completing the movement:
public float maxMoveSpeed = 10;
public float smoothTime = 0.3f;
Lastly, the Smooth Damp function needs a local value to work from, in this case, a Vector 2, to be able to track the velocity of the object between frames:
Vector2 currentVelocity;In the function, you’ll reference the local Current Velocity with the ref keyword.
What is the ref keyword in Unity?
The ref keyword in Unity works in a similar way to the out keyword, which is used to return additional information from a function.
However, while the out keyword is one way, the ref keyword works both ways. It is both set and used by the function.
In this case, the Smooth Damp function sets and reads the Current Velocity value, which is how it can perform a smoothing action over time, even though a new function is called each frame.
Here’s how it looks all together:
public class MoveTowardsSmoothDamp : MonoBehaviour
{
    public float maxMoveSpeed = 10;
    public float smoothTime = 0.3f;

    Vector2 currentVelocity;

    void Update()
    {
        Vector2 mousePosition = Camera.main.ScreenToWorldPoint(Input.mousePosition);
        transform.position = Vector2.SmoothDamp(transform.position, mousePosition, ref currentVelocity, smoothTime, maxMoveSpeed);
    }
}
How to follow an object at a distance in 2D
The Move Towards and Smooth Damp functions both take a parameter for their target position.
Which means that, if you want an object to follow a target in 2D, such as the mouse or another object, but from a set distance, all you need to do is offset the position of the target in the direction of the following object.
So how does that work?
First, you’ll need to know the direction between the two objects.
This is because the offset that you’ll need to add defines a point on the path between the target and the following object.
How to get the direction between two objects in 2D
Getting a direction vector between two objects in 2D works by subtracting the position of the origin object from the position of the target and then normalising the result.
Or, put simply, start with the target position on the left and subtract the position the direction should start from.
Like this:
// How to find the direction of an object
Vector2 direction = (Vector3 targetPosition - Vector3 myPosition).normalized;
Normalising the direction vector limits its length to 1 (making it a Unit Vector).
This can be useful for defining distance in a specific direction as a Unit Vector, multiplied by a distance value, will create a direction vector with an exact length.
In this example, getting a unit vector from the mouse position and multiplying it by a Minimum Distance value, such as 2 units, will create a 2 unit offset in the direction of the object that’s following the mouse.
Like this:
public class MoveTowardsSmoothDamp : MonoBehaviour
{
    public float maxMoveSpeed = 10;
    public float smoothTime = 0.3f;
    public float minDistance = 2;

    Vector2 currentVelocity;

    void Update()
    {
        Vector2 mousePosition = Camera.main.ScreenToWorldPoint(Input.mousePosition);

        // Offsets the target position so that the object keeps its distance.
        mousePosition += ((Vector2)transform.position - mousePosition).normalized * minDistance;

        transform.position = Vector2.SmoothDamp(transform.position, mousePosition, ref currentVelocity, smoothTime, maxMoveSpeed);
    }
}
This means that the object will follow the mouse, but at a distance, never moving closer than the value of Min Distance to the mouse’s position and smoothly moving away if it does get too close.
Which looks like this:

Smooth Damp will smoothly ease the object to the mouse’s position while setting a minimum distance, makes the object follow without getting too close.
The only reason for working out the direction between the two objects in this example is to work out which way the offset should point.
However, there are other reasons why you might want to work out the direction of another object.
For example, to make one object look at another.
Make a 2D object look at the mouse position
While it seems like a simple task, rotating one object so that it looks at another in 2D can sometimes be tricky.
This is mainly because otherwise convenient functions, such as Look At, don’t always produce the results you want.
A lot of the time, when you’re rotating an object in 2D, all you really want to do is rotate an object around its forward Axis, the Z-Axis.
If the object is a flat sprite, any rotation around the X or Y-Axis could cause the object to become invisible because of its orientation towards the camera.
Because of this, the simplest way to rotate an object in 2D, is around its Z-Axis, using a single float value.
Like this:
transform.eulerAngles = new Vector3 (0, 0, float angle);Then, all you’d need to do to rotate the 2D object is pass in the angle of rotation.
Easy, right?
Except, how do you get the angle between the object that’s rotating and the position it’s supposed to be looking at?
How to get the angle between two 2D objects in Unity
To get the angle between two objects, in this case between an object and the mouse position, you’ll need to first get a direction vector between them.
Just like in the earlier example, getting a direction works by subtracting the starting position from the target.
In this case, that means subtracting the position of the object that’s supposed to be looking at the mouse from the mouse’s position in the world.
Like this:
Vector3 mousePosition = Camera.main.ScreenToWorldPoint(Input.mousePosition);
Vector2 direction = mousePosition - transform.position;
To work out the angle, next you’ll need to decide which way is the object’s forward direction.
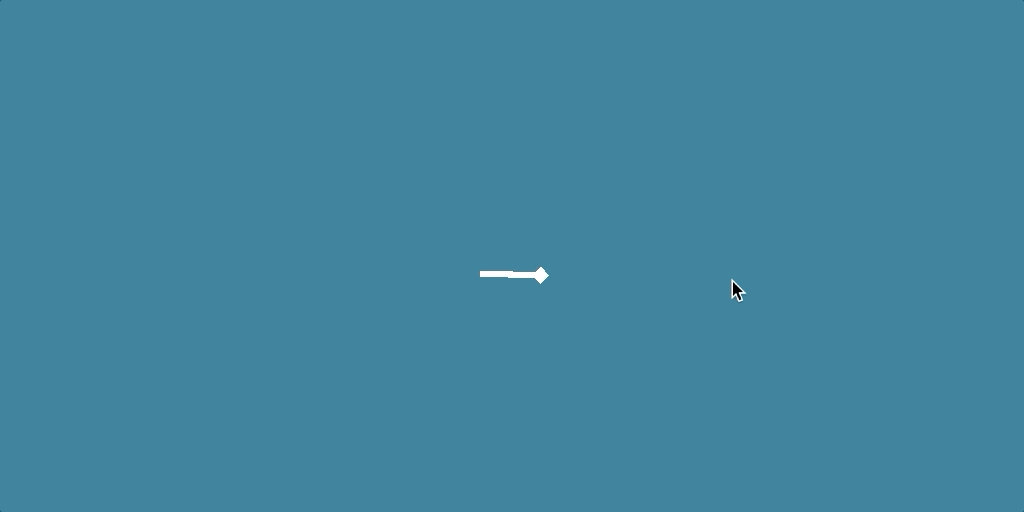
For example, if you have a simple 2D arrow:
![]()
Then the forward direction of that object is to the right (if you want the arrow to point at the mouse correctly that is).
Meaning that the angle you’d need to find is the angle between Vector2.right and the direction of the mouse from the object.
So how can you do that?
Helpfully, the Signed Angle function in Unity does exactly that.
float angle = Vector2.SignedAngle(Vector2.right, direction);Then, to rotate the object, all you need to do is set the object’s Z rotation to the angle value:
float angle = Vector2.SignedAngle(Vector2.right, direction);
transform.eulerAngles = new Vector3 (0, 0, angle);
Which looks like this:

Calculating the angle between the object and the mouse makes it easier to rotate in 2D, by only using the Z-Axis.
Angle vs Signed Angle in Unity
There are two different functions in Unity for getting an angle between two vectors, Angle and Signed Angle.
While they both work in similar ways, returning the smallest of the two possible angles between the vectors, the type of value they return is slightly different.
For example, Angle returns an unsigned value, meaning it can only be positive. In this case, that means that the angle will always be between 0 and 180 degrees.
For this use case, that means that, when the angle between the two vectors is less than 0 degrees, or more than 180, the object starts to rotate away from the mouse.

Using the Angle function, instead of Signed Angle, causes the object to rotate away from the mouse at negative angles.
However, Signed Angle returns a value between -180 and 180 degrees, which covers the full circle of rotation, allowing the object to look at the mouse no matter where it is.
Here it is all together:
public class LookAtMouse : MonoBehaviour
{
    void Update()
    {
        Vector3 mousePosition = Camera.main.ScreenToWorldPoint(Input.mousePosition);

        Vector2 direction = mousePosition - transform.position;
        float angle = Vector2.SignedAngle(Vector2.right, direction);
        transform.eulerAngles = new Vector3 (0, 0, angle);
    }
}
How to rotate a 2D object smoothly
In the same way that it’s possible to smooth the movement of an object towards the mouse, the rotation of an object can also be eased.
Typically, there are two ways of doing this.
Either with the Rotate Towards function, which will rotate the object at a consistent max speed (measured in degrees per second)
Like this:
public float turnSpeed = 45; // degrees per second

    void Update()
    {
        Vector3 mousePosition = Camera.main.ScreenToWorldPoint(Input.mousePosition);

        Vector2 direction = mousePosition - transform.position;
        float angle = Vector2.SignedAngle(Vector2.right, direction);

        Vector3 targetRotation = new Vector3(0, 0, angle);
        transform.rotation = Quaternion.RotateTowards(transform.rotation, Quaternion.Euler(targetRotation), turnSpeed * Time.deltaTime);
    }
Which looks like this:
Rotate Towards will rotate the object to face the mouse at a consistent speed, measured in degrees per second.
Or, the second option is to smooth the rotation using Smooth Damp.
Using Smooth Damp will cause the object to turn to look at the mouse in a smoother, more natural motion that is eased at the start and end of its movement.
Like this:
public float maxTurnSpeed=90;
public float smoothTime=0.3f;
float angle;
float currentVelocity;

    void Update()
    {
        Vector3 mousePosition = Camera.main.ScreenToWorldPoint(Input.mousePosition);

        Vector3 direction = mousePosition - transform.position;
        float targetAngle = Vector2.SignedAngle(Vector2.right, direction);

        angle = Mathf.SmoothDampAngle(angle, targetAngle, ref currentVelocity, smoothTime, maxTurnSpeed);
        transform.eulerAngles = new Vector3(0, 0, angle);
    }
Notice that this method uses a specific type of Smooth Damp, Smooth Damp Angle, which is a Maths function that allows the angle value to move past 180 degrees.
Using Smooth Damp Angle instead of the standard Smooth Damp stops the arrow from going ‘the long way round’ when passing the 180 / -180 degrees point.
Instead, the arrow freely rotates to look at the mouse, no matter where it is.
Which looks like this:

Smooth Damp Angle eases the rotation of the object towards its target.
Make a 2D projectile follow the mouse in Unity
The separate methods of moving an object and looking towards the mouse can be combined to make an object follow the mouse position.
For example, to create a missile projectile, that moves towards the mouse, you could combine the method of rotating an object towards the mouse with a simple script that moves the object forwards at a set speed.
Like this, for example:
public float speed = 5;

void Update()
{
    transform.Translate(Vector3.right * speed * Time.deltaTime);
}
The result is a projectile that moves forwards while turning towards the mouse position.
Which looks like this:

Combining the Look At script with a script that moves the object forward creates a homing missile.
The accuracy of the projectile depends on how quickly it can turn, where a higher turn speed, in degrees per second, means that the projectile can face the target position sooner, making a tighter turn towards it.
Like this:

Increasing the turn speed makes the projectile turn faster and follow more tightly.
But what about physics objects?
If your projectile has a Collider attached to it, it’s usually a bad idea to move it around using its Transform.
This is to do with the performance hit of moving a Static Collider, which is simply any object with only a Collider attached, using its Transform component.
Typically, in 2D, you’ll get better performance when moving it with a Rigidbody component, in this case, set to a Kinematic Body Type.
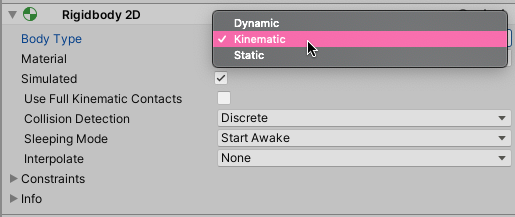
Helpfully, you’ll still be able to use the same calculations to manage angle and movement as when moving the object using its Transform.
However, instead of setting the position of the object directly, you’ll need to set the position and rotation of the Rigidbody using the Move Position and Move Rotation functions.
Like this:
public Rigidbody2D rb;
public float turnSpeed = 45;
public float moveSpeed = 5;

void FixedUpdate()
{
    Vector3 mousePosition = Camera.main.ScreenToWorldPoint(Input.mousePosition);

    Vector3 direction = mousePosition - transform.position;
    float angle = Vector2.SignedAngle(Vector2.right, direction);
    Vector3 targetRotation = new Vector3(0, 0, angle);

    rb.MoveRotation(Quaternion.RotateTowards(transform.rotation, Quaternion.Euler(targetRotation), turnSpeed * Time.deltaTime));
    rb.MovePosition(rb.position + ((Vector2)transform.right * moveSpeed * Time.deltaTime));
}
Now it’s your turn
Now I want to hear from you…
How are you using the mouse position with other objects in your game?
Are you turning or moving objects towards the mouse?
And what have you learned about working with the mouse position in 2D that you know others will find useful?
Whatever it is let me know by leaving a comment.
Image attribution

John French writes all of the Unity tutorials for Game Dev Beginner, and specialises in deep-dive guides teaching game development basics.

Comments
Hi John, I had some specific questions for you regarding moving objects with the mouse. I’m open to paying for some scripting. I’ll give my email address associated with this comment so you can contact me if interested.
Hi Walter, I’m already working on an article about that so I may already be covering what you need. If you could let me know what you’re after I can work it into the article. All the best, John.
Hey John, I’ve been looking for many tutorial about how to make my game object follow mouse position in order to complete my assignment. And then I found your tutorial, THIS tutorial, you’re really a kind man giving this easy to learn tutorial. I like this one, Thanks John.
You’re welcome, glad it helped!
Any idea on how you could make the object follow at a distance, but only on the x axis? thanks in advance!
The examples in this article directly affect the object’s transform position, but what you could do is use the same code to set a Vector 2 variable and then lock one part of that to whatever value you want it to be, after you’ve calculated the position. Something like:
Vector2 newPosition = // Code that would have set the transform goes here;
transform.Position = new Vector2( newPosition.x, float lockedValue);
This is off the top of my head but something like that should work.
Thanks a lot again!. I’ve just discovered this web and it’s a hidden gem!!
My God! what a tutorials, incredibly detailed… Wow! is the only thing I can say.
I’ve went through some of the tutorials and all of them have the same level of detail and love.
Thanks a lot for your effort making this tutos.
You’re welcome!
Hi John,
This is so clear and helpful, I really appreciate it! I’m working on a 2D game where I only have left and right walking animations that I would like to apply to the Y axis as well. I’ve been able to create the effect in Unity’s Animation Inspector, but it does not work when in play mode. Have you done an article on this, or would you be willing to look at the code? I’m very new to the subject, so I’m sure that my code is both redundant and missing things :]
Thanks again!
Thank you! Send me the code at [email protected] and I’ll see if I can spot the problem.
Hello!
Can I follow moving objects wth the help of Dotween?
I haven’t done it myself but I think so yes, I believe DoTween supports dynamic easing-type functions.
Hey John, I’m making a 2d game where the weapon needs to point at the cursor. I’m using the first method of mouse-controlled rotation and it works fine, until my character moves away from the origin (0,0). It starts to point vaguely away from the origin as the character moves away. Is there another article you’ve written that would help me with this?
Hi Evan, I thought I might have made a mistake in the script but I double-checked and I wasn’t able to recreate the problem you’ve been having. If you’d be willing to share more details about it with me at [email protected] I can try to help.
An absolutely unbelievable guide. Thank you so much for this.