
In Unity, getting the mouse position on the screen is fairly straightforward.
It’s a property of the Input class so, to access it from a script, all you need to do is use Input.mousePosition, which returns the position of the mouse, in pixels, from the bottom left of the screen.
Simple.
But what if you want to actually do something with the mouse position in the game world, such as click on a Game Object, or drag something around the screen.
Perhaps you want to make another object face the position of the mouse or fire something towards it.
Whatever it is, you’re going to need to translate the mouse’s position on the screen, which is measured in pixel coordinates, into a real position in the world that Game Objects use.
So…
How do you get the mouse position in world space in Unity?
To calculate the mouse position in world space, use Camera.ScreenToWorldPoint with Input.mousePosition, to get a Vector3 value of the mouse’s position in the Scene. When Using a 3D Perspective Camera you must set the Z value of Input.MousePosition to a positive value (such as the Camera’s Near Clip Plane) before passing it into ScreenToWorldPoint. If you don’t, no movement will be detected.
To interact with Game Objects using the mouse, there are several methods available. Almost all of them involve firing a Ray into the Scene from the mouse’s world position to collide with objects and retrieve a reference to them. Options include using Camera.ScreenPointToRay with Physics.Raycast for checking against 3D colliders or Physics.Raycast2D for 2D games.
In this article, you’ll learn the different methods for finding the mouse position in 2D and 3D Scenes, find out about some common pitfalls to avoid and see examples of how to use the mouse to interact with other objects in the game.
Mouse to World in Unity (video)
If you prefer to learn by watching, try my video on how to convert the mouse position to world space in Unity, or you can continue to the full article below.
Here’s what you’ll find on this page:
Methods for getting the world position of the mouse on the screen (using Screen To World Point)
- How to convert the mouse position to world space in 2D
- How to convert the mouse position to world space in 3D
Methods for using the mouse position inside of a 3D Scene (using Raycasts and Screen Point to Ray)
- How to get the mouse position in world space in a 3D Scene (Screen Point To Ray)
- Get the mouse position in world space using a Plane (lightweight method)
- Detect mouse coordinates on Terrain (using Terrain Colliders)
- How to get the mouse position on any object (using Physics.Raycast)
- How to Ignore certain objects when using Raycasts
- The right way to use the LayerMask Parameter
How to click and select an object in 2D & 3D (how to get object references)
Let’s start with the basics…
How to convert the mouse position to world space in 2D (using Screen To World Point)
Converting the position of the mouse on the screen into world space is relatively straightforward.
It can be done with ScreenToWorldPoint, passing in the mouse position, which returns a Vector3 position of the mouse in the Scene.
Like this:
Vector3 worldPosition = Camera.main.ScreenToWorldPoint(Input.mousePosition);In many cases, this works fine.
However,
Input.mousePosition is a Vector3 value, meaning that it also has a third Z value, which can cause some problems.
How to get the mouse position using the new Input System
The Mouse Position property of the Input Class uses Unity’s default method of input, the Input Manager. However, if you’re using Unity’s new Input System, you’ll need to use a different method for capturing the mouse position.
While the X and Y values consist of pixel coordinates (up and right from the bottom left of the screen) the Z value is for depth from the camera object.
This means that when it’s used with Screen ToWorld Point the Z value, which is 0 by default, simply returns the Z position of the Camera object.
Depending on how you wish to use the world position value, this may not be a problem for you.
However, if you were to move a 2D object to the world position, exactly as it is, it would disappear behind the viewable area of the Camera. This is because, even when using a 2D Orthographic Camera, the Camera Object is normally behind the Near Clip Plane of the viewing frustum.
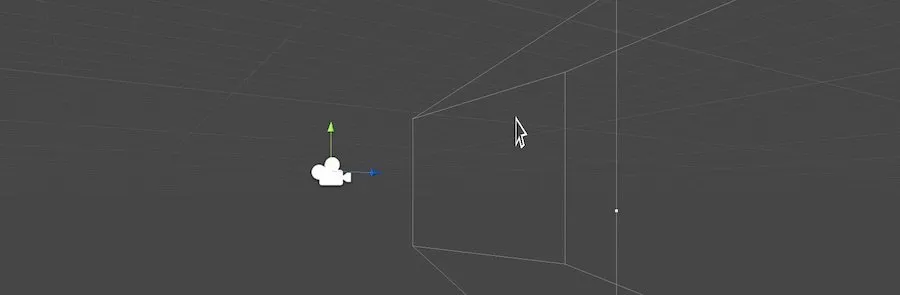
This can be avoided by manually setting the Z value to a positive value before passing it into Screen To World Point to give it some depth. For example, setting the Z value to the Camera’s Near Clip Plane will place it inside the viewable area, as can be seen in the example below:
Setting the Z value of Input.mousePosition to the Near Clip Plane of the Camera places it inside the visible area.
In scripting it looks like this:
Vector3 worldPosition

void Update()
{
    Vector3 mousePos = Input.mousePosition;
    mousePos.z = Camera.main.nearClipPlane;
    worldPosition = Camera.main.ScreenToWorldPoint(mousePos);
}
How to convert the mouse position to world space in 3D (using Screen To World Point)
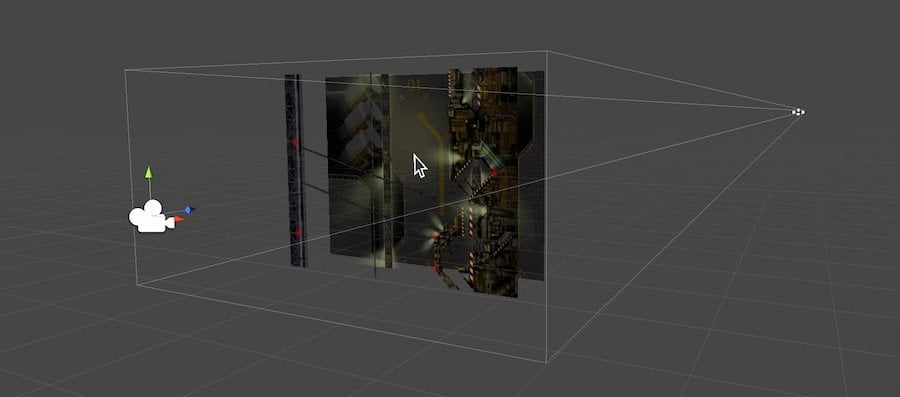
Screen To World Point also works for getting the mouse position on the screen with a 3D perspective Camera as well, however this will only work if you set the Z value of the mouse position to a positive value before passing it into the Screen To World Point function.
If you don’t, all of the mouse’s movement will be perceived to be at the origin of the Camera’s frustum, which is a single point. The mouse’s world position will always appear to be the same as the Camera and, while this is technically correct, it’s not going to be of any use.
When using 3D Cameras, if you don’t set the Z value of the Mouse Position before using it with Screen To World Point, the position will fixed to the origin of the Camera frustum.
Adding a depth value prevents this, by shifting the mouse’s position further into the frustum where mouse movement can actually be perceived.
In this example, the mouse position’s Z coordinate has been set to the same depth as the Near Clip Plane of the Camera, so that movement can be detected.
These methods are ideal for simply translating the mouse position from pixels to a world position.
And, particularly for 2D games, this may be all you need to do.
However, in these examples, the position of the mouse in the world is still only on the screen or, more accurately, the Near Clip Plane of the Camera.
In 3D games, you may also want to extend the position of the mouse further into the Scene so that you can use it other ways. To place markers, select objects or fire projectiles for example.
So, in the next section, I’ll be exploring just that, and finding out all the different ways to extend the mouse position into a 3D world.
Getting the mouse position in world space in a 3D Scene (using Screen Point To Ray)
The method for converting a mouse position on the screen to a point inside the Scene depends a lot on what you want to do. Or more specifically, where in the world do you want the mouse position to be?
Should it be on a wall?
On the floor?
Or maybe on some, or any of the Game Objects in the Scene?
While each method differs, one thing remains the same. You will need to account for the depth of the mouse position from the Camera.
One way to do this is to simply set the depth yourself, just like when using Screen To World Point in the first method. By adding depth to the Vector 3, you can extend the position of the mouse into the viewing frustum of the Camera.
However…
If you need to position the mouse against actual objects in the Scene or, if you want to select and interact with objects using the mouse, you’re going to need to fire a Ray into the Scene to collide with and get information about those Game Objects.
So let’s explore some of the basic methods available for firing Rays into 3D Scenes in Unity.
How to get the mouse position in world space (without using Colliders) using a Plane
It’s possible to get the mouse position as a Vector3 value in the Scene without detecting collisions with Game Objects.
This is ideal if all you want to do is project the mouse position onto a floor or a wall or any other flat surface, without worrying what it’s going to need to hit.
It’s done by creating a Plane, which you can think of as an infinitely, flat, virtual surface.
Then, by firing a Ray into the Scene from the mouse position on the Camera, the world position is measured where the Ray and the Plane intersect.
That part is done by using Ray.GetPoint, which returns a real world position at a precise distance along the line of a Ray. In this case, where it intersects with the Plane.
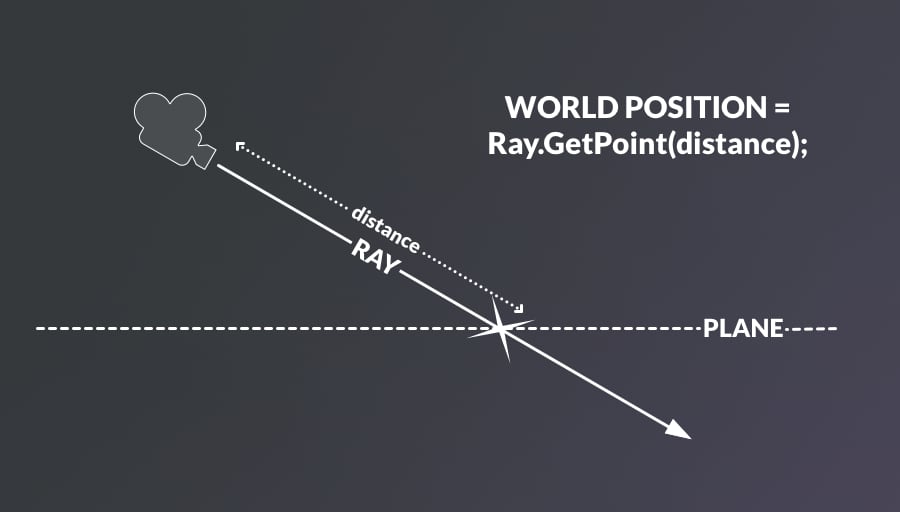
Using a Plane is an easy and lightweight method for placing the mouse position inside the game world.
This method is useful because it’s lightweight, it doesn’t require you to create any Game Objects or Colliders and can be done entirely from scripting, like this:
public Vector3 worldPosition;
Plane plane = new Plane(Vector3.up, 0);

void Update()
{
    float distance;
    Ray ray = Camera.main.ScreenPointToRay(Input.mousePosition);
    if (plane.Raycast(ray, out distance))
    {
        worldPosition = ray.GetPoint(distance);
    }
}
You may have noticed the Out keyword in the example above.
What does the Out keyword do?
Put simply, it lets you retrieve all kinds of information about a collision, such as where it happened and what was hit. As we explore Rays in Unity further we will be using it a lot, so it’s worth going into the Out keyword, and what’s happening in this script, in a little more detail.
What is the Out keyword used for in Unity?
The Out keyword allows functions to return multiple values despite only having a single return type.
In this case the return type of Plane.Raycast is bool, which is needed to detect if the Ray is actually intersecting with something or not (true if it is, false if it isn’t). The Out keyword allows you to get extra information about that collision so long as you declare a variable to store the value in.
In this example, we’re simply saving the length of the Ray (up to its collision point) in the float named ‘distance’ but, as you’ll see later in this article, it’s possible to store more detailed sets of data too.
What’s happening in this script:
Every frame, in Update, the script does the following:
- Creates an invisible Plane in the Scene that faces up and has no offset. To create a different Plane we could have it face a different direction, or offset it (with the second parameter, distance) so that it’s higher up or lower down than the origin.
- Declares a float called distance to hold the distance value. This will be used to measure the distance along the Ray.
- Creates a new Ray, called ray, that fires forward from the Camera’s mouse position in the world.
- Checks to see if the Plane and the Ray intersected, saving the length of the Ray if it did in the ‘distance’ variable. We use the out keyword to save data from the function in a different variable.
- Updates the World Position to a new Vector3 using the GetPoint function of Ray.
Getting the mouse position against a flat plane is a great way to get the mouse position in a 3D world quickly and easily.
However…
While it works great for games with large flat surfaces, it may not work for you if you’re trying to create a more natural landscape in your game, such as Terrain.
So what do you do if you want to place your mouse position there?
How to detect mouse coordinates on Terrain

Getting the mouse position on the Terrain works in a very similar way to getting the Mouse position on a plane.
However, instead of creating a Plane to intersect with, we will simply use the Collider that’s attached to the Terrain object.
Here’s what it looks like in Scripting:
using System.Collections;
using System.Collections.Generic;
using UnityEngine;

public class MousePositionOnTerrain : MonoBehaviour
{
    TerrainCollider terrainCollider;
    Vector3 worldPosition;
    Ray ray;

    void Start()
    {
        terrainCollider = Terrain.activeTerrain.GetComponent<TerrainCollider>();
    }

    void Update()
    {
        ray = Camera.main.ScreenPointToRay(Input.mousePosition);
        RaycastHit hitData;

        if(terrainCollider.Raycast(ray, out hitData, 1000))
            {
                worldPosition = hitData.point;
            }
    }
}
Just like before, we’re creating a Ray that fires into the Scene from the Mouse position.
What’s different, however, is that, instead of storing a distance value along the length of the Ray, we are instead storing much more detailed RaycastHit data in a variable called ‘hit’. We’re also using a maximum distance parameter of 1000.
RaycastHit is a data type in Unity that provides different properties about a Ray that has intersected with a Collider.
This is incredibly useful for getting all kinds of information about a Game Object, such as a reference to its Collider, the Transform of the object and the point in world space that the Ray hit the object. Which is what’s happening here.
Just like when getting the position against a Plane, the Terrain method is ideal for when you only want to compare the mouse position against a certain object’s Collider.
But what if you don’t want to check against just one object, what if you want to check the mouse position against multiple objects, or any object or even a group of specific objects.
Here’s how to do that…
How to get the mouse position on any object (using Physics.Raycast)
Just like getting the mouse position on the Terrain, mapping the mouse against any Game Object involves a similar process of firing a Ray, detecting the collision and, if there was one, saving the hit data with the Out keyword to a Raycast Hit variable.
The difference, however, is that we’re no longer checking against a specific Collider, as was the case with the Terrain and Plane examples.
So how can you check for a collision without referencing a specific Collider?
Check all of them of course!
The Physics class in Unity allows you to check if a Ray has hit any Collider in the Scene using the Physics.Raycast function.
Updating the script to work on every Collider (except for 2D colliders which use the 2D physics engine) looks like this:
using System.Collections;
using System.Collections.Generic;
using UnityEngine;

public class MousePositionOnTerrain : MonoBehaviour
{
    Vector3 worldPosition;

    // Update is called once per frame
    void Update()
    {
        Ray ray = Camera.main.ScreenPointToRay(Input.mousePosition);
        RaycastHit hitData;

        if(Physics.Raycast(ray, out hitData, 1000))
            {
                worldPosition = hitData.point;
            }
    }
}
But what if you don’t want to check against every single object with a Collider on it?
What if you want to ignore some of them?
How to ignore certain objects when using Raycasts
There will likely be objects that you don’t want the Ray to collide with, so how can you get the mouse position against some objects, but not others.
There are a couple of methods available for sorting between all of the possible objects that can be hit by Rays
Check the object’s Tag
Once you have the hit data of an object, you can find out all kinds of information about it.
Like its Tag.
For example, to check if a Ray hit an object with the Player tag:
Ray ray = Camera.main.ScreenPointToRay(Input.mousePosition);
RaycastHit hitData;

void Update()
{
    if (Physics.Raycast(ray, out hitData, 1000) && hitData.transform.tag == "Player")
    {
        Debug.Log("Mouse is over the Player");
    }
}
Use the Ignore Raycast Layer
The Ignore Raycast Layer allows you to mark objects that will not receive Raycasts.
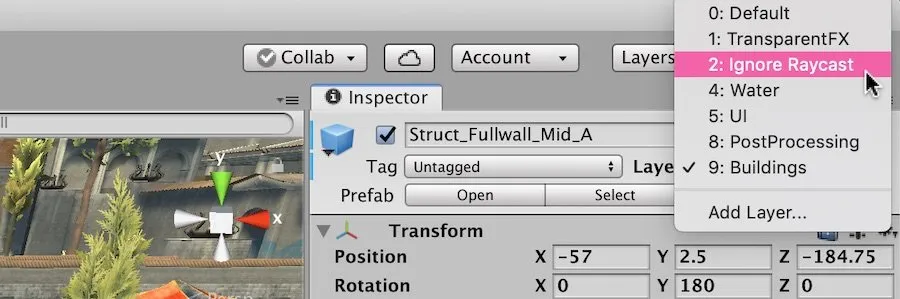
Unity provides a convenient Layer that ignores Rays
This is a convenient method for excluding objects from Raycast hits and is ideal if you want Rays to hit most of your objects but not all.
However, depending on the structure of your game, you may need Game Objects to still be able to receive some Raycast Hits, but not from the mouse, and vice versa.
Luckily it’s possible to specify which Layer or Layers you want to include when detecting Raycasts, and which ones you don’t, using LayerMasks.
The right way to use Layer Masks
Using a LayerMask parameter with the Physics.Raycast function allows you to specify which Game Object Layers are included or excluded when detecting Raycast Hits.
The easiest way to do this is by adding a public LayerMask variable to the script, which you can then set in the Inspector.
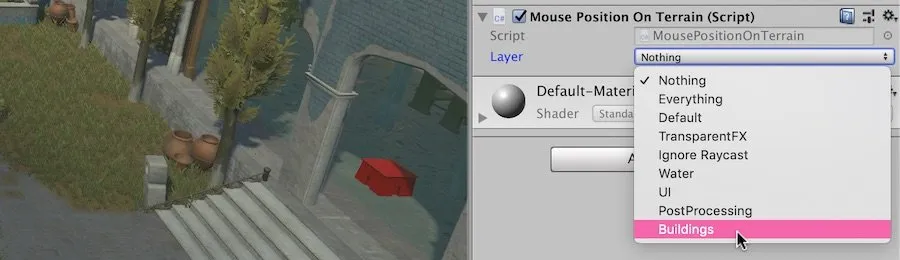
Setting the LayerMask is easiest to do in the Inspector, but it’s not impossible to do in code either…
Then simply pass that into the Physics.Raycast function, like this:
using System.Collections;
using System.Collections.Generic;
using UnityEngine;

public class MousePositionOnTerrain : MonoBehaviour
{
    public LayerMask layerMask;
    Ray ray;
    RaycastHit hitData;
    Vector3 worldPosition;

    // Update is called once per frame
    void Update()
    {
        ray = Camera.main.ScreenPointToRay(Input.mousePosition);

        if (Physics.Raycast(ray, out hitData, 1000, layerMask))
        {
            worldPosition = hitData.point;
        }
    }
}
Simply set the Layer, or multiple Layers, to match which Layers that you do want to receive Raycasts.
Alternatively, you can do it all in scripting.
How to set a LayerMask parameter in code
If you prefer to set the layer in a script, it looks like this:
// Will only check for Raycasts on Layer 9
LayerMask layerMask = 1 << 9;

if (Physics.Raycast(ray, out hitData, 1000, layer))
    {
        // Layer was hit!
    }
In this example, I’ve set the script to only recognise hits against the 9th Layer.
Simply replace 9 with the index of the layer you wish to use.
How to set a LayerMask parameter to detect every layer except one
Using the same example, to get hits on every layer except for Layer 9, use the bit inverse operator ‘~’ when passing in the value.
Like this:
if (Physics.Raycast(ray, out hitData, 1000, ~layer))
    {
        // Layer was hit!
    }
You may have noticed that I didn’t simply enter the number 9, as you might expect to be able to do.
So… why can’t you just enter the number of the Layer in the LayerMask parameter?
I’ll explain…
When your LayerMask isn’t working (and how to fix it)
Something I found incredibly confusing the first time I started experimenting with Rays is that the integer LayerMask parameter that Physics.Raycast uses is not the same as the Layer index number as seen in the inspector.
So if you try to just enter the number into that parameter it won’t work.
Here’s what’s actually happening…
While Physics.Raycast does take an integer for the LayerMask parameter, it’s being used in binary.
This means that the decimal value that you put in does not match to the Layer you want (unless you put in 1, or 0).
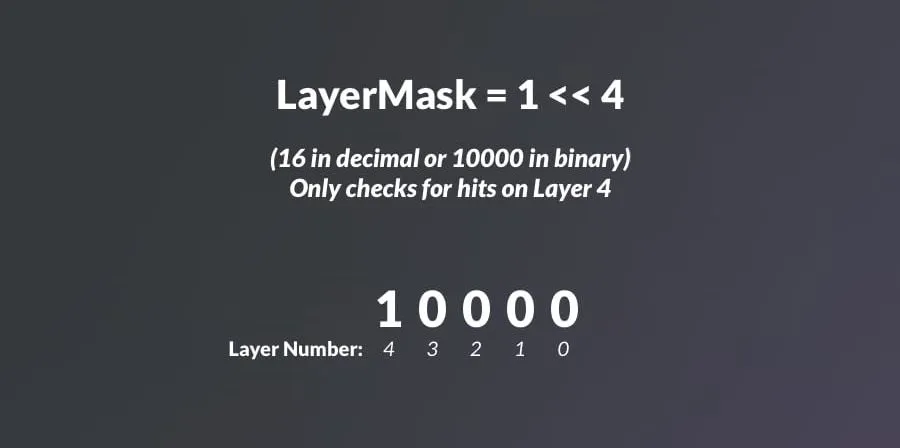
For example, say I want to check for hits against the 4th Layer, ‘Water’. I might think I can simply enter the number 4.
However…
If I do that, the binary representation for 4 is 100. Unity actually uses the binary value to flag which Layers to include.
Unity will check, from right to left, each digit to see if it’s a 1. The first two digits are 0, meaning Layer 0 and Layer 1 will not be checked for Ray hits. The 3rd digit is a 1 so Layer 2 will be checked for hits.
Layer 2 is, ironically, the Ignore Raycasts Layer.
While it’s potentially confusing, there is a benefit. Using the value in this way allows multiple Layers to be included or excluded, offering greater flexibility.
The right way to use the LayerMask parameter in scripting
Getting back to the example, if entering the actual number 4 won’t work, what does.
One method is to work out what the binary value should be and convert it… In this case, the required binary value to check Layer 4 would be 10000 which, in decimal, is 16.
Which will work.
But there is an easier method than this for setting the LayerMask in code, and you’ve already seen it.
Remember the ‘<<‘ in the previous script? That’s the Bit Shift operator and what it does is move the bits in a binary value to the left.
So, for example, 1 << 4, moves the bits in the number 1 (which in binary is also 1) by four places to the left. Which returns 10000. In decimal, this is 16. Which is exactly the number we need to flag the 4th Layer to receive hits.
So, to enter a LayerMask value in code, either enter the decimal version of the binary value you want (in this case 16) or enter the Layer Number using the Bit Shift operator, in this case, ‘1 << 4’.
The bit shift operator is simply a convenient way to enter a LayerMask in code, as it allows you to use the Layer number from the Inspector.
The benefit of doing it this way is that it’s more convenient and more readable. You can easily pass in the actual number of the layer you’d like to use.
And, while the easiest method, by far, is to simply use a public LayerMask variable. The Bit Shift operator offers an easy way to do it all in code.
If you’re interested in learning more about the Bit Shift operator from someone who actually knows what they’re talking about, Stelimar wrote an in-depth explanation of how it works on the Unity forums here
How to click on a 2D Game Object with the Mouse in Unity

To interact with 2D objects using the mouse, just like in a 3D game, you will need to fire a Ray inside the Scene to detect them.
Unity has separate Physics systems for 2D and 3D, meaning that 3D Rays will not be detected against 2D Colliders and vice versa. So for this, we will need to use Physics2D and 2D Colliders.
Here’s how to do it:
- First, make sure that the object you want to select has a 2D collider component on it. This method will not work against 3D Colliders.
- Next, get the mouse position in the world using ScreenToWorldPoint as before, this will act as the starting point for the Ray.
- Next, create a RaycastHit2D variable to check for hit information and pass in the mouse’s world position (but as a Vector2, so ignoring the 3rd Z value), set the Ray’s direction to zero (0,0) and set the Ray to zero distance (0). This fires a ray at a single point that’s infinitely deep but, as Physics2D allows for Ray hits to be detected from inside of Colliders, it works.
- Finally, check if the Hit Data variable is null, and if it isn’t, get a reference to the Game Object.
Here’s what it looks like in scripting
using System.Collections;
using System.Collections.Generic;
using UnityEngine;

public class SelectObjectOnClick : MonoBehaviour
{
    public GameObject selectedObject;
    void Update()
    {
        Vector3 worldPosition = Camera.main.ScreenToWorldPoint(Input.mousePosition);
        RaycastHit2D hitData = Physics2D.Raycast(new Vector2(worldPosition.x, worldPosition.y), Vector2.zero, 0);
        if (hitData && Input.GetMouseButtonDown(0))
        {
            selectedObject = hitData.transform.gameObject;
        }
    }
}
While there are several methods available for detecting clicks on objects in 2D, using a Ray is especially useful if you don’t want to have to add a script to each clickable object.
And while you may not want to make every object selectable, it’s easy to only allow certain objects to be selected by using a LayerMask.
For example:
using System.Collections;
using System.Collections.Generic;
using UnityEngine;

public class SelectObjectOnClick : MonoBehaviour
{
    public GameObject selectedObject;
    public LayerMask layerMask;

    void Update()
    {
        {
            Vector3 worldPosition = Camera.main.ScreenToWorldPoint(Input.mousePosition);
            RaycastHit2D hitData = Physics2D.Raycast(new Vector2(worldPosition.x, worldPosition.y), Vector2.zero, 0, layerMask);
            {
                if (hitData && Input.GetMouseButtonDown(0))
                {
                    selectedObject = hitData.transform.gameObject;
                }
            }
        }
    }
}
Then in the inspector, set the LayerMask to the Layer or Layers that you do want to be checked.
How to select an object with the mouse in 3D
Earlier we explored the different methods for detecting Raycast hits against objects in world Space, which we can use to get a reference to an object.
Once you have a reference to a Game Object, you can do something with it.
Maybe you want to highlight it as the mouse rolls over it, or perhaps you want to find the object’s position, find out its name, get a Component from it or simply select it, storing the reference to use in some other way.
Simply use the Raycast Hit data to find the Transform that was hit. From that you can also get the Game Object, by using RaycastHit.transform.gameobject.
Just like selecting an object in 2D, the object will need to have Collider on it for this to work:
using System.Collections;
using System.Collections.Generic;
using UnityEngine;

public class SelectOnClick : MonoBehaviour
{
    public GameObject selectedObject;
    Ray ray;
    RaycastHit hitData;

    void Update()
    {
        ray = Camera.main.ScreenPointToRay(Input.mousePosition);

        if (Physics.Raycast(ray, out hitData, 1000) && Input.GetMouseButtonDown(0))
        {
            selectedObject = hitData.transform.gameObject;
        }
    }
}
How to highlight, select and deselect a Game Object using Rays
If you’re using the mouse position in the world to select Game Objects, then it’s likely that you will want players to be able to deselect objects as well.
Using this example script, you can allow players to ‘Click Off’ of an object to deselect it:
using System.Collections;
using System.Collections.Generic;
using UnityEngine;

public class SelectOnClick : MonoBehaviour
{
    public GameObject selectedObject;
    public GameObject highlightedObject;
    public LayerMask selectableLayer;
    Ray ray;
    RaycastHit hitData;

    void Update()
    {
        ray = Camera.main.ScreenPointToRay(Input.mousePosition);

        if (Physics.Raycast(ray, out hitData, 1000, selectableLayer))
        {
            highlightedObject = hitData.transform.gameObject;

            if (Input.GetMouseButtonDown(0))
            {
                selectedObject = hitData.transform.gameObject;
            }
        }
        else
        {
            highlightedObject = null;

            if (Input.GetMouseButtonDown(0))
            {
                selectedObject = null;
            }
        }
    }
}
Ready-made options
Mouse Interaction – Object Highlight
Mouse Interaction by Arigasoft is an out-of-the box solution for highlighting objects, showing tooltips and info boxes and generally managing the interaction between the mouse and an in-scene object.
Target Maker – Ready-made cursor targets
Target Maker by Ripcord Development is a library of hi-res cursor target textures (but that includes prefabs and a demo) for highlighting positions on the ground, or on a map. It’s made for real-time strategies, but really it’s suitable for any game where you issue a command or highlight a target at a position on the ground.
Now it’s your turn.
For such a simple operation this is a huge topic and when you think about all of the different ways that games can use the mouse, it’s easy to understand why.
But I want to know what you think about it…
How are you using the mouse in your game? Did a method in this article help you?
Or maybe you’re using the mouse in some other way?
Whatever it is, let me know by leaving a comment.
Image Attribution
- Icons made by Freepik from www.flaticon.com
- Design vector created by freepik – www.freepik.com
- Geometric vector created by macrovector – www.freepik.com

John French writes all of the Unity tutorials for Game Dev Beginner, and specialises in deep-dive guides teaching game development basics.

Comments
This is very clear and comprehensive, thank you for posting! I’d never heard of the plane-intersecting method, which turned out to be exactly what I needed. I’m sure I’ll be referring back to here plenty in the future.
Thanks Tim, glad it helped!
Thank you! I struggled with this thing almost 3 days and u gave me clear answer. It was really helped a lot. I’ll be referring back to here plenty in the future too.
You’re welcome. Glad it helped.
No. screenpointtoray is very unnecessary here, you just need to say that pos.z is equal to pos.x….
like so…
Vector3 pos = Camera.main.ScreenToViewportPoint(Input.mousePosition – dragOrigin);
pos.z = pos.x;
Vector3 move = new Vector3(0, pos.y * dragSpeed, pos.z * -dragSpeed);
always a pleasure x
Thanks for your feedback however I’m not sure which method you’re referring to? The mouse to viewport examples in this article don’t use ScreenPointToRay and the mouse to world methods need rays to intersect with objects. I’m always interested in updating and improving my articles so, if you’d be willing to go into more detail, please feel free to email me at [email protected].
wow, nice tuts here. thanks man…
You’re welcome!
Thank you! The explanation was very detailed and very easy to follow along!
You’re welcome, glad it helped!
Thanks, terrific article. If you ever update it, could you include how to use the new Input System? I think getting an event with a Vector2 or Vector3 object and acting on it is better than explicitly checking for Mouse Down or Mouse Position from Input. But when I tried to actually do this, I got lost in the conversion, probably having to do with World Space. I’m a fan of the Input System, even if it is a bit of a pain to set up.
You’re welcome, the new input system is definitely on my radar so hopefully sometime in the future.
Hey there; is there a way for code in another object (like, say, the one that codes for the mouse) to utilize code stored in an object it clicked on? I tried typing some code using the both “selectedObject” and “hitData”, and neither work.
Once you’ve got a Game Object reference, you should then be able to use that to get a reference to whatever script or Component you need to access. For example,
See my article on Get Component for more info.
Thank you for your effort on writing this post. It gave me insight on what my problem is, but unfortunately not how to fix it. Would be nice to add code examples to ScreenToWorldPoint. All I know is that I need to figure out how to move the z of the mouse position.
You’re welcome! You can manually adjust the z position to extend the world point into the scene or, like in the example in the post, you can set it to the near clip plane, so that it appears in the right position on a perspective camera:
Otherwise, if you want a point that collides with objects, you can use a ray to intersect with colliders and get that distance for the z value.
If these examples don’t cover what you want to do, let me know so that I can update the post.
All the best,
I’ve been searching all over for something like this. This is by far the most comprehensive and well written explanation I have found. Thank you!
You’re welcome!
You have outdone yourself with this tutorial John. Well Done! You are absolutely the best Unity Tutorial writer bar none.
Thank you so much!
P.S. for your readers: If you want to get an array of ALL of the objects that the ray hits, use: Physics.RaycastAll. Note that order of the results is undefined so you might want to sort based on distance if you need to.
Thanks so much!
Bookmarking this page for sure. Im building a simple 3D space game and wanted a floating reticle to follow the mouse and lock onto asteroids flying down the Z axis. Using the Physics class example helped a ton. I even learned to keep the reticle from locking onto the player ship by using the Ignore Raycast Layer. Thanks a ton!
Thank you! So glad it helped.
Thank you very much for this post. It is very useful in that the code here works (I got my object to track the mouse), but I don’t fully understand it 🙁
I am building a 3D top down shooter. I have a Plane in my scene at (0,0,0), so I thought I’ll use that to send the ray. However it does not collide. When I used the plane as you suggest at Vector3.Up (which is (0,1,0), there is no collision.
My camera’s rotation is set to look down:
transform.rotation = Quaternion.Euler(new Vector3(90f, 90f, 0f));
It’s position is tracking the player, with height set to 25:
transform.position = new Vector3(
player.transform.position.x,
25,
player.transform.position.z);
I wish there was an easy tool to plot all of this in 3d and get my brains around it 🙂
Thanks! To help with your problem, maybe try drawing the Ray that you’re using to see where the problem might be. That’ll make it easier to find out whether the issue is with the Ray or the plane or something else.
Hope that helps.
Thanks alot for your guide.
But i have one question:
How do you make use of this mouseposition to make the player object look at the direction of the mouse?
thanks.
Thanks! Try transform.LookAt(Vector3 positionToLookAt);
put it in Update on a script on the object you want to rotate, that should work.
All your articles are awesome!
Thank you Alex, I appreciate the support!
I came across this article a couple of days ago and as a non-coder (google cut and paste ninja) I found it excellent and the explanations of the pitfalls and strengths of the different methods is great. I got my controller working pretty easily after ‘borrowing’ and modifying the layermasked camera raycast method and using some invisible colliders to surround my player to catch rays that wouldn’t hit anything.
I liked it so much i’ve pimped it on r/Gamedev on reddit, everyone should read this.
Thank you! I’m really glad to hear it helped you.
Terrific! Thank you so much.
You’re welcome!
Why create a Plane every frame? Isn’t it better to create it at the start and use it?
Yep, you’re right. It would be better to do that. I’ve updated the code example, thanks for pointing that out.
Vector2 MousePostion = Input.mousePosition;
Vector2 ScreenRessolut = new(Screen.width, Screen.height);
Vector2 AltenativeWSpace;
AltenativeWSpace = new(ScreenRessolut.x/2 – MousePostion.x, ScreenRessolut.y/2 – MousePostion.y);