When you’re building the different parts of your game, there’s a good chance that you will reuse many of the objects that you make, elsewhere.
For example, you may want to place the same decorative object in many different places to create your game’s environment, or you might want to repeatedly spawn copies of an object over and over, such as when firing a projectile.
And, even if your object is meant to be a one-off, such as the player, for example, you will probably want to place it in a number of different scenes, in which case you probably don’t want to have to go into each of them to change something about it.
Which is where Prefabs can be extremely useful.
Prefabs in Unity are reusable game object assets, that allow you to place multiple copies of the same object in your game, and manage them all from one place.
In this article, you’ll learn how prefabs in Unity work, how to make your own and how they can make modifying the different moving parts of your game much easier to do.
Here’s what you’ll find on this page:
- What are Prefabs in Unity?
- How to use Prefabs
- How to change a Prefab
- How to use Prefab Variants
- How to use Nested Prefabs
- How to Unpack a Prefab
So what, exactly, are prefabs?
What are Prefabs in Unity?
Prefabs are object templates that allow you to save the configuration of a game object that’s in your scene as an asset in your project.
To create a prefab, simply drag an object from your scene, into your Project Window.
Like this:
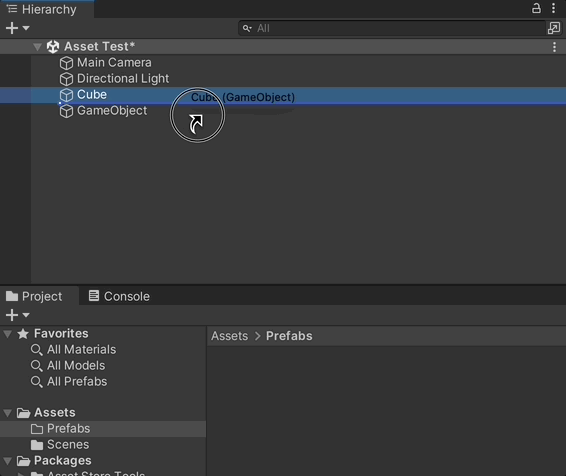
This will save a copy of it as a template, exactly as it is, with its structure, components and unique data intact, so that it can be reused elsewhere in your game.
Which works by either dragging the prefab back into one of your scenes to create a new copy of it, or by instantiating it in your scene at run time, using a script and a game object reference.
Instantiating Prefabs
It’s possible to create a copy of a prefab in your scene by using the Instantiate Function.
To do this, simply declare a game object variable, and drag your prefab to it. Then, when you call Instantiate, pass in the reference to the prefab asset.
But, when holding a reference to a prefab in your script, it’s possible to accidentally change the prefab asset in your project.
For example, if you create a new object from a prefab and then modify it in some way, by using the game object reference you used to create the object, you’ll actually be changing the asset in your project, not the newly created instance.
To avoid this, if you need to work with an object after you’ve created it, make sure to cache a reference to newly created objects when they’re instantiated.
Like this:
GameObject newObject = Instantiate(prefabReference);That way, you’ll avoid making changes to your prefabs by mistake.
But why is this useful?
And when should you use a prefab?
The general idea of a prefab is to move the configuration of an object outside of the scene it was built in, so that it exists as an asset and not an instance.
Which allows you to paste the same object in multiple places, or in multiple scenes.
Then, if you then want to change something, you won’t need to find every copy to do it, you can simply change the prefab, and all of its copies will be updated as well.
This works because objects that are created from prefabs keep a connection to their original asset, meaning that changing the asset, changes its copies.
As a result, you may find it useful to create a prefab for any object in your game that you plan to reuse, especially as your game gets bigger, as it can make it much easier to update your game’s objects, even if you don’t know where they all are.
But, exactly how prefabs and their copies are updated can be a little confusing at first.
So how do they work?
How to use Prefabs
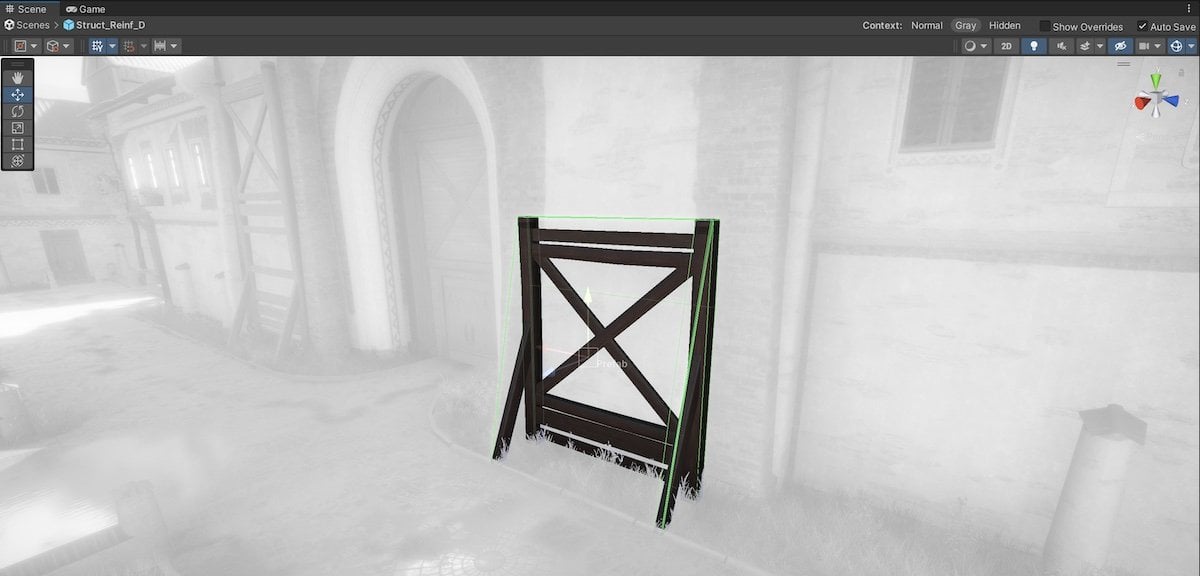
When you drag a prefab into a scene, it will create a new copy of that asset in the hierarchy.
This is a Prefab Instance, a unique version of the original object that inherits all of its data but that can be individually modified.
You’ll be able to tell prefab instances apart from other objects in your game, as they’re highlighted Blue in the object hierarchy.
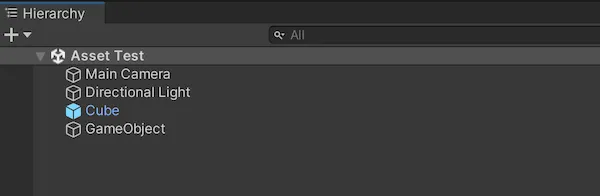
Meaning that a connection exists between that object and a prefab template.
But how does that connection work?
And what happens when you do change something?
How to change a Prefab
There are two ways you can change a prefab in Unity.
Either by changing the prefab itself, in Prefab Mode, or by modifying one of its instances with a Prefab Override.
Prefab Mode
Making changes in Prefab Mode means changing the prefab itself.
Which means that any modifications you make will be applied to other copies of the asset, anywhere else in the game.
To enter Prefab Mode, double-click the prefab asset in the project window, which will take you to what looks like an empty scene with only the prefab object inside of it.
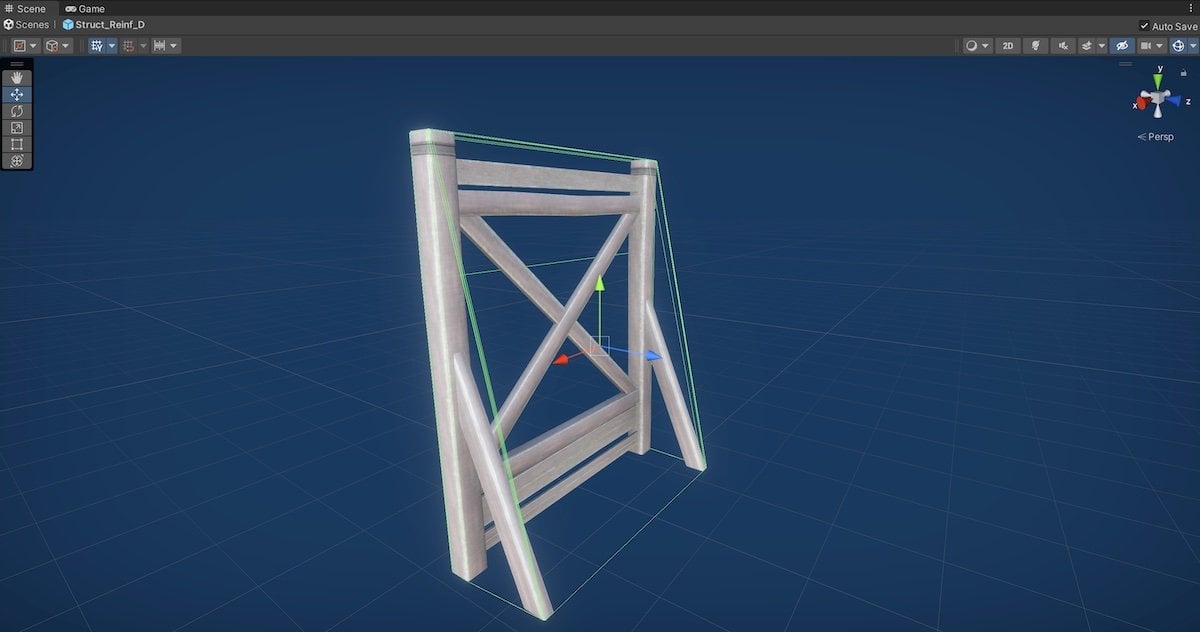
Prefab Mode in Isolation allows you to edit the original prefab, updating changes to copies in your scenes.
This is Prefab Mode in Isolation and, if Auto Save is checked, changes that are made here will be applied to all of the prefab’s instances as soon as you make them.
Alternatively, it’s possible to edit a prefab by using Prefab Mode in Context.
This works in exactly the same way as editing a prefab in isolation, except that you can make your changes while viewing an instance of your prefab in the scene.
Which can be useful if you need to see how it will look compared to other objects around it.
Prefab Mode in Context works in the same way as editing a prefab in isolation, except that you’ll be able to see what it looks like in the scene.
To enter prefab mode in context, select an instance of the prefab and click Open in the Inspector, or click the Arrow to the right of the prefab instance.
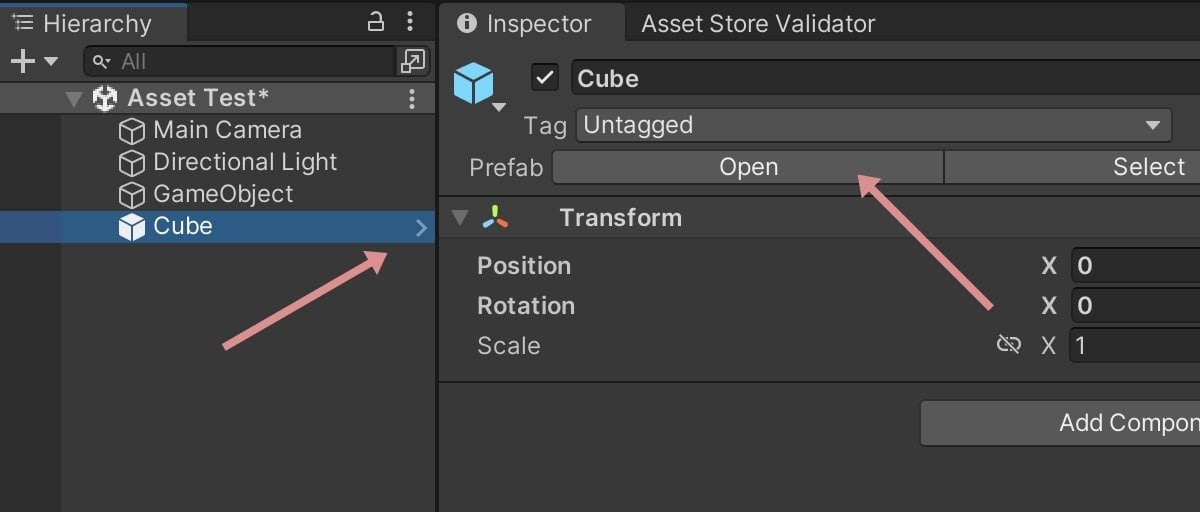
To enter Prefab Mode in Context, click the right arrow next to the instance in the hierarchy, or select it and click Open in the Inspector.
Even though prefab mode in context may seem like you’re modifying the values of an individual object, anything you change here will be applied to other prefab instances in the game.
That is, unless, an instance has had one of its values changed locally.
Prefab Overrides
A Prefab Override is a change that’s been made on an instance of a prefab, not the prefab asset itself.
This overrides the prefab’s original value, preventing it from being changed when the base prefab is.
Overridden values are highlighted with a Blue Strip and are marked in bold, so that you can easily spot values that have been changed.
You can also Apply your new instance overrides to the prefab asset, making them permanent, and changing the original, as well as all of its instances.
Or you can Revert an instance back to its default values, resetting it to match the prefab template.
When changing the settings of a prefab instance, it’s possible to apply your changes to the prefab itself or restore the instance to default values.
However, not everything on a prefab instance can be changed.
For example, while it’s possible to add new game objects to a prefab, you won’t be able to remove existing objects or alter their structure.
Meaning that, if you want to disable a part of a prefab, instead of deleting that object, you’ll need to turn it off instead.
While components and scripts, on the other hand, can be added or removed freely, but they can’t be reordered.
However, while changing one part of one instance of a prefab may be useful, what if you want to create more duplicates based on that one new instance?
For example, what if you want to create multiple copies of an instance that’s only slightly different from its original.
That’s where Prefab Variants come in.
How to use Prefab Variants
Prefab Variants are prefabs of other prefabs.
They allow you to create hierarchical prefab structures, where an object’s data inherits from the prefab variant that it’s based on and the root prefab that was used to create it.
So how do they work?
Let’s say, for example, that you create a prefab of a breakable container, such as a crate.
The prefab contains all of the logic and components required for the object to break, dropping some loot in the process.
As a result, you can easily place prefab instances of breakable crates all over your game and, if you need to change something about how they work, you can, by modifying the prefab that they’re based on.
But, what if you also want to create a breakable barrel as well?
You may not want to have to recreate the breakable part of the object, as this will make it harder to change later, but the object needs to be different.
One option is to create a prefab instance of the crate, but that looks like a barrel instead.
Then you could just copy it around your scene.
Which would work,
But, doing it this way means that there’s no connection between the objects that are barrels, meaning that if you wanted to change anything about the barrel, specifically, you’d need to change every single one individually.
Alternatively, you could recreate the object in the same way that you built the crate, making a new prefab.
But, you wouldn’t be able to change how both types of breakable container worked from one place, you’d need to copy the same changes between each set of breakable objects.
Which, if you end up with many different types of breakable container, could cause you problems later on.
So what’s the solution?
Prefab Variants allow you to save the changes you make to a prefab, as a new prefab.
Which means that you can create new copies of it that will, in turn, inherit those changes as default values.
This creates a kind of prefab hierarchy, where the prefab variant is only responsible for its own overridden changes.
Meaning that, if you change a value on the original prefab, that wasn’t overridden on the variant, it will update any objects that, ultimately, inherit from the prefab and all of the variant copies as well.

Using Prefab Variants, it’s possible to create a kind of inheritance system, but for objects, not scripts.
This can be extremely useful for creating base objects, with core functionality that sub-objects, prefab variants, are derived from.
This works in a similar way to script inheritance, where an object inherits attributes from its base object, but is able to override its own data if needed.
But, just like with inheritance, prefab variants only really work when the object is a version of its base.
Which might not always be the case.
Sometimes, you might want to piece different objects and systems together instead, in a similar way to Script Composition.
So how can you?
How to use Nested Prefabs
While prefab variants allow you to create different versions of the same template object, Nested Prefabs allow you to create a single object that is a prefab, but that also contains other prefabs.
This can be useful when you want to combine multiple reusable objects together to make something new, but you still want to be able to update each of them individually from their original prefabs.
However, nested prefabs can, sometimes, be a little confusing to work with.
This is because, when you change something, it’s not always clear what you’re changing, and how it will affect the relationships between the prefab instances and their original templates.
For example, imagine that you have a prefab, your player object, and on that prefab you’ve added a system, such as a combat system, or a health system, something that’s reusable, and that you might want to put on another object in your game, but that you want to be able to modify from one place.
However, if you change something on the instance of that system, what are you actually changing?
Are you overriding settings on the system prefab, or the player prefab?
The answer is, it can be either.
Most of the time, when you view a prefab that contains other prefabs, you’ll be looking at the outermost prefab.
So, for example, if you have a prefab inside a prefab, in the hierarchy you’ll be looking at the top-level prefab only and, if you change something, it will be applied to that configuration of objects by default.
This means that any changes you make to the nested prefab will be overridden, as you might expect.
But, what’s different is, that, your changes won’t appear as a change to the nested prefab, they’ll be recorded as a change to the top-level prefab instead.
Meaning that, if you apply those changes, the top-level prefab will be updated, but the nested prefab’s original asset will not.
This can be a problem if you’ve selected a nested prefab in the hierarchy, and have been editing it, only to find that the option to apply your changes is missing on that object specifically.
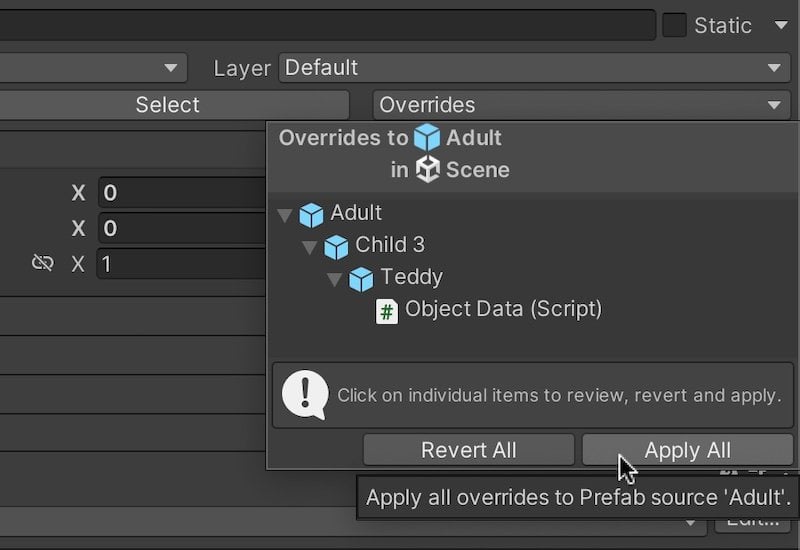
However, it is still possible to apply overridden changes to a prefab within a prefab.
This works by selecting the outermost prefab instance and, instead of clicking Apply All, selecting the object in the Overrides Dropdown that you want to apply changes to.
This will then give you the option to apply any modifications you’ve made to either the nested prefab, or to the containing prefab instead.

When your prefab contains other prefabs, you can choose which prefab to apply instance changes to.
Nested prefabs are ideal for maintaining connections to complex objects in your game so that they’re easier to manage and easier to change.
But, what if you don’t want an object to update with its prefab anymore?
How can you remove the connection between a prefab instance and its template?
How to Unpack a Prefab
When you right-click an instance of a prefab in a scene, you’ll see the option to Unpack that prefab.
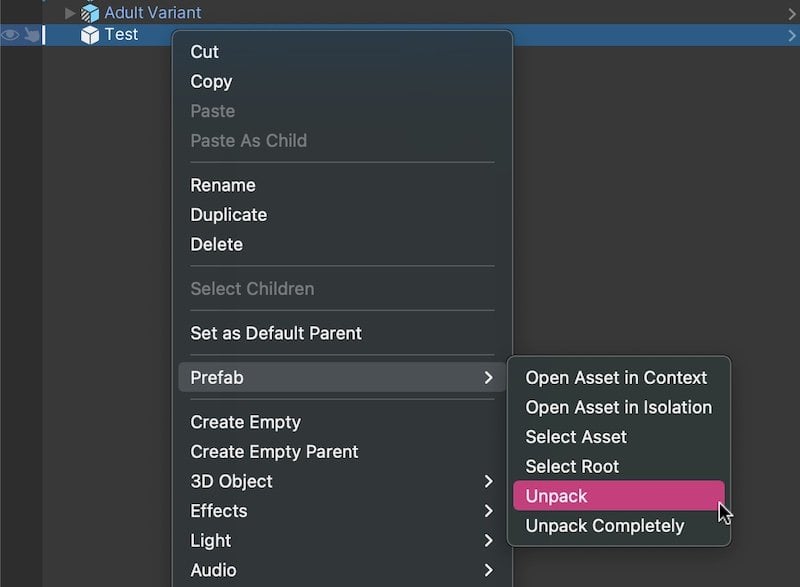
Unpacking a prefab will break the connection between an instance and its original template.
Unpacking a prefab breaks the connection between the object and the template that was used to create it, leaving regular game objects in their place.
Exactly what gets left, depends on whether you unpack the prefab or if you unpack it completely.
Unpack vs Unpack Completely
When you select Unpack Prefab, the contents of the prefab as seen in prefab mode will be added in place of the prefab instance.
This means that, if the prefab contained other prefabs, while the top-level object is no longer connected to its original template, any prefabs that were contained within it will still maintain their connection to their original objects.
While Unpack Completely will remove all connections from an instance.
Meaning that, even if the object contains other prefabs, all of their connections will be broken as well, leaving only plain game objects in their place.
How to fix a missing Prefab
If you accidentally delete a prefab asset, it will break its connections to instances in your scenes.
When this happens, their object names will turn red, instead of blue.
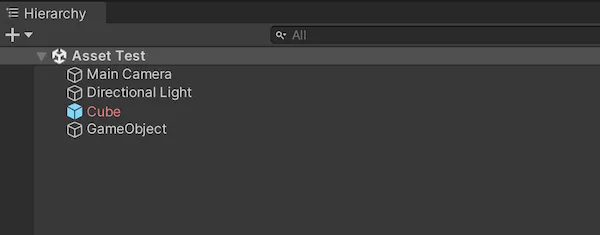
While the objects that already exist in your scene will be fine, you won’t be able to update them from one place anymore.
What’s more, script references to the prefab asset will now be broken, causing errors.
So how can you fix it?
If you accidentally delete a prefab, it can sometimes be possible to simply undo what you did, by putting the deleted file back.
While there’s no guarantee that this will work, simply putting the file back in place can sometimes restore the broken connections as they were.
Likewise, it’s possible to create a new prefab from one of the now, broken instances.
The drawback with this method is that all of the prefab instances will inherit the settings of the new prefab, even if they had their own overrides.
However, in any case, these workarounds generally only work if Unity hasn’t been closed and reopened.
This is most likely because of how Unity locates files in your project, using a set of GUID references that is recreated as needed, such as when the project is first opened.
In which case, you may need to manually restore the connection between your prefab and its instances by recreating its meta files.
For more information on how to do that, try Ágoston Romhányi’s guide here.
Now it’s your turn
Now I want to hear from you.
How are you managing objects in your game?
Are you using nested prefabs, variants, or something else?
And what have you learned about using prefabs in Unity that you know someone else would find helpful?
Whatever it is, let me know by leaving a comment.

John French writes all of the Unity tutorials for Game Dev Beginner, and specialises in deep-dive guides teaching game development basics.

Comments
thanks for this article
I use prefabs a lot but sometimes they become weird and complex for me .
You’re welcome!
Great article, I have read 50% of your articles and they are a huge help in my beginner gamedev journey, keep up the great work. One question,
If I want to pass parameters to my prefabs during instantiation, what is the preferred way to do it?
Thanks! Off the top of my head, the best way to do this would be with the Game Object reference that the Instantiate function returns. Then use Get Component to find whatever script it is you want to pass data to. If you haven’t tried it already, my Instantiate article might be able to help.
Are prefabs affecting the game’s performance? If I pre-assemble a bunch of assets like walls and lights into prefabs like a corridor section, would it hurt or I better not forget to unpack them before finalizing the level?
They shouldn’t affect the game’s performance at all. It’s best to think of prefabs as an editor-only tool. As far as I understand it, any prefab instances in the hierarchy are essentially unpacked when the game runs anyway.
Yes, one of the best articles out there on this. Thanks