
Chances are, a lot of the objects in your game will have been put there by you, ahead of time, in the Unity Editor.
However…
While it’s possible to create big parts of your game manually, it’s extremely likely that, at some point, you’re going to need to create an object from code, as your game runs.
For example, you might want to create a bullet firing from a gun, generate waves of new enemies over time, or drop collectable objects and loot as the game is played.
Luckily, it can be very simple to spawn an object in Unity by using the Instantiate function, which allows you to create new objects in your scene based on existing objects in your project.
However, while the Instantiate function can be very straightforward, there are a lot of different ways to use it and, because creating new objects can be an extremely resource-intensive process, how you create and destroy objects can have a big impact on the performance of your game.
In this article, you’ll learn all of the different ways to use instantiate, how to clone existing prefabs and create new empty game objects, and how to use and reuse spawned objects efficiently.
Here’s what you’ll find on this page:
- How to instantiate an object in Unity
- How to spawn a prefab
- How to set the rotation & position of a new object
- How to instantiate an object as a child
- How to instantiate an empty object
- How to instantiate multiple objects
- How to instantiate an object at timed intervals
- How to create a projectile
- How to reuse objects in Unity (using an object pool)
Let’s get started…
How to instantiate an object in Unity
Instantiate in Unity is a function of the Object Class that allows you to spawn new objects in your scene, from code, as your game runs.
It works by passing in a reference to an existing game object which is then duplicated as a clone.
Like this:
public GameObject objectToSpawn;

void Start()
{
    Instantiate(objectToSpawn);
}
This basically works in the same way as manually duplicating an object in the hierarchy while the game is running in play mode, where the object that’s being created will inherit the same properties and position as the object it’s being cloned from.
Which is why the object that you reference when using Instantiate is referred to as the original, while the object that’s created will be marked as a clone.
The Instantiate function creates a clone of an original object.
However, while it’s possible to create copies of game objects that already exist in your scene, unless that’s the behaviour that you want, the typical way to use Instantiate is by creating a duplicate of a prefab game object, from your project’s assets instead.
How to spawn a prefab
The Instantiate function allows you to create a new object in your scene that’s based on an existing prefab in your game’s assets.
Which is useful, as it allows you to set up an object template ahead of time that can then be created from code when your game is running.
How to create a prefab in Unity
Before you can copy a prefab, you’ll need to create one in the first place.
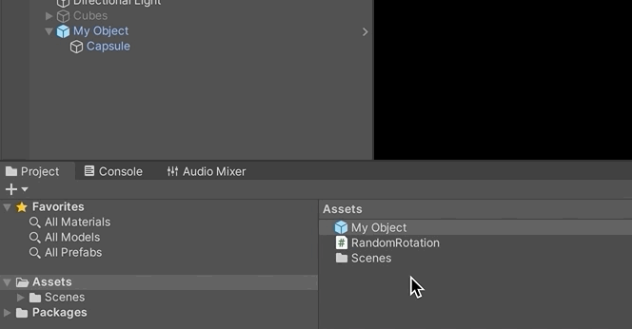
The simplest way to do this is to build your object inside your scene. Then, once you’re done, drag the object to your project’s assets to create a prefab of it.
Your new prefab will appear in your project’s assets, while the object in your scene will turn blue, highlighting the connection between the prefab template and the object in the hierarchy.
You’ll then be able to delete the object from your scene and use the prefab in the Instantiate function.
The most basic version of the Instantiate function takes a single parameter, which is a reference to the game object you want to duplicate.
To spawn a prefab, simply drag the object that you want to create from your project’s assets to a public game object reference and then pass that into the Instantiate function.
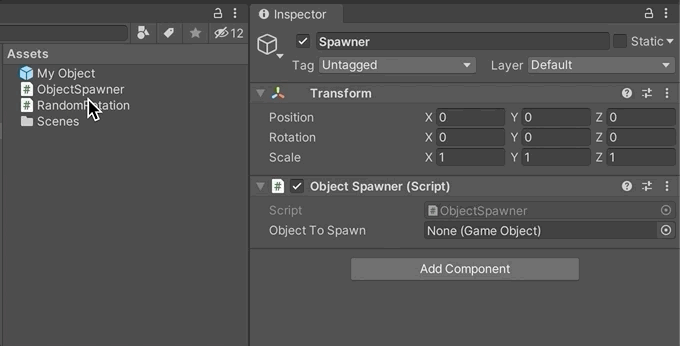
To create a specific object, drag the prefab you want to instantiate into the game object reference on the script.
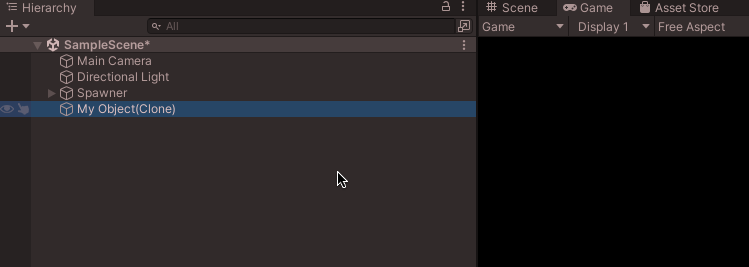
This will create a clone in the scene based on the object prefab, which can be useful for creating new objects in your game that are managed as assets in your project.
Instantiating a prefab is also much safer than simply copying another object in the scene, as, if the original object is destroyed, trying to use it with the Instantiate function will cause an error.
However…
By keeping a reference to the object prefab in your script, it’s possible to accidentally make changes to the prefab asset itself, instead of the object clone that you create.
This happens because it’s possible to modify a prefab from code, while the game is running in play mode.
And while Unity will stop you from causing any serious damage, such as accidentally deleting a prefab by destroying it, for example, it’s still possible to turn components on or off, or to change data in the prefab’s scripts.
Which can cause an issue with object parameters as, if you do accidentally target a prefab, instead of its clone, changing any of its variables basically changes the prefab’s default values.
Which is a problem since, because you’re accessing the asset, not an object instance in the running scene, the changes will persist, even after exiting play mode.
For example, if you create a new object from a prefab that uses a rigidbody and a collider and then, accidentally, change the original, such as turning off its collider, running the same scene a second time, in the exact same way, will cause the object to fall through the floor when, previously, it didn’t.
Which can be confusing.
How to get a reference to an instantiated object
When using Instantiate to spawn a prefab, it can sometimes be easy to accidentally modify the prefab asset by confusing the reference to the original object with the clone.
Luckily, getting a reference to the actual object you create when using Instantiate is pretty simple.
To do it, simply set a Game Object variable to the result of the Instantiate function when you call it.
Like this:
void SpawnOject()
{
    GameObject newObject = Instantiate(objectToSpawn);
}
This works because Instantiate returns a reference to the new object it creates, which can be useful for setting up an object as soon as it’s spawned.
How to set the rotation and position of a new object
While the basic overload method of Instantiate only requires a game object reference to work, chances are, you’ll want to pass in more information than that when creating a new object.
Such as where it should go, for example.
By default, an instantiated object inherits the position and rotation of the object it’s cloned from.
Meaning that, if you clone an object in the scene, the new object will be created in the same position as the original.
And if you instantiate a prefab, Unity will use the position and rotation data of the asset in your project.
However…
It’s possible to choose where an object is created by passing in its position and rotation data manually.
Like this:
Instantiate(GameObject objectToSpawn, Vector3 position, Quaternion rotation);It works by passing in a Vector 3 value for the object’s position and a Quaternion rotation value to determine the orientation of the object.
However, while Vector 3 values are relatively simple to work with, Quaternions, which is the type of rotation data that Unity uses behind the scenes, are not meant to be human-readable.
And while it’s possible to pass in a rotation manually using the Euler function, in many cases it’s easier to use an existing rotation as a reference instead.
Such as the position and rotation of the object that the script is attached to, for example.
Like this:
Instantiate(objectToSpawn, transform.position, transform.rotation);Or the original rotation of the prefab object
Instantiate(objectToSpawn, transform.position, objectToSpawn.transform.rotation);
Or, it’s possible to specify ‘no rotation’, using the identity property of the Quaternion class which, since both parameters are required, can be useful for specifying the position of a new object, but not its rotation.
Like this:
Instantiate(objectToSpawn, transform.position, Quaternion.identity);How to instantiate an object with a random position and rotation
When using Instantiate, you may not always want to set a specific position and rotation and, for some tasks, you might want to spawn the object at a random point instead.
So how can you?
Typically, creating a random position involves deciding on a limited area inside which a random Vector 3 point can be generated and then passing that into the Instantiate function.
For example, it’s possible to get a random direction using the Inside Unit Sphere property of the Random class which, when multiplied by a radius and added to a point of origin, will return a random position inside of a sphere.
Like this:
public GameObject objectToSpawn;
public Vector3 origin = Vector3.zero;
public float radius = 10;

void Start()
{
    // Finds a position in a sphere with a radius of 10 units.
    Vector3 randomPosition = origin + Random.insideUnitSphere * radius;
    Instantiate(objectToSpawn, randomPosition, Quaternion.identity);
}
While using a minimum and maximum position allows you to generate a random position inside a cube.
Like this:
public GameObject objectToSpawn;
public Vector3 minPosition;
public Vector3 maxPosition;

void Start()
{
    Vector3 randomPosition = new Vector3(
        Random.Range(minPosition.x, maxPosition.x),
        Random.Range(minPosition.y, maxPosition.y),
        Random.Range(minPosition.z, maxPosition.z)
    );

    Instantiate(objectToSpawn, randomPosition, Quaternion.identity);
}
While generating a random position can take a little bit of work, luckily, creating a random rotation is much more simple.
This is because the Random class has a built-in function for returning a random rotation value,
Which works like this:
public GameObject objectToSpawn;
public Vector3 minPosition;
public Vector3 maxPosition;

void Start()
{
    // Creates an object with a random rotation
    Instantiate(objectToSpawn, transform.position, Random.rotation);
}A lot of the time, if you’re just spawning simple standalone objects, instantiating them with their own position and rotation values may be all you need to do.
However, what if you want to create an object that’s part of something else?
How to instantiate an object as a child in Unity
When creating an object using the Instantiate function, it’s possible to create it as a child of another object.
You might typically do this to create an object that’s attached to another object, such as your player.
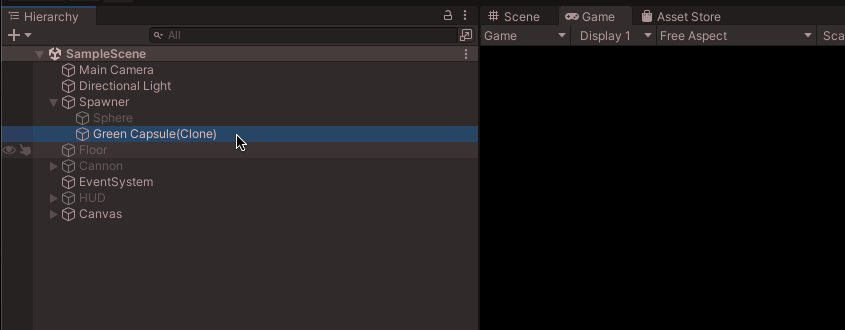
Alternatively, if you’re creating a large number of objects programmatically, nesting them under a parent object can make your hierarchy much easier to work with.
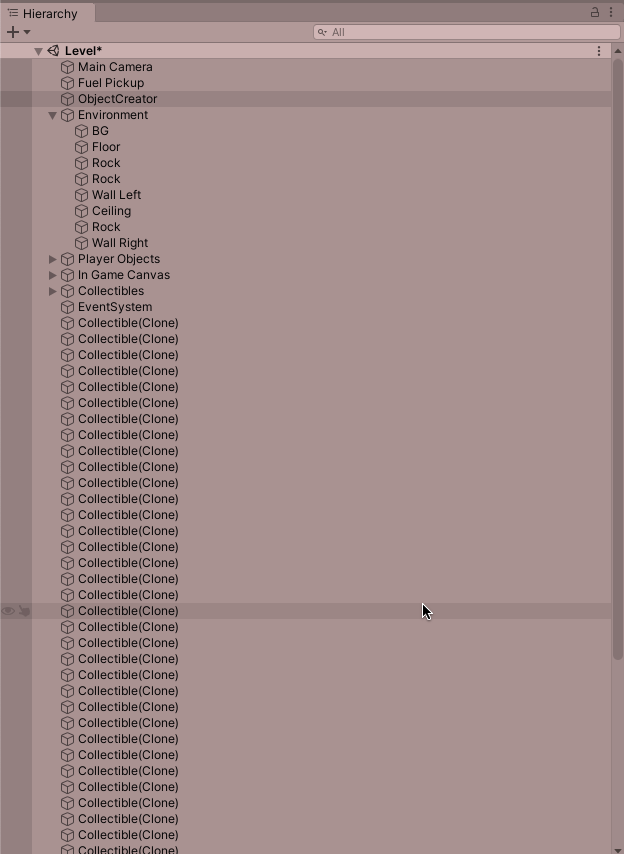
Instantiated objects can quickly clutter up the hierarchy.
It works by passing in a transform component for the parent object, such as the transform of the object that the spawning script is attached to, to the 2nd parameter of the Instantiate function.
Like this:
void SpawnOject()
{
    Instantiate(objectToSpawn, transform);
}
When instantiating an object as a child of another object, the new object inherits the position and the rotation of the parent in addition to its own, original orientation.
So, for example, if the original prefab was rotated by 90°, and the parent object is also rotated by 90°, the rotation of the object that’s created will be a, combined 180°.
This can be useful, however, if you’d prefer to manually set the position and rotation of an instantiated object, while still attaching it to another object as a child, you can do that too, either by instructing the function to use world space,
Like this:
// Creates a child object using its original position and rotation values
Instantiate(objectToSpawn, transform, true);
Or by setting the position and rotation values using parameters, as well as passing in a parent transform.
Like this:
// Creates a child object but uses custom position and rotation values
Instantiate(objectToSpawn, transform.position, transform.rotation, transform);
This can be useful if you want to create the object as a child of another for organisational reasons, as it allows you to specify the object’s transform values as if it hasn’t got a parent.
How to instantiate a prefab by name (using Resources)
Creating an object from a prefab can be fairly straightforward. Just use the Inspector to connect the object that you want to create and you’re good to go.
But, what if, for whatever reason, you don’t want to use an object reference to spawn a new object?
What if you’d rather use the name of the object instead?
The Resources folder, which is a special folder in Unity, allows you to instantiate a prefab object using its name, instead of an object reference.
This can be useful whenever using an object reference is inconvenient or impossible to do and allows you to use a path name instead.
To do it, first, you’ll need to add a folder named Resources to your project, then simply place the object you want to create inside.
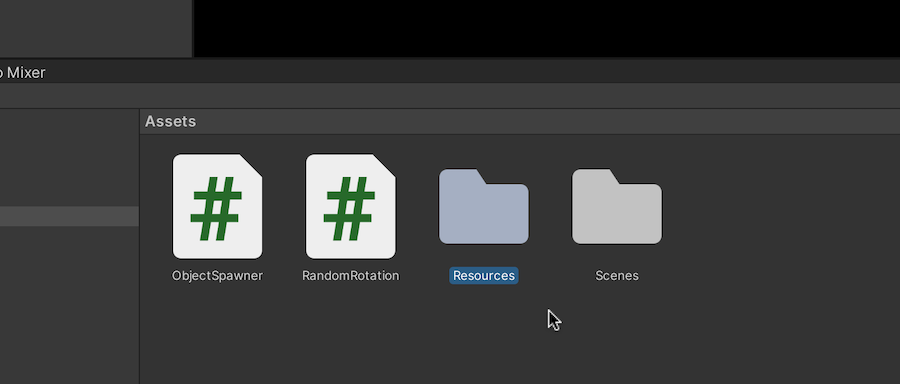
The Resources folder can be used to load assets using a path name instead of a reference.
Then, load the asset using the path name, casting it as a game object.
Like this:
void SpawnOject()
{
    GameObject newObject = (GameObject)Instantiate(Resources.Load("Sphere"));
}
The Resources folder can be useful for loading assets by path name, however, there are drawbacks.
For example, by default, all of the assets in the Resources folder are loaded whether they’re used or not, which can increase the size of your finished game.
What’s more, while the flexibility of being able to swap out an asset for another with the same name can be useful, it can also be easy to get a text string wrong, breaking the connection.
Meaning that, if you’re planning on loading a prefab by its name, instead of using a reference, it’s worth understanding a little about how the Resources folder works before using it excessively.
For more information on the Resources folder, try Unity’s official documentation here.
How to instantiate an empty object in Unity
While you might normally use Instantiate to create ready-made objects that are copies of prefabs, it is also possible to create entirely new objects from code in Unity.
For example, it’s possible to create an empty game object simply by creating a new game object instance.
Like this:
new GameObject();This will add an empty game object in your scene, at the world’s origin.
However, if you’re going to create an object in this way then, chances are, you’re going to want to actually do something with it once you’ve created it.
For this reason, just like when declaring a new variable, you may want to cache a reference to the empty game object when you create it.
Like this:
GameObject newObject = new GameObject();It’s also possible to set the name of the object, or pass a series of components into the game object’s constructor, when you call it.
Like this:
GameObject newObject = new GameObject("My New Object", typeof(AudioSource), typeof(Rigidbody), typeof(BoxCollider));Alternatively, since you already have a reference to the new empty game object, it’s possible to set it up however you want after creating it.
For example, you can set the object’s name, position or rotation manually by accessing the object’s properties, or you can give the the object functionality by adding components to it using the Add Component function.
Like this:
GameObject newObject = new GameObject();

newObject.name = "My New Object";
newObject.transform.position = transform.position;
newObject.transform.rotation = transform.rotation;

AudioSource audioSource = newObject.AddComponent<AudioSource>();
audioSource.playOnAwake = false;
audioSource.loop = true;
newObject.AddComponent<Rigidbody>().isKinematic = true;
newObject.AddComponent<BoxCollider>();
It’s also possible to instantiate primitive shapes, such as cubes and spheres, from a script.
This works in the same way as creating a 3D shape in the editor except that it can be done in code.
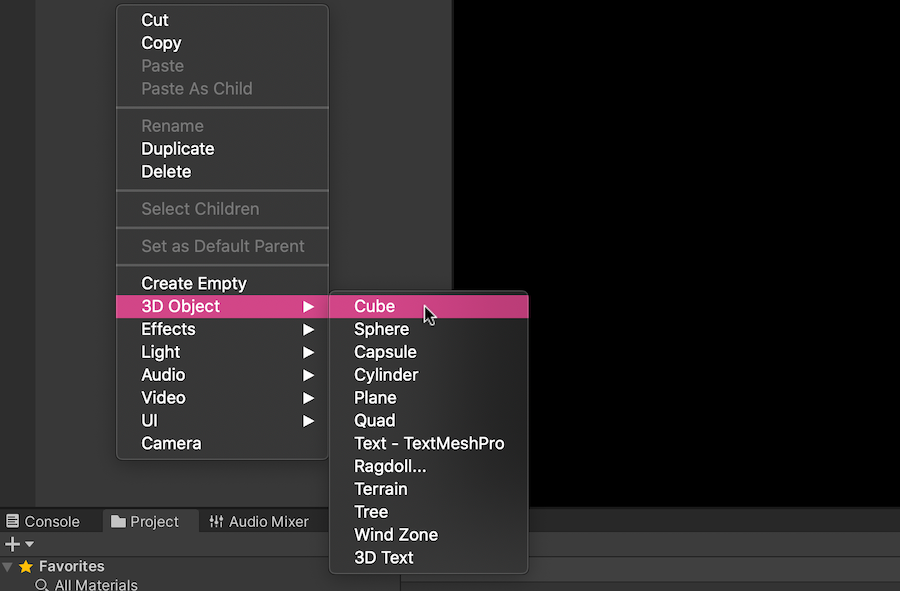
The Create Primitive function works in a similar way to right-clicking to create a 3D object.
To do it, simply call the Create Primitive function of the Game Object class, which can be used to create a new sphere, capsule, cylinder, cube, plane, or quad shape in the scene, with a collider, just like when creating a 3D shape manually.
Like this:
GameObject newCube = GameObject.CreatePrimitive(PrimitiveType.Cube);Knowing how to create game objects from code, whether they’re based on existing prefabs or entirely new, can be extremely useful for adding objects to your game as it runs.
And while this can be useful for creating functionality in a finished game it can also help you to build your project in the Unity editor.
For example, using Instantiate, it’s possible to create a large number of objects from code quickly and easily, which can be much easier than placing objects manually, by hand.
So how can you use Instantiate to help you build your game?
How to instantiate multiple objects in Unity
The Instantiate function can be useful for creating a large number of objects quickly and easily.
And while this is useful in-game, such as for generating waves of enemies or randomly placed objects, it can also be useful in the editor.
Typically, this works by iterating through a loop a certain number of times within a single frame to create multiple objects.
For example, imagine that you’d like to place five objects neatly in a row.
Simply use a for loop to iterate through the function five times, changing the position each time.
Like this:
public class SpawnInARow : MonoBehaviour
{
    public Vector3 firstPosition;
    public float gap = 2;

    public GameObject objectToCreate;

    void Start()
    {
        Vector3 position = firstPosition;

        for (int i = 0; i < 5; i++)
        {
            Instantiate(objectToCreate, position, Quaternion.identity);
            position.x += gap;
        }
    }
}
Or, if you want to create a grid of objects, simply nest a for loop inside of another for loop.
Like this
public GameObject gridObject;
public Vector2Int grid;
public float y = 0;

    private void Start()
    {
        GenerateGrid(grid);
    }

    // Generates a 2D grid on the floor
    void GenerateGrid(Vector2Int gridSize)
    {
        for(int x=0; x < gridSize.x; x++)
        {
            for (int z = 0; z < gridSize.y; z++)
            {
                Instantiate(gridObject, new Vector3(x, y, z), Quaternion.identity);
            }
        }
    }
This works by generating a complete row along the z-axis for each incrementation of the x-axis and can be useful for placing objects in a large grid, such as tiles on a floor.
But, once you’ve created your objects in play mode, how can you reuse them?
To actually use generated objects in the editor, you’ll need to save them before exiting play mode.
To do this, simply create the objects you want to use, making sure to parent each instantiated child to the object that’s creating it, and then, while the game is still running, drag the finished object to your assets to turn it into a prefab.
It’s possible to save a prefab while the game is running, which allows you to generate objects using code and then save them for later as assets.
Then exit play mode, after which you can drag the prefab back into your scene and unpack it, severing the object-prefab connection.
Simple!
However, while creating multiple objects all at once can be useful for all kinds of things, sometimes you may want to create an object periodically, at set intervals.
For example, what if you want to create an object every few seconds?
How to instantiate an object at timed intervals
There are a couple of different ways to instantiate an object at timed intervals but, generally speaking, the process of measuring an interval and spawning a new object as soon as a certain amount of time has passed, is similar between all of them.
It typically works by keeping track of the amount of time that has passed each frame by adding the last frame’s delta time to a float value.
Like this:
public float interval = 5;
float timer;

void Update()
{
    timer += Time.deltaTime;
    if(timer >= interval)
    {
        // Spawn an object
        // Reset the timer
    }
}
Once the timer has recorded an amount of time that is equal to or greater than the interval you want to measure, an object is spawned and the timer is reset.
Which works,
However, the method you use to reset the timer can change how accurate it is.
For example, you might be tempted to reset the timer by setting it back to zero, however, this can cause it to become inaccurate over time.
This happens because, at the point the time interval is identified as having elapsed, an additional amount of time may have already passed, since each frame takes a certain amount of time to process.
Put simply, the timer is always a little bit late.
Luckily, the solution is simple. Instead of resetting the timer to zero, simply subtract the required interval from the timer value.
Like this:
public GameObject objectToCreate;
    public float interval = 5;
    float timer;

    void Update()
    {
        timer += Time.deltaTime;
        if (timer >= interval)
        {
            Instantiate(objectToCreate);
            timer -= interval;
        }
    }
While it’s not possible to execute a function in-between frame intervals, meaning that an object will always be spawned on either one frame or the next, measuring time in this way can make a repeating function, such as spawning an object every few seconds, more accurate over time.
Alternatively, Invoke Repeating uses a similar approach to call a function at timed intervals.
It takes a string value, which is the name of the function you’d like to call, and a float value for the required delay between function calls.
Both the Subtraction Method and Invoke Repeating, when compared to a metronome of the same frequency, are shown to be as accurate as each other, while the Reset Method, simply changing the timer back to zero, loses synchronisation over time as the difference between each frame adds up.
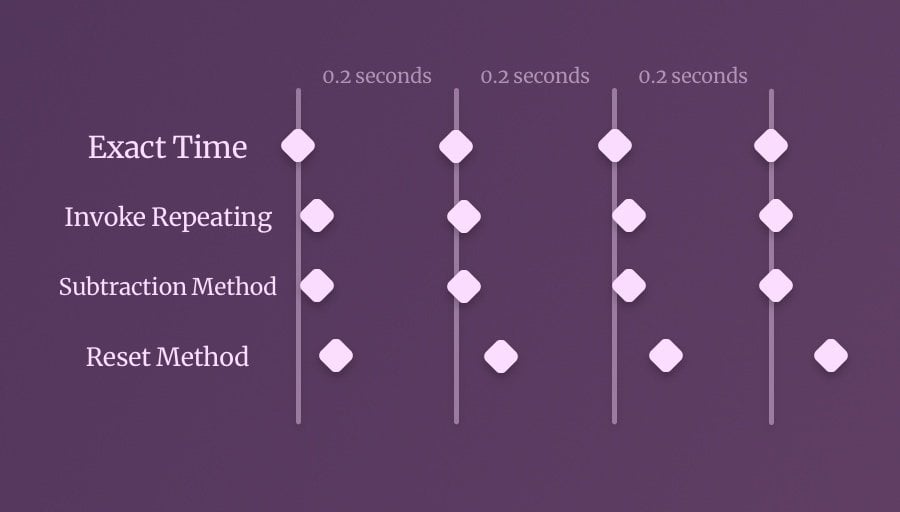
Subtracting the required interval from a timer, instead of resetting it to zero, allows you to repeat a function more accurately.
When spawning objects between larger intervals, the lost time is barely noticeable meaning that, in many cases, you won’t notice much of a difference.
However, when instantiating an object frequently, at exact intervals, subtracting the timer interval instead of resetting it can help to stop the rhythm of the function from feeling choppy.
This is particularly noticeable when spawning an object rapidly, with a sound effect, such as when repeatedly instantiating a bullet or a projectile from a weapon, for example.
Speaking of projectiles…
How to create a projectile in Unity
Spawning a projectile using the Instantiate function can be relatively straightforward.
What can be tricky, however, is lining up the rotation of the object that’s created with the spawn point, so that the projectile is created in the right place and moves in the right direction.
So how can you instantiate a projectile in Unity, and make sure that it moves the right way when you do?
One way to do this is to use a game object as a spawn point.
This might be the object that the spawning script is attached to, or an empty game object at the point of firing.
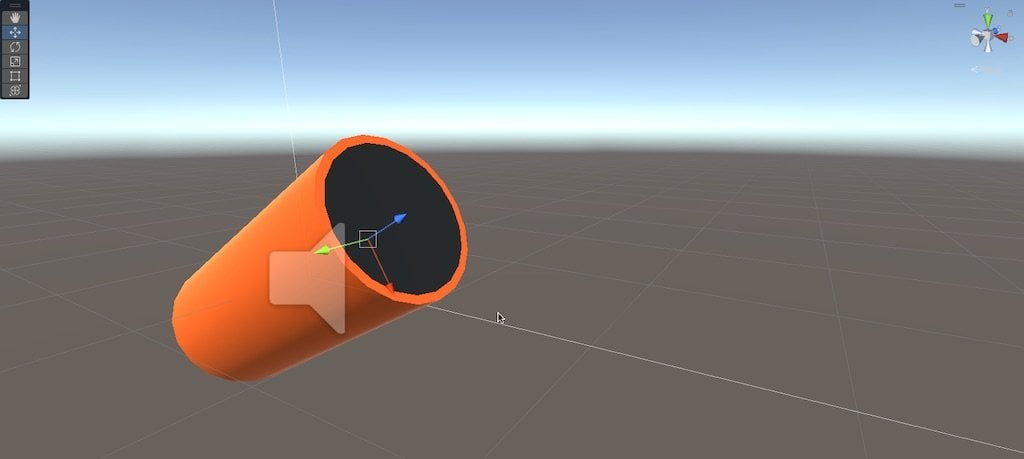
What’s important, however, is that if the firing object moves, the spawn point can move and rotate with it.
Secondly, you’ll need to make sure that the projectile and the spawn point both point in the same direction.
The easiest way to do this is to decide which direction is going to be forward, such as the object’s blue z-axis for example, and make sure that both the spawning script and the projectile point the same way.
For example, on the projectile, you might apply an impulse force to its rigidbody along its forward axis as soon as the object is enabled.
Like this:
public class CannonBall : MonoBehaviour
{
    public float force = 10;

    void Start()
    {
        GetComponent<Rigidbody>().AddForce(transform.forward * force, ForceMode.Impulse);
    }
}
Then, when spawning the object, simply make sure that the spawn point is also facing forward, relative to the object it’s attached to, and that, when creating the projectile, the rotation is set to match.
Like this:
public class Cannon : MonoBehaviour
{
    public GameObject cannonBall;
    public Transform spawnPoint;

    public AudioSource audioSource;
    public AudioClip fireSound;

    void FireCannon()
    {
        audioSource.PlayOneShot(fireSound);
        Instantiate(cannonBall, spawnPoint.position, spawnPoint.rotation);
    }
}
If you’re creating projectiles using Instantiate then, chances are, that you’re going to be creating and destroying a large number of objects as your game runs, which can cause problems with performance.
This happens because of the automatic memory management that occurs when instantiating new objects and destroying old ones.
As a result, if you’re spawning a large number of objects repeatedly, such as enemies or projectiles, it’s generally a good idea to reuse old objects instead of destroying them and then creating them every time you need a new one.
This is a process known as object pooling and can help to avoid poor performance caused by garbage collection, particularly on lower-powered devices.
How to reuse objects in Unity (using an object pool)
Object pooling is the process of reusing an object instead of repeatedly destroying and instantiating it, which can create garbage and reduce performance.
There are many different ways to create an object pool but it typically involves maintaining a data collection, such as an array or a list, that’s linked to a certain type of object, such as a projectile in your game.
Old objects are added to the list when they’re no longer needed, where they’re turned off or reset instead of destroyed.
Then, when a new object of that type is required, it can be enabled from the list, the object pool, where it will be turned back on, instead of being instantiated, saving performance.
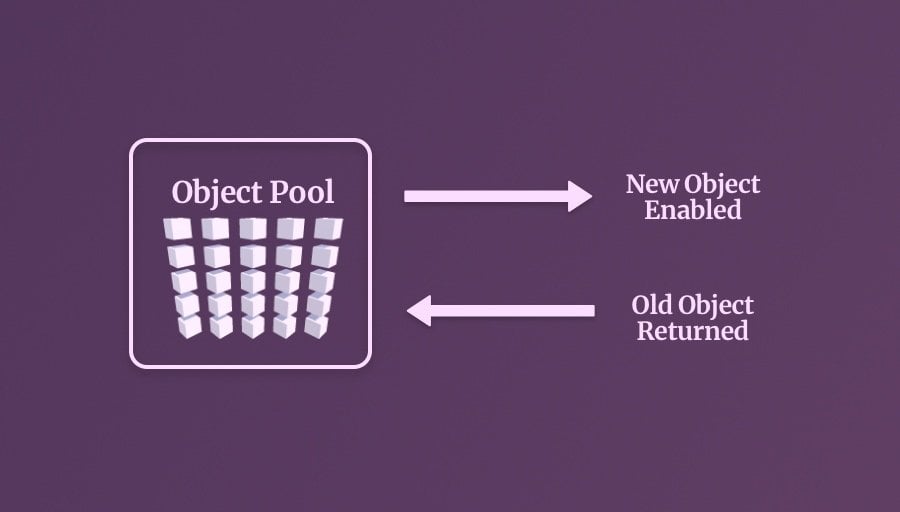
An object pool reuses objects by turning them on or off instead of destroying them and instantiating them.
There are many different options for creating an object pool system and many developers will choose to simply build their own.
However, as of Unity 2021, there is a built-in object pool system available.
So how does it work?
How does Unity’s built-in object pool work?
To use Unity’s Object Pool system, you’ll need to be using Unity 2021 or higher and you’ll need to add the UnityEngine.Pool namespace to any script that accesses the pool.
Like this:
using UnityEngine.Pool;You’ll then be able to declare a new pool of a particular type, such as a game object:
ObjectPool objectPool = new ObjectPool<GameObject>();When you do this, you’ll need to pass a reference to up to four functions that will be called when different requests are made to the object pool.
- Create – Which is called when an object is first instantiated
- Take – Which is called when an object is taken from the pool
- Release – Which is called when an object is released back to the pool
- Destroy – Which gets called when an object is destroyed instead of being returned
The Take and Release functions are called every time a pool object is requested or returned.
This happens even if the object is newly created or can’t be put back in the pool, so it’s a good idea to use these functions to enable or disable the parts of your pool object that need to be reset.
Like this:
void OnTake(GameObject poolObject)
{
    poolObject.SetActive(true);
}

void OnRelease(GameObject poolObject)
{
    poolObject.SetActive(false);
}
These functions will be called when objects are returned to the pool or when new objects are requested from it.
This can be done by using the Get Function to take a new object from the pool, or the Release Function, to send one back.
Like this:
// requests a new object from the pool, and returns a reference to it, triggering the Take Function
GameObject newGameObject = objectPool.Get();

// Returns an object to the pool, triggering the Pool's release function.
objectPool.Release(gameObject);
While the Create and Destroy functions are used to create a new object if a pooled object isn’t available or to destroy an object if a returned object can’t be placed in the pool, for example, because the pool is full (for more information on how to limit the size of a pool, see Unity’s official documentation here).
They are called before and after the Take and Release functions and this is typically where you’d place the Instantiate function, to create a new object when there isn’t one in the pool, and the Destroy function, to delete an object that cannot be returned.
Like this:
GameObject OnObjectCreate()
{
    GameObject newObject = Instantiate(objectPrefab);
    newObject.AddComponent<PoolObject>().myPool = objectPool;
    return newObject;
}

void OnObjectDestroy(GameObject poolObject)
{
    Destroy(poolObject);
}
Together, the Take, Release, Create and Destroy functions are connected to the Object Pool when the pool is instantiated.
Like this:
using UnityEngine;
using UnityEngine.Pool;

public class SpawnUsingPool : MonoBehaviour
{
    public GameObject objectPrefab;
    ObjectPool<GameObject> objectPool;

    void Awake()
    {
        objectPool = new ObjectPool<GameObject>(OnObjectCreate, OnTake, OnRelease, OnObjectDestroy);
    }

    GameObject OnObjectCreate()
    {
        GameObject newObject = Instantiate(objectPrefab);
        newObject.AddComponent<PoolObject>().myPool = objectPool;
        return newObject;
    }

    void OnTake(GameObject poolObject)
    {
        poolObject.SetActive(true);
    }

    void OnRelease(GameObject poolObject)
    {
        poolObject.SetActive(false);
    }

    void OnObjectDestroy(GameObject poolObject)
    {
        Destroy(poolObject);
    }
}
In this example, when creating a new object, a Pool Object component is added to it and a reference to the originating object pool is set.
Why do it like this?
This is to give the pooled object the ability to return itself, for example, if it dies or moves out of range, it can release itself back to the pool it came from in the same way that any other object could normally destroy itself.
Like this:
using UnityEngine;
using UnityEngine.Pool;

public class PoolObject : MonoBehaviour
{
    public ObjectPool<GameObject> myPool;

    public void DestroyPoolObject()
    {
        myPool.Release(gameObject);
    }
}
How to instantiate an object with parameters
When creating an object using an object pool, you’re not really spawning a new object, you’re reusing an old one.
Which means that you’ll need to reset the object to its original state before you can use it again.
Likewise, when creating a new object, you may want to pass data to its scripts to customise them or initialise them in a particular way.
So how can you?
Generally, other than the Instantiate function’s overload methods, there’s no built-in way to set the parameters of an object when creating it.
Which makes sense, since every object in your game is going to be unique to your project anyway.
However, there are a few different ways you can set up a new or reused object in Unity.
For example, you could add your object’s components to the object when it’s created, or find them using Get Component, both of which would give you a reference to the object’s scripts, allowing you to modify their values.
Or you could manage all of your object’s setup from an initialisation script that’s already connected to the systems and components you may want to tweak when creating it.
Or, if you’re creating objects using an object pool, each script could use its On Enable and On Disable functions, which are automatically called when the object is turned on or off, to manage their own initialisation and reset tasks.
However, there’s no one right answer and the method that’s best for you is going to depend on what it is you need to manage on the object and the structure of your game.
Now it’s your turn
Now I want to hear from you.
How are you instantiating objects in your game?
Are you using an object pool or spawning objects as you need them?
And what have you learned about creating new objects in Unity that you know someone else will find useful?
Whatever it is, let me know by leaving a comment.

John French writes all of the Unity tutorials for Game Dev Beginner, and specialises in deep-dive guides teaching game development basics.

Comments
Hello,
I noticed that at the part of creating a random rotation there was a problem(maybe)
The text:
“This is because the Random class has a built-in function for returning a random rotation value”
The code:
Instantiate(objectToSpawn, transform.position, Random.random);
After checking the documentation of unity API I didn’t find the function “Random.random”, but another one “Random.rotation”.
Is that a slip of the pen or it really can run as a script? (now I can’t check it without my PC around)
Hoping your reply ^^
My mistake! Well spotted. Fixing it now.
Just read through all your articles in the last couple of weeks and want to thank you. You are an excellent teacher and I learned so much! I hope you will continue to make new articles.
Thank you so much, great to hear that they’ve been helpful. Don’t worry, lots more articles to come!
I just wanted to echo Quazeye and say that this blog has been by far my favorite resource for learning Unity. I’m making a music-based rhythm game and I’ve got a programming background, so something about your articles has completely clicked with all the questions and thoughts I’ve had throughout the process.
Thank you! I really appreciate it.
Every topic is an another rare information source. Keep it that way friend. Love to read really.
Really nice post! I am trying out a few things from here, the only issue now is that when I try to instantiate a TextMeshPro, this does not appear in the screen while entering game mode, does anyone know what the problem might be? or is there a special mode to instantiate TMPro ?
Thank you again!
Great article. At the ObjectPool, I did miss a bit of information on the code to create a new object (ObjectPool.Get()), especially since you did describe the ‘myPool.Release()’ bit.
Thanks! looking back at this, it looks like I’ve included it in the article as Take, when setting up the object pool, which seems to be the same as Get, which I haven’t mentioned. I’ll revisit this part and make it clearer. Thanks for your help.
How can i randomize the spawn of instantiate without it spawning in something like a wall? Basically i want it to detect collision with wall, and if it detects a collision, it wont spawn until it doesnt detect anymore collision. And it’s a 2d game. I dont know the code for it can you please help me? Thank you.
One method might be to check the area before trying to spawn anything there. For example, you could use BoxCast to check if there are any colliders in a particular position, and if there aren’t any, you can spawn something there. You might need to get the dimensions of the object you want to spawn, but you could use the dimensions of the prefab that you’re picking as the original that gets passed into Instantiate.
The Unity’s new pooling system deserves its own article. It looks simple but the devil is as usual in details.
Can I add different prefabs to the same pool? I have a pool of several different things I want to spawn in the same way. So I am doing OnObjectCreate, but passing in several prefabs of the different objects I want to spawn. Is this a good idea? Am I doing it right?
Off the top of my head, you might need multiple pools of different object types and then manage them with a single point of access. So it’s a pool that contains multiple pools.
This was SUPER helpful! Thank you very much 🙂