One of the first things you’re likely do in a script in Unity is make a variable.
And, chances are, when you do, you’re probably going to make it public.
Like this:
public float number;The public keyword in Unity is an Access Modifier, which defines the accessibility level of whatever you put it in front of.
In this case, making something public means allowing other scripts to use it.
For example, a public class can be referenced by other classes,
A public variable can be read and set by other scripts,
And a public method can be called from elsewhere in your game.
Even if you’re new to Unity, access modifiers are, generally, very easy to use.
Public for public things, private for private things.
Easy, right?
Until you’re following a tutorial and you see something like this for the first time:
protected override void MyFunction(){...}While there’s nothing particularly complex going on here, if you’re new to Unity and new to scripting, it can be a little daunting.
Luckily, the access modifiers that Unity uses can be very straightforward, once you know how they work.
So how do they work?
Access Modifiers in Unity, explained
Access Modifiers in Unity allow you to give other scripts permission to read and use variables, functions and classes.
There are Four broad types of access modifier:
- Public
- Private
- Protected
- and Internal
You’ve probably already used Public and Private to change the access level of variables and functions in your scripts.
Protected, on the other hand, which limits the accessibility of a type to inheriting classes only, may be new to you.
While you, typically, won’t use Internal in Unity, as this relates to types that exist inside of another assembly, and Unity will compile almost all of your code into one assembly by default, anyway.
Meaning that, functionally, Internal works in the same way as Public does.
Public is probably the access modifier that you’re the most familiar with.
But how, exactly, does it work?
Public in Unity
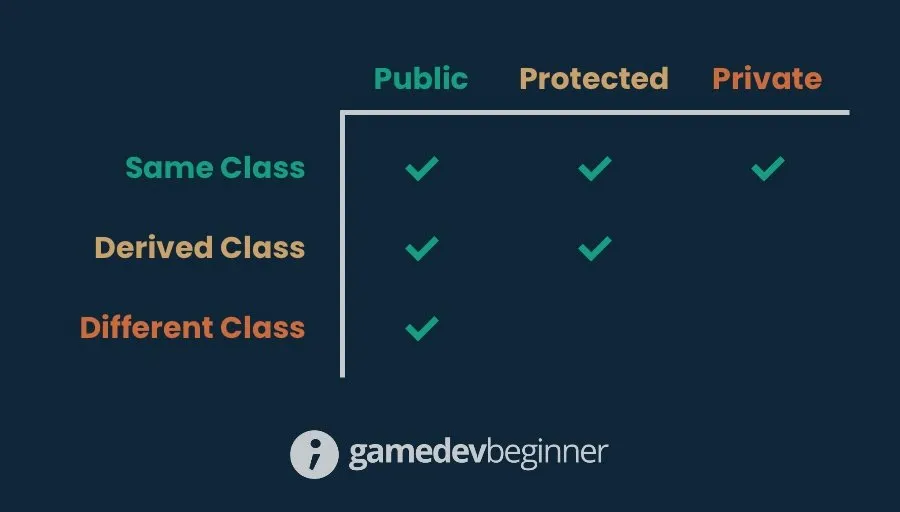
Public types are, basically, unrestricted, meaning that public variables, classes and functions can be read and used by any other script.
To make something public, just add the public keyword when declaring it.
Like this:
public class ExampleClass : MonoBehaviour
{
    public float number;

    public void AddNumber(float numberToAdd)
    {
        number += numberToAdd;
    }
}
Public functions and variables can then be accessed from other classes using a reference to the script and the dot operator.
Like this:
public class OtherClass : MonoBehaviour
{
    ExampleClass exampleClass;

    private void Start()
    {
        exampleClass.AddNumber(5);
        Debug.Log(exampleClass.number);
    }
}In Unity, classes themselves are usually public, meaning that, so long as you have access to the namespace that they exist in, you’ll be able to access them from anywhere.
However, a class can, optionally, be set to Internal, which is the default type for classes, structs and enums if you don’t explicitly set an access modifier.
Like this:
class ExampleClass : MonoBehaviour
{
    // This class will be Internal by default
}
However, in Unity, unless you manually add additional assemblies, Internal is, basically, the same as public anyway, so there’s no real need to change this.
Private and Protected classes in Unity
Normally, when you create a class, you’re creating it directly in the default, global namespace.
In which case, it can either be Public or it can be Internal which, in Unity, means the same thing in most cases.
However, if you declare a class within a class, then it’s possible to make it Private, which is the default, or Protected instead, limiting its access.
Like this:
class GeneralClass : MonoBehaviour
{
    // This class is Internal by default

    class LocalClass
    {
        // This class is private by default.
    }
}
This can be useful if you want to create a class as a kind of data structure that you only intend to use privately in the same script that you declare it in.
Variables that are marked as public are automatically serialized by Unity, meaning that, if they’re a serializable type, such as a number, a string, or a serializable class, they will show up in the Inspector.
However, while you might use the public keyword to force values and references to appear in the Inspector at first, it’s typically good practice to only make something public if you actually need something else to be able to access it.
Otherwise, it’s generally better to use the Serialize Field attribute to show a value in the Inspector instead, while keeping the actual variable Private.
Private in Unity
Private variables and functions provide the lowest amount of access and can’t be used by anything outside of the body that they exist in.
For example, a private variable can’t be read or used by another script, even if it has a reference to the script that it exists in.
Member variables, meaning variables that exist inside of a script, are usually private by default, meaning that if you don’t explicitly set their accessibility, they will be private.
Like this:
float numberA; // this is private
private float numberB; // so is this!
Read Only in Unity
While private can be useful for limiting any kind of external access to a variable there are additional methods of restricting how a value can be used regardless of whether it’s public or private.
For example, the Read Only modifier can be used to prevent a value from being set outside of its constructor.
If constructors are new to you, they’re basically setup functions that are used to set a type’s initial data when it’s created.
Meaning that a read only variable can only be set once, when it’s initialised.
Like this:
public readonly int year = 2024;You’d generally use read only for data that will be set when it’s created and that will then never change.
This might be a value that is used throughout a script, but that isn’t meant to be modified at any point, not even by the class that created it.
Alternatively, if you want to create a variable that can be modified locally, but that other classes can read, but can’t change, then it’s possible to give a variable public access with private write permissions.
One way to do this is with an auto-implemented property, which can be used to combine a public get with a private set.
Which looks like this:
public float NumberC { get; private set;}Most of the time, making something public or private may be all you need to do.
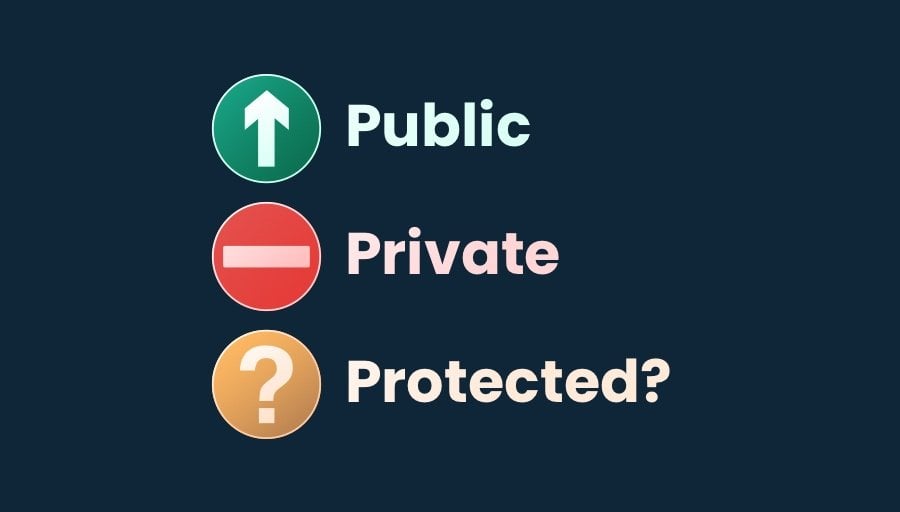
However, there’s another access modifier, Protected, that provides more access than private does, but without making something completely public.
So how does Protected in Unity work?
And when would you use it?
What Protected in Unity means
Marking a variable or a function as Protected means that only classes that inherit from the class that it’s in will be able to access it and use it.
This can be useful when you want to create base stats and functionality that other classes will use, but only if they’re derived from that type.

Protected works as kind of a middle-ground between public and private, allowing derived classes to change and use protected types, but hiding them from other, unrelated scripts.
For example, you might create a Human base type that holds a Health variable and a Walk function.
Making them Protected means that inheriting classes, such as an Enemy or an NPC class, can call and use them, while external classes can’t.
Like this:
class Human : MonoBehaviour
{
    protected float health;

    protected void Walk()
    {
        // Walk
    }
}

class NPC : Human
{
    private void Start()
    {
        health = 100;
        Walk();
    }
}

class Enemy : Human
{
    private void Start()
    {
        health = 50;
        Walk();
    }
}
You’d normally only need to use the protected keyword when using Inheritance, as it allows you to give classes the ability to use the data and functionality that’s in their base classes without exposing it to other scripts that may not need to use it.
Virtual and Override functions in Unity
When using inheritance, the relationship between variables and functions can be a little more complex than simply whether or not something can be accessed.
This is mainly because inheriting classes may use, or modify, their own versions of functions that also exist in the class they inherit from.
For example, a base class and an inheriting class might both use some kind of Awake function, which can be a problem as one function of the same type will normally hide the other, stopping it from being called.
The Abstract, Virtual, Override and Sealed modifiers can be used to manage the relationship between hierarchical classes.
These modifiers are used in addition to access modifiers, so you’ll commonly see them with public, private and protected keywords, not instead of them, and they’re typically used to describe a function’s relationship with the class that it inherits from or with classes that may inherit from it.
Why not just make everything Public?
When you first start working with Unity, and especially if game development is new to you, you might find that a simple approach is to just make everything public, so that you can access it easily.
After all, you’re probably the only person that’s working on your game, so you know how everything is supposed to be used.
And, while your project is small, that may not be a problem.
However, the main issue with giving yourself access to everything is that, once you get into your project, you’re likely to forget how everything works.
Projects get big, fast, and even simple systems can be surprisingly complex.
As a result, it’s generally good practice to only make something public if it really needs to be, limiting a script’s functionality to a few essential exposed functions and values.
That way, even if you’re the only one working on your game, your scripts will be easier to understand and harder to break.
Now it’s your turn
Now I want to hear from you.
How do you use the public, private and protected access modifiers in your project?
Do you make everything public? Or do you try to keep as much of your game as inaccessible as possible?
And what have you learned about access modifiers in Unity that you know someone else would find useful?
Whatever it is, let me know by leaving a comment.


Comments
In my case, I declare all variables private
Is it a bad habit to only declare public with properties only the variables you need?