
Zooming a camera in and out is a commonly used mechanic in many different games.
A lot of the time, it’s a simple feature to create and to use.
However…
While zooming a camera in Unity can be very straightforward, there are several different ways to do it, with each method producing a different type of zoom.
So, how do you zoom a camera in Unity?
There are 3 main methods for zooming a camera in Unity, with each method producing a different type of zoom effect:
- Perspective Zoom, which works by changing a camera’s field of view to zoom the image in, giving the effect of looking through a telescope.
- Movement Zoom, which involves physically moving a camera object closer to the subject, and can be used to adjust the position of a top-down camera or third-person camera.
- 2D orthographic Zoom, which increases or decreases the viewable area of a 2D camera by changing its orthographic size.
Which method you use depends on what type of zoom effect you want to create and how you want it to work. In this article, you’ll learn the differences between each of the methods and how you can use them to add zoom features into your own game.
Here’s what you’ll find on this page:
- How to zoom a camera in Unity (using field of view)
- How to zoom an object by moving it closer (the movement method)
- How to zoom a 2D camera (orthographic zoom)
Let’s get started.
How to zoom a camera in Unity (using field of view)
The basic method of zooming a camera in Unity can be very straightforward.
In fact, all you need to do to create a basic zoom effect is reduce the camera’s Field of View property.
Like this:
Camera.main.fieldOfView = 30;The field of view zoom effect, which works with cameras using the standard perspective projection mode, is similar to the effect of looking through a sniper scope or a telescope.
Changing the field of view produces a zoom effect similar to looking through a telescope.
Which makes it ideal for zooming in with weapons, first-person camera zoom or any type of zoom that aims to reproduce the effect of zooming in with a real lens.
There’s just one problem…
While adjusting the field of view property to create this type of zoom effect is appropriate, keep in mind that the effect is different than moving closer to an object, for example.
The field of view property in Unity relates, by default, to the vertical viewing angle of the camera, where increasing or decreasing the value changes the viewable area.
Reducing the angle reduces the size of the camera image which, when enlarged to fill the screen, creates the zoom effect.
A wide field of view shows more of the game world.
While a narrow field of view, shows less of the camera image, zooming it in.
For example, halving the camera’s field of view has the effect of 2x magnification, while dividing it by four will zoom the camera in by 4 times.
Which makes it ideal for lens-based zoom effects, like weapon zoom.
For example, you could use a field of view zoom to create a weapon zoom effect when the right mouse button is held down.
Like this:
public class x2Zoom : MonoBehaviour
{
    public Camera cam;
    public float defaultFov = 90;

    void Update()
    {
        if (Input.GetMouseButton(1))
        {
            cam.fieldOfView = (defaultFov / 2);
        }
        else
        {
            cam.fieldOfView = (defaultFov);
        }
    }
}
In this basic example, the field of view property is set to half of a locally stored default value (which has been set to 90 degrees) to create a 2x zoom whenever the right mouse button is held down.
Why use a default setting?
You may have noticed that, in many games, you’re able to manually change the field of view setting, as increasing the field of view can help some players avoid motion sickness while reducing it can improve performance (since less of the game world is being rendered).
By changing the relative value, instead of setting a new, absolute viewing angle, you’ll be able to create a zoom effect that’s relative to the player’s view settings. So, for example, instead of zooming to a fixed field of view angle, you’ll be zooming to a multiplier of the player’s setting.
In this example, the field of view setting is instantly set to the new value, which snaps the camera to the new zoom level immediately.
Which in some cases, might be exactly what you want.
However,
You might want to smooth the zooming motion so that, instead of happening immediately, the camera zooms in over an amount of time.
Here’s how to do that…
Smooth camera zoom in Unity
Generally, there are two ways to smoothly change a value in Unity.
By time, where the movement takes place over a fixed duration, and by speed, where the duration varies but the speed of the movement is always constant.
Smoothing a value by speed generally involves using the Move Towards function, which increments a value towards a target at a consistent rate.
Like this:
void ZoomCamera(float target)
{
    cam.fieldOfView = Mathf.MoveTowards(cam.fieldOfView, target, zoomSpeed * Time.deltaTime);
}
Whereas, to smooth a movement over a fixed period of time, you would typically use an interpolating function like Lerp.
Which method you use is your choice, however, because this particular action (zooming in and out in first-person) is basically a player movement, i.e. raising or lowering a scope to eye level, it doesn’t make sense to smooth the motion by speed.
If the movement was speed based, a greater zoom amount would take longer to transition to than a smaller one.
Instead, for this example, it makes more sense that the transition to the zoomed view takes the same amount of time no matter how far you’re zooming. And for that, you’d normally use Lerp.
However, I don’t want to use Lerp for this either.
Why?
While Lerp is great for changing a value over a fixed period of time, it isn’t as convenient for continuous changes, i.e. ‘following’ a value.
Which is what I want the zoom function to do. I want the zoom value to smoothly follow the target amount, but I also want the full motion to take a fixed amount of time.
What I can do, however, is use the Move Towards method but, instead of passing in a fixed speed, I can calculate the amount of angle change required for the full movement and divide that by the duration I want, giving me a speed value.
Like this:
public class SmoothScopeZoom : MonoBehaviour
{
  public Camera cam;
  public float zoomMultiplier = 2;
  public float defaultFov = 90;
  public float zoomDuration = 2;

  void Update()
  {
    if (Input.GetMouseButton(1))
    {
      ZoomCamera(defaultFov / zoomMultiplier);
    }
    else if (cam.fieldOfView != defaultFov)
    {
      ZoomCamera(defaultFov);
    }
  }

  void ZoomCamera(float target)
  {
    float angle = Mathf.Abs((defaultFov / zoomMultiplier) - defaultFov);
    cam.fieldOfView = Mathf.MoveTowards(cam.fieldOfView, target, angle / zoomDuration * Time.deltaTime);
  }
}
Why do it like this?
Doing it this way means that the speed of the transition is relative to the amount of angle change required. Meaning that the duration of a full zoom movement always remains the same, in this case 1 second. Dividing the result by the duration I want means that I can specify how long the transition should take.
It also means that, if the player releases the zoom button halfway through the transition, the time taken to return to the default field of view will be half, just as you’d expect it to be.
Getting a jerky first-person camera when zoomed in?
Depending on how your character controller is built, you might find that zooming a long way makes the camera less precise than before.
Usually, this is because the amount of rotation applied is magnified with the zoom, and it can often help to reduce look sensitivity while zooming in to help the player aim more easily.
However, there’s also another, less obvious, contributing factor that you might not think to check.
If your character controller’s head rotation is being calculated using Fixed Update, which is used to keep physics-based operations in sync with the physics engine, then all of the player’s movements may be refreshing at a lower rate than the game’s framerate.
For example, when the game is running at 60 fps, Update is being called every 16 ms or thereabouts. The physics engine, however, by default is updated every 20 ms, which works out as 50 frames per second.
So, if the controller’s movement and view rotation are physics-based, that means that most of how the player perceives the game will be at 50 frames per second, no matter how fast it runs.
Which can be particularly noticeable when movements are exaggerated, such as when zooming in.
To fix this, enable Interpolation on the Rigidbody component, which will smooth out the movements between each Fixed Update step.
While zooming based on field of view is a great way to create a realistic zoom effect, it’s best used to emulate real-world lens-based zooming, such as with a scope.
However, that may not be the zoom effect you’re after.
For example, instead of zooming in to view an object that’s far away, it may be that all you really want to do is move the camera closer to the object.
So let’s do that next…
How to zoom an object by moving it closer (the movement method)
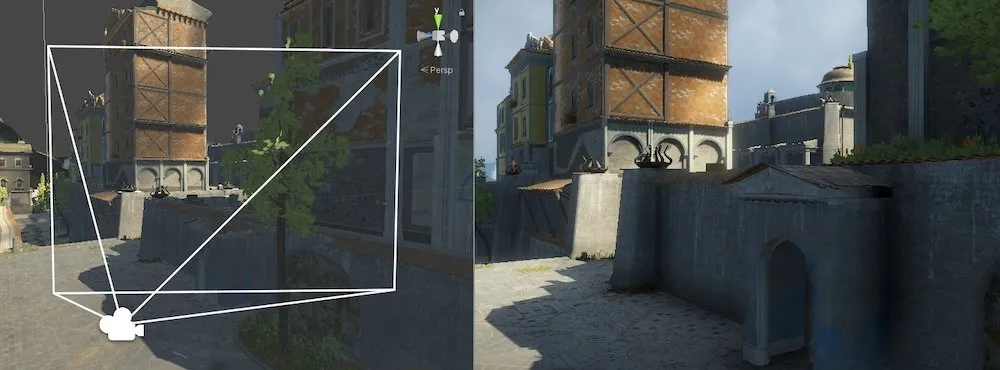
Movement-based zoom basically involves moving the camera closer to the object it’s looking at.
Whereas you might use a field of view zoom to look down a weapon’s sights, movement-based zoom is essentially camera control, where the player is simply bringing the camera in closer without changing its viewing angle.
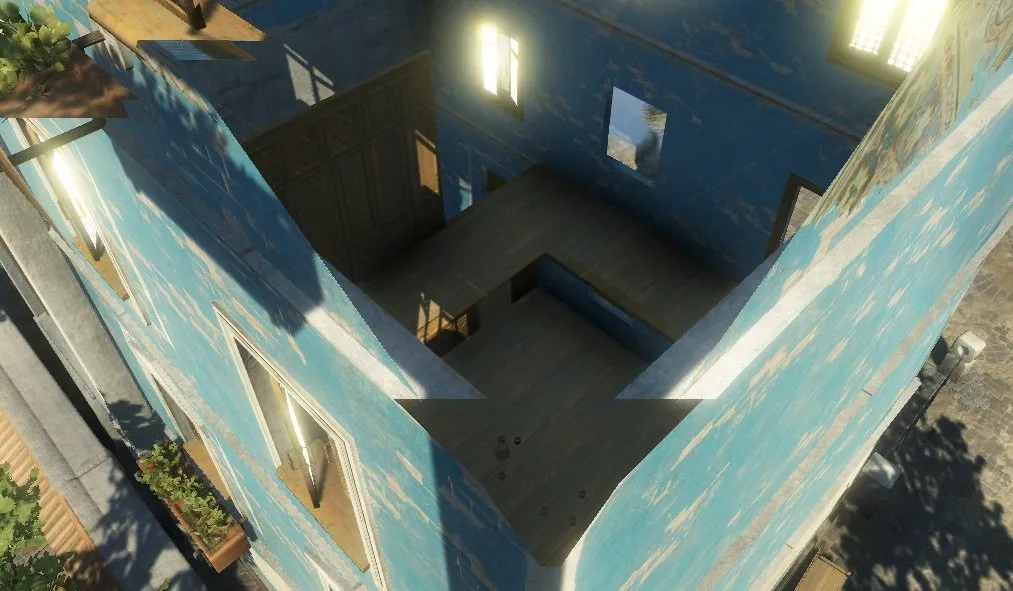
Typically, you might use movement zoom to control a camera’s distance from a player in third-person, or as part of a top-down camera system for a real time strategy game.
Here’s how…
How to make a top-down camera
In this example, I’m going to make a simple top-down camera controller that can be panned around with the keyboard and zoomed in using the mouse’s scroll wheel.
This method requires two objects, a parent game object, that will be moved around, and a child object, the camera, which is rotated down towards the scene and will be moved closer to create a basic zoom effect.

I can move the Camera Controller object around by passing the Horizontal and Vertical axes into the Translate function,
Like this:
public class CameraMovement : MonoBehaviour
{
    public float speed = 25;

    void Update()
    {
        MoveCamera(Input.GetAxis("Horizontal"), Input.GetAxis("Vertical"));
    }

    void MoveCamera(float x, float y)
    {
        Vector3 movementAmount = new Vector3(x, 0, y) * speed * Time.deltaTime;
        transform.Translate(movementAmount);
    }
}
This works by getting the movement values from the two directional axes and multiplying them by delta time and a speed value.
In this case, I’ve set the speed value 25, meaning that the camera will move at 25 units per second.
Now that I can move my camera, I want to be able to zoom it in closer to the world.
I can do this by using the local forward direction of the camera object.
// Forward direction in world space
Vector3.forward;

// Forward direction in local space
Transform.forward;
Because the camera is rotated down, facing towards the world, moving it along its local forward vector, which is the direction of its blue, Z-Axis, moves it forward in the direction it’s facing.
In this case, that’s towards the world, creating a zooming motion.
The camera is already facing the world, all I need to do to zoom it in is move it forward.
Here’s how it works.
The camera’s forward vector is a direction vector, meaning that its magnitude (the length of the vector) is limited to 1.
So, multiplying its forward direction vector by a float value, such as a zoom amount, for example, will return a new vector, that’s set forward by a number of units, and that can be used to set the camera’s zoomed position.
Like this:
public class MovementZoom : MonoBehaviour
{
    public float zoomLevel;
    public Transform parentObject;

    void Update()
    {
        transform.position = parentObject.position + (transform.forward * zoomLevel);
    }
}
This allows me to set the zoom position of the camera with a single float variable, which makes it easy to manage and easy to control.
For example, if I want to set a maximum zoom amount, I can clamp the zoom value before moving the camera.
Like this:
// Limits the zoom to 30 units
zoomLevel = Mathf.Clamp(zoomLevel, 0, 30);
Or if I want to smoothly move the camera towards its target, I can have the camera follow the zoom value at a set speed using Move Towards.
Like this:
// Follows the zoomLevel value at 30 units per second
zoomPosition = Mathf.MoveTowards(zoomPosition, zoomLevel, 30 * Time.deltaTime);
transform.position = parentObject.position + (transform.forward * zoomPosition);
But…
While I now have a method of using the zoom value, a way to limit it to a minimum and maximum zoom level and a way to smoothly move the camera into its zoom position at a set speed,
I still haven’t connected any of it to any kind of control…
How to zoom a camera using the mouse scroll wheel
In this example, I’m making a top-down camera that can be panned around with the keyboard and zoomed in and out using the mouse.
But, I haven’t connected the mouse’s scroll wheel input to the script yet.
Luckily, however, it’s simple to do.
Using the Input Class, Unity’s default method of getting input from devices, I can access the Mouse Scroll Delta, which is a Vector 2 value that returns the vertical and horizontal scroll amounts as values between -1 and 1.
In this case, I only want to detect vertical scroll data, which is the Y value of the Vector 2 value.
I can then use the delta value to increase or decrease the zoom amount.
Like this:
public float zoomLevel;
public float sensitivity=1;

void Update()
{
    zoomLevel += Input.mouseScrollDelta.y * sensitivity;
}
Adding a sensitivity modifier allows me to modify how much the value reacts to the movements of the mouse’s scroll wheel.
This can be useful for tweaking the zoom behaviour, for example, to make zooming over large distances easier, or to allow for differences between scroll wheel inputs.
The result is a smooth position based zoom function, clamped to a minimum and maximum distance, with tweakable sensitivity.
Here’s the complete example:
using UnityEngine;

public class MovementZoom : MonoBehaviour
{
    // Movement based Scroll Wheel Zoom.

    public Transform parentObject;
    public float zoomLevel;
    public float sensitivity=1;
    public float speed = 30;
    public float maxZoom=30;
    float zoomPosition;

    void Update()
    {
        zoomLevel += Input.mouseScrollDelta.y * sensitivity;
        zoomLevel = Mathf.Clamp(zoomLevel, 0, maxZoom);
        zoomPosition = Mathf.MoveTowards(zoomPosition, zoomLevel, speed * Time.deltaTime);
        transform.position = parentObject.position + (transform.forward * zoomPosition);
    }
}
Movement-based zoom is a great way to add this particular type of zoom control to a game.
There’s just one problem…
Because this method of zooming is essentially a movement control, not a camera control, the camera object can easily be zoomed through other objects, clipping them against the camera.
I zoomed in too far…
Depending on your game world, and how high the camera is above that game world, this may not be an issue for you.
However, if the height of your scene varies enough that it’s possible for the camera to move into objects while zooming, you may want to build in some basic collision detection to move the camera back out if it’s too close.
How to automatically zoom the camera out to avoid collisions with objects
One method for detecting collisions against world geometry when using a movement-based camera zoom such as this is to check what’s in the line of sight of the camera with a Ray.
Like this:
void ClipCheck()
    {
        Ray ray = new Ray(parentObject.position, transform.forward);

        if (Physics.SphereCast(ray, 3, out RaycastHit hit, maxZoom))
        {
            if (hit.distance < zoomLevel+3)
            {
                zoomLevel = hit.distance - 3;
            }
        }
    }
Calling this function before calculating the position of the camera will help to prevent it from moving through objects when zoomed in.
This works by firing a ray from the parent object of the camera, covering its entire line of sight. Then, if the ray hits any Colliders in the game world, and if the camera is within 3 units of where it hit, it pulls the zoom level back by 3 units to make space.
This helps to dynamically clamp the maximum zoom level to 3 units in front of any object with a collider attached to it.
Also, because the line of sight is drawn from the camera’s parent object, and not the camera itself, there’s less chance of the camera sneaking in under an object.
Lastly, you may have noticed that I used Spherecast, not Raycast to check for collisions in the camera’s line of sight. Spherecast works like a thick Raycast, essentially firing a sphere into the scene instead of a line, in this case with a radius of 3. In this example, it works well because it basically makes the line wider, allowing it to catch smaller objects more easily.
How to zoom a 2D camera (orthographic zoom)
While zooming with a 3D perspective camera typically involves changing the camera’s field of view, or by simply moving the camera closer to its subject, zooming in and out in 2D works in a different way.
This is because a 2D camera typically uses orthographic projection, not perspective projection, meaning that the 3D world is viewed flat, in 2D.
Orthographic vs Perspective camera projection in Unity
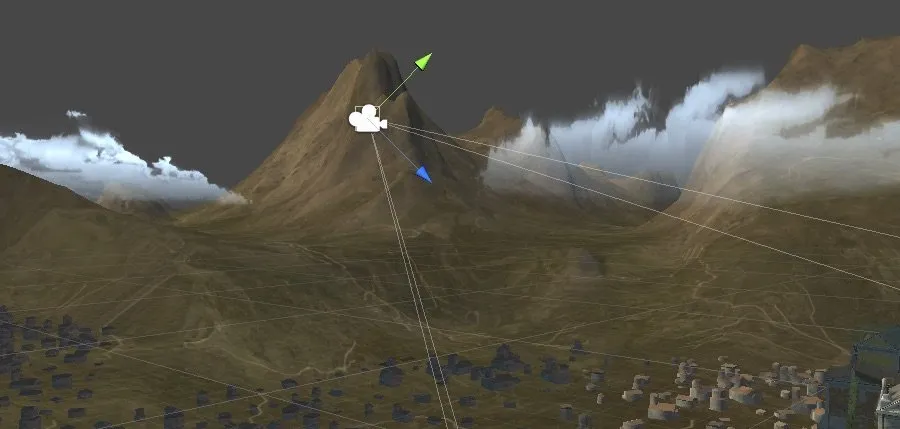
You can see the difference between these two methods by looking at their viewing frustums, which is the region of space in the 3D world that is visible from the camera.
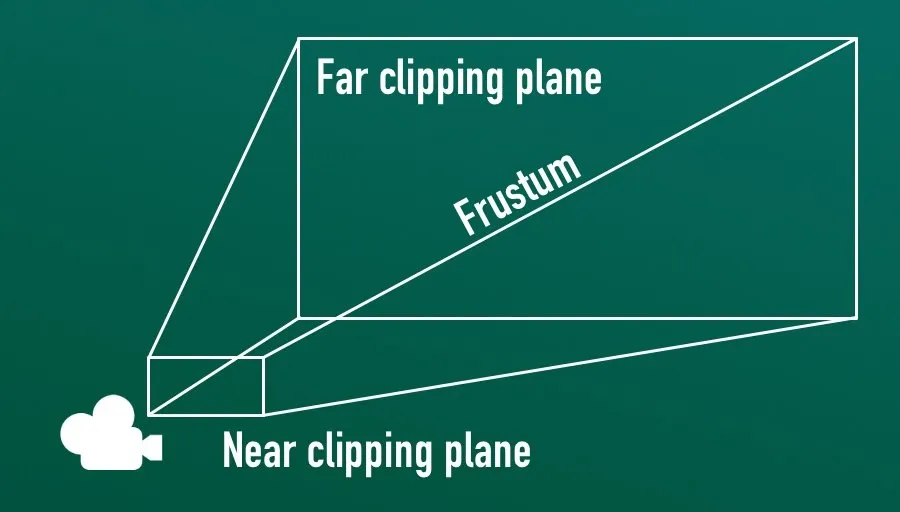
A perspective camera’s frustum extends out. The far clipping plane is wider than the near clipping plane.
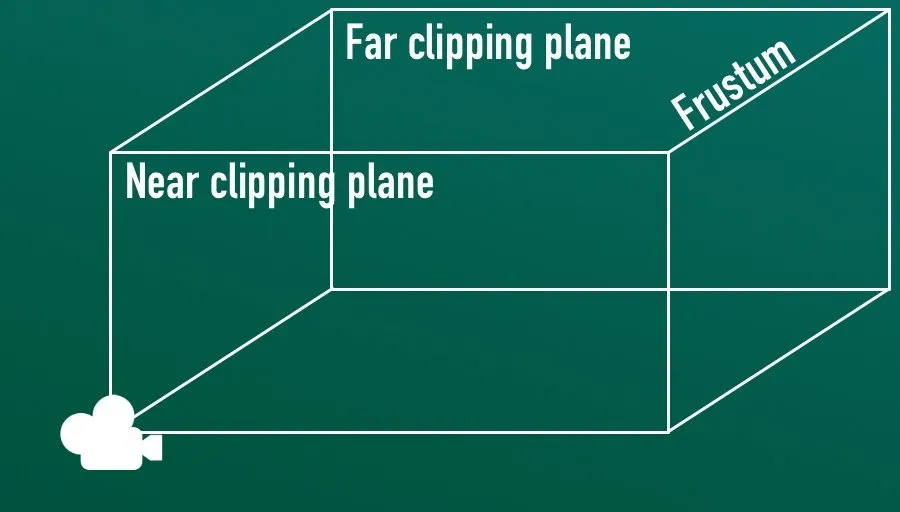
Using an orthographic projection method, the viewing frustum runs along parallel lines. You can see just as much at the far clipping plane as you can at the near clipping plane. Flattening the projection.
Perspective camera projection creates a standard 3D image with visible depth. Objects that are the same size appear smaller when further away and the angle from which they’re viewed is affected by the camera’s relative position.
A 3D perspective projection camera view
Orthographic camera projection, however, renders the entire image at the same scale, regardless of an object’s distance from the camera.
As such, it’s a commonly used camera mode for 2D games, as it basically renders the scene without any depth.
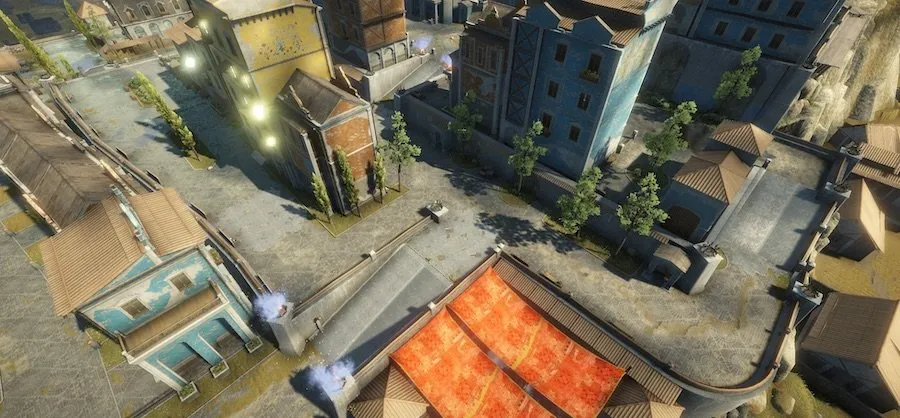
For example, rendering the same camera angle with an orthographic camera creates an isometric 2D view:
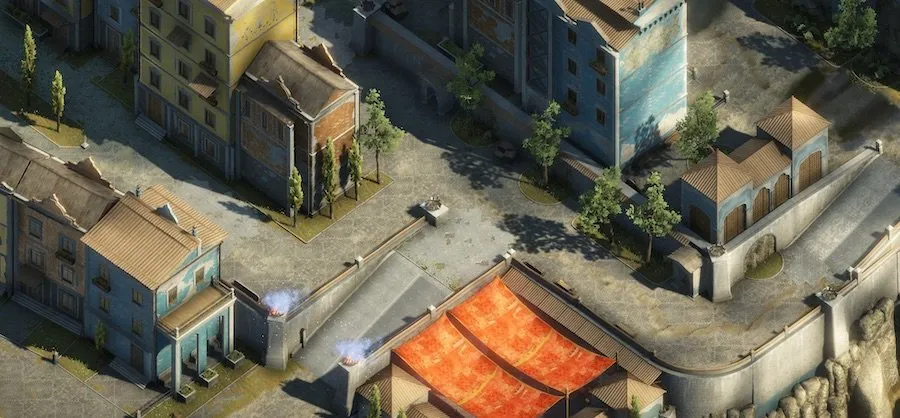
Everything looks good in isometric.
Put simply, this means that field of view doesn’t apply when using a 2D camera and that moving the camera closer to an object doesn’t change its size on the screen.
So how can you zoom a 2D camera?
How to zoom in 2D (using an orthographic size)
While a perspective camera can be zoomed by using its field of view, a 2D orthographic camera zoom can be changed using its Size property:
Camera.main.orthographicSize = 5;The orthographic size represents half of the vertical viewing volume of the camera in units, while the horizontal size is determined by the screen’s aspect ratio.
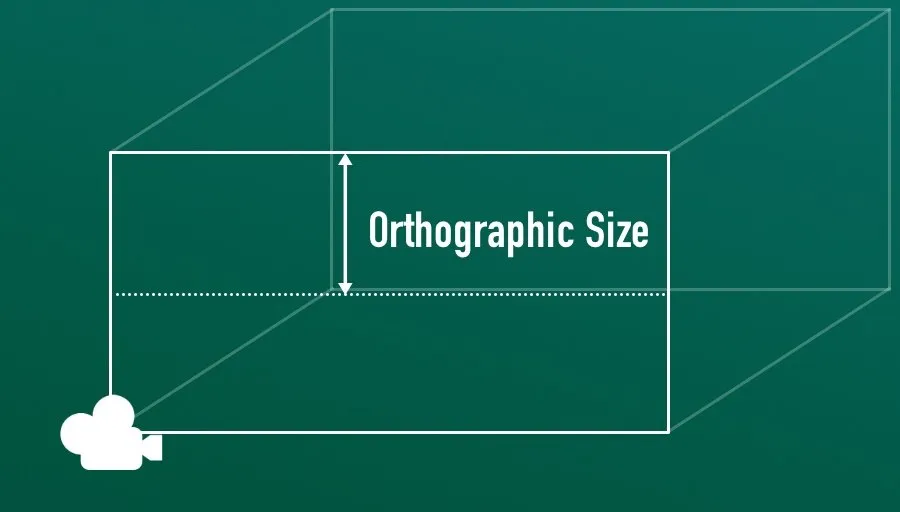
Orthographic Size in Unity is measured as half of the height of the viewing volume, in units.
This means that to zoom the camera out and show more of the world, you’ll need to increase the orthographic size. While reducing the size of the volume gives the effect of zooming the camera in.
Just like the other methods in this article, zooming with an orthographic camera basically involves setting a single zoom value and having the camera follow it to create a smoothed zooming motion.
Like before, I can use the Move Towards function to follow the zoom target at a set speed, and use minimum and maximum zoom values to keep the camera within a workable range.
Like this:
public class OrthographicZoom : MonoBehaviour
{
    public Camera cam;
    public float maxZoom =5;
    public float minZoom =20;
    public float sensitivity = 1;
    public float speed =30;
    float targetZoom;

    void Start()
    {
        targetZoom = cam.orthographicSize;
    }
    void Update()
    {
        targetZoom -= Input.mouseScrollDelta.y * sensitivity;
        targetZoom = Mathf.Clamp(targetZoom, maxZoom, minZoom);
        float newSize = Mathf.MoveTowards(cam.orthographicSize, targetZoom, speed * Time.deltaTime);
        cam.orthographicSize = newSize;
    }
}
Just like in the movement-based example, I’ve added a variable to adjust the sensitivity of the scroll wheel, and a speed value to control how fast the camera can zoom in and out.
One key difference, however, between this method and the movement-based zoom method is that, because a larger orthographic size represents a larger viewing area (i.e. zoomed out), you’ll typically want to subtract the value of the scroll wheel delta instead of adding to it. So that scrolling up zooms in and scrolling down zooms out.
Now it’s your turn
Now I want to hear from you.
How are you using camera zoom in your game? Are you using one of the three methods in this article, or something else entirely And what have you learned about zooming the camera that others will find useful?
Whatever it is, let me know below by leaving a comment.

John French writes all of the Unity tutorials for Game Dev Beginner, and specialises in deep-dive guides teaching game development basics.

Comments
I’m using the FOV method to create a zooming mechanic for my game. But I’ve run into an issue.
When the FOV is at a value lower than 25, it causes a raycast I’m using to interact with objects, to keep hitting the last spot it hit.
E.g I shoot the raycast at a cube then shoot the raycast at a wall and it still hits the cube. The debug.drawray I’m using shows the ray hitting the wall too. But if I zoom out (increase the FOV) then now I can move from the cube to the wall.
I have no idea what’s happening here. Any ideas?
Does the Raycast start from a position that could be affected by the FOV change? So, for example, are you generating it from the object, or from a screen position? If you’re able to, email me at [email protected] with some more information and I’ll try to help.
i can’t input the fieldOfView from camera, what “using” do you use. sorry im new on unity
You’ll need a reference to a camera, either one that you declare yourself or the main camera (Camera.main) which is the first active object in the scene tagged as main camera. You shouldn’t need additional using directives for that. If I’ve misunderstood, email me at [email protected] and I’ll try to help.
Holy effin’ eff, it finally effin’ worked!
Thank you so much!!!
You’re welcome!
Hii,
I am crating a image gallery aplication. I want zomm in and out a image upto pixel level. Which zoom technique will be best ?
Thank You.
My best guess would be orthographic size, since you’ll likely be in 2D.
it’s possible to zoom the camara touching her x y scale at her transform?
Do you mean changing the scale of the camera object? That shouldn’t change the view of the camera, let me know if I’ve misunderstood.
Thanks for the article. I just used the orthographic method, but it didn’t work for me. I think you forgot the part where you have to set `targetZoom = cam.orthographicSize`.
In the end I used a simpler version.
“`
void Update()
{
if (Input.mouseScrollDelta.y == 0)
return;
targetZoom = cam.orthographicSize – Input.mouseScrollDelta.y * speed * Time.deltaTime;
cam.orthographicSize = Mathf.Clamp(targetZoom, minZoom, maxZoom);
}
“`
Well spotted! I’ll update the article.
Thanks man … your code worked a lot better.
Hey, just noting that Mathf.Clamp has its parameters as (value, min, max), not (value, max, min)
If you’re referring to the orthographic example, this is because higher values create a lower zoom. However, I should have been clearer with the variable naming there.