The Raycast function is extremely useful for creating connections between objects in Unity.
For example, if you want to select an object just by looking at it or clicking on it.
Or if you want to shoot an object with a weapon or obstruct a line of sight.
Or perhaps if you need to check how high the player is from the ground, or what it is they’re standing on.
That’s where Raycasts can help.
So… what is the Raycast function and how does it work?
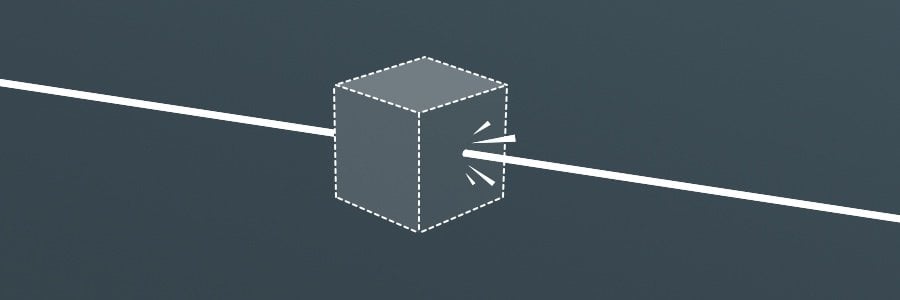
Raycast in Unity is a Physics function that projects a Ray into the scene, returning a boolean value if a target was successfully hit. When this happens, information about the hit, such as the distance, position or a reference to the object’s Transform, can be stored in a Raycast Hit variable for further use.
This makes Raycast extremely useful for getting information about other objects, performing ground checks or, generally, doing anything that involves a line of sight connection between two objects.
However…
While Raycast can be very straightforward to use, it can be a little unintuitive at first.
And if you’re new to Unity, the large number of features available, not to mention the many different versions of Raycast, each with their own quirks, can make it daunting to use at first.
But don’t worry, because, in this article, I’ll show you everything you need to know about using Raycast in Unity, step by step,
Let’s get started…
Here’s what you’ll find on this page:
- How to use Raycast in Unity
- How to create a Ray
- How to use the Raycast Hit variable
- How to use the Raycast function
- The different features of the Raycast function
- What’s an Overload Method in Unity?
- Limit the Raycast Range by entering a Max Distance
- How to use Layer Masks with Raycasts
- How to ignore trigger colliders when using Raycast
- How to hit multiple objects using Raycast
- Other types of Raycast
- Should you use Raycast in Fixed Update or Update?
- How to use Raycast in Unity in 2D
Raycast in Unity: Overview video
For a general overview of how to use Raycast functions in Unity, try my video, or continue to the full article below.
How to use Raycast in Unity
The basic version of Raycast is made up of three different parts:
- A Ray variable
- A Raycast Hit variable
- The Raycast function
Here’s how each of them work…
How to create a Ray
A Ray is simply a data struct in Unity that represents a point of origin and a direction for the Ray to travel.
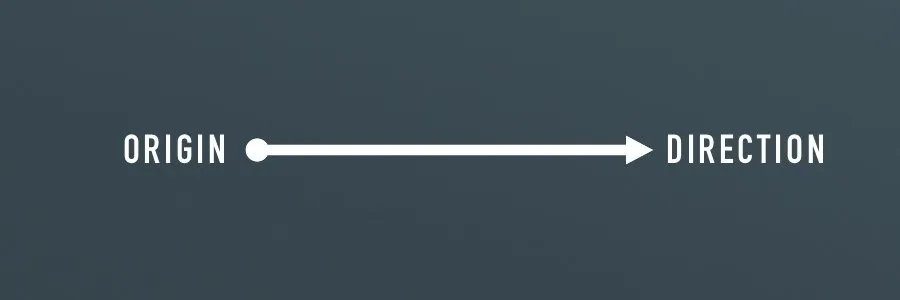
In its most basic form a Ray is an origin and a direction.
The origin is the position in the world that the Ray will start from and takes a Vector 3 value.
While the direction property takes a trajectory in the form of a normalised Vector 3.
Normalising a vector limits its magnitude, which is the length of the Vector, to 1, which is useful for representing a consistent direction.
There are a few ways you can create a new Ray.
You can create a Ray manually,
Like this:
// Creates a Ray from this object, moving forward
Ray ray = new Ray(transform.position, transform.forward);
Or, alternatively, you can use one of the helper functions to create a Ray automatically, such as a Ray that starts at the center of the camera’s viewport,
Like this:
// Creates a Ray from the center of the viewport
Ray ray = Camera.main.ViewportPointToRay(new Vector3 (0.5f, 0.5f, 0));
In the above example, the 0.5f values represent the middle of the viewport in both dimensions.
Or from the Mouse Position on the screen,
Like this:
// Creates a Ray from the mouse position
Ray ray = Camera.main.ScreenPointToRay(Input.mousePosition);These helper functions make it easy to create a Ray from an existing point in the world.
However, while you can cache a reference to the Ray you create, you’ll still need to update it every time you use it.
So, for example, if your Ray’s origin and direction are going to be different every frame, you’ll need to update the Ray every frame too.
Like this:
Ray ray;

void Update()
{
    ray = transform.position, transform.forward;
}
Otherwise, when you come to use the Ray, it won’t be in the right position.
How to visualise Raycast in the scene
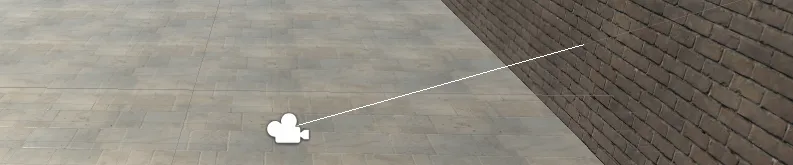
Using Debug.DrawRay, you can check if your Rays are going where they’re meant to.
Did you know you can visualise Rays in the game world?
The Debug Class includes a function, Draw Ray, that allows you to render a Ray in the world.
Like this:
Debug.DrawRay(Vector3 origin, Vector3 direction);This function can be useful for making sure your Ray is going where you want it to.
For example, I could define a Ray variable for use in Raycast functions.
Like this:
Ray ray = new Ray(transform.position, transform.forward);And then, render a visible line using Draw Ray, passing in the same values as I used to create my Ray.
Like this:
Debug.DrawRay(ray.origin, ray.direction * 10);Notice that I’ve multiplied the direction value by 10.
This is because the Vector 3 that’s used for direction in Ray variables is normalised (meaning that it will have a magnitude, the length, of 1).
Multiplying the direction value by the distance of the Ray, in this case by 10, means I can match the length of the Ray I actually use with the length of the drawn line.
Once you’ve decided where your Ray will start from and which direction it’ll go in, you’ll need a place to store the data you get from it.
That can be done with a Raycast Hit variable.
How to use the Raycast Hit variable
The Raycast Hit variable is a data struct that stores information about Ray’s collision.
It records information like where the hit happened in the world, what object did the Ray collide with and how far away it was from the origin of the Ray.
To use it, all you need to do is declare it:
// Container for hit data

RaycastHit hitData;
Then, later, when you use Raycast to fire a Ray into the scene, you’ll have a place to store any information retrieved from the hit.
For example, you can get the position of the hit in the world using RaycastHit.point:
Vector3 hitPosition = hitData.point;Or the distance from the Ray’s origin to the point of impact using RaycastHit.distance:
float hitDistance = hitData.distance;You can also get information about the Collider that was hit, such as its Tag.
// Reads the Collider tag

string tag = hitData.collider.tag;
Or, you could even use Raycast Hit to get a reference to an object’s Transform:
// Gets a Game Object reference from its Transform

GameObject hitObject = hitData.transform.gameObject;
How to get the first object hit by a Raycast
Using a Raycast Hit variable with Raycast will store information about the first object that is hit by the Ray.
This is the default behaviour and is typically how you’d expect the Raycast functionality to work.
This means that, if it’s not working how you expect it to, it’s likely that there’s a different issue that’s causing the problem.
While the Ray and Raycast Hit variables define where a Ray will go and how information from hits will be stored, they don’t do anything on their own.
So, to actually fire Rays into the scene, and check if they hit anything, you’ll need to use the Raycast function.
Here’s how to do it.
How to use the Raycast function
The Raycast function in Unity allows you to check if a Ray collides with another object in the scene, saving the hit data to a Raycast Hit variable if it does.
There are several different versions of Raycast, each from different classes, that can be used in different ways, however, one of the most common ways to use Raycast is using the Physics Class, which returns a boolean true or false, depending on if the Ray hit anything.
Like this:
void FireRay()
{
    Ray ray = new Ray(transform.position, transform.forward);
    RaycastHit hitData;

    Physics.Raycast(ray, out hitData);
}
This will fire the ray that you’ve created into the scene and save information about anything that’s hit to the Raycast Hit variable you declared.
This works because of the Out Keyword in the function.
What is the Out Keyword in Unity?
The out keyword in Unity is used to return extra information from a function.
Normally, when calling a function, you pass data into it via its parameters and get information back via its return type.
But, a function can only have one return type.
The out keyword allows you to return extra information from a function.
With the Raycast function, you’ll commonly see the out keyword used to store the Raycast Hit data that, if there is any.
Raycast takes an out Raycast Hit argument, meaning that a Raycast Hit variable will need to be specified when you call it.
Then when the function runs, Raycast Hit data will be stored in the variable you specified, allowing you to access it.
The out keyword allows you to save information in addition to the return type of Raycast.
So what is the return type?
Physics.Raycast has a bool return type, which returns true if the Ray hits a target.
This means that you can place the Raycast function in an if condition.
Like this:
void Update()
    {
        Ray ray = new Ray(transform.position, transform.forward);
        RaycastHit hitData;

        if (Physics.Raycast(ray, out hitData))
        {
            // The Ray hit something!
        }
    }
Using Raycast in this way means that code inside the if condition will only run if the Ray actually hits something.
This is useful because it means that you can limit your code to only use Raycast Hit data when it actually exists.
Or to only perform an action if the Raycast was successful.
Whether a Raycast was successful or not typically depends on if it hit something, however, because of the additional features of the Raycast function it’s possible to limit what counts as a successful hit in other ways as well.
Such as limiting the distance the Ray can travel, excluding certain layers or choosing if trigger colliders should be ignored.
Which of these settings are available to you depends on which overload method of the Raycast function you decide to use.
The different features of the Raycast function
There are many different versions of the standard Raycast function and each one offers slightly different functionality.
For example, some versions of Raycast only take a few parameters and perform a simple function in return, while others accept more complex sets of data and do more with it.
These different versions are Raycast’s overload methods.
What’s an overload method in Unity?
An overload method is simply an alternative version of a method that takes a different set of parameters and that may return a different type of value.
For example, the most basic version of Physics.Raycast takes only one parameter, a Ray:
if (Physics.Raycast(ray))
{
// The Ray hit something
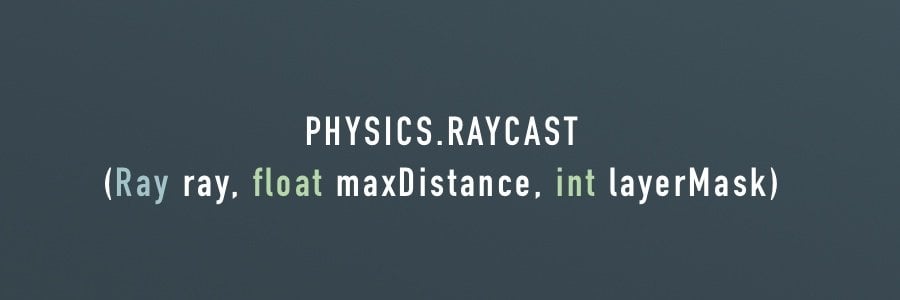
}While using a different overload method allows you to specify a Ray, a Raycast Hit variable, a Max Distance, a Layer Mask (to include or exclude certain layers from being hit) and a Query Trigger Interaction setting, which determines if Trigger Colliders can be hit or not.
Like this:
public LayerMask layerMask;

    void Update()
    {
        Ray ray = new Ray(transform.position, transform.forward);
        RaycastHit hitData;
        if (Physics.Raycast(ray, out hitData, 10, layerMask, QueryTriggerInteraction.Ignore))
        {
            // The Ray hit something less than 10 Units away,
            // It was on the a certain Layer
            // But it wasn't a Trigger Collider
        }
    }
Overload methods allow you to pass different information into a function to achieve different results.
How do you select an overload method in Unity?
A specific overload is defined by the parameters that are passed into it and their order.
So, to select a certain overload, simply pass in the set of parameters that match the overload you want to use.
How can you tell which parameters you need to enter?
Depending on your text editor, you may be able to preview what other functionality a method can support, as you’re writing it.
Like in Visual Studio, using the up and down arrow keys:

Each overload method is made unique by the parameters it accepts, and no two overloads can accept the same parameters in the same order.
Because of this, to use an overload method, you’ll need to enter the exact set of parameters it requires, in the right order.
Otherwise, it won’t work.
This can sometimes mean that, to use a specific overload, you may need to pass in parameters for functionality you don’t actually need.
But don’t worry…
Raycast supports a large number of overload methods (16 at the time of writing this) so chances are good that one of them will offer the functionality you want with minimal extra fuss.
So what can you do with different Raycast overload methods?
Limit the Raycast range by entering a max distance
Most of the overload methods available for Physics.Raycast also allow you to specify a max distance as a float value.
Like this:
Ray ray = new Ray(transform.position, transform.forward);

if (Physics.Raycast(ray, 10))
{
    // Hit Something closer than 10 units away
}
Setting a max distance can be useful for creating distance-limited functionality, such as weapons that can only shoot so far, or simply to avoid complications from Rays that extend infinitely across your scene. Not only is it useful, it’s also good for performance to limit the extent of a Ray, which is why it’s no surprise that many of Raycast’s overload methods (12 to be precise) accept a parameter for max distance.
While setting a distance can be useful for limiting the reach of a Ray, there will often be times when Raycasts intersect with many different types of collider.
How you distinguish between the different types of objects in your game is entirely up to you.
However, one option that works particularly well with Raycasts, is to use layers.
How to use Layer Masks with Raycasts
One of the most helpful features of the Raycast function is the ability to filter out colliders depending on their layer.
This allows you to completely ignore objects on layers that aren’t intended to collide with Raycasts.
As you can imagine, this can be extremely useful when you’re working with a large scene, with many different types of objects and colliders and you only want to check for collisions against some of them.
So how does it work?
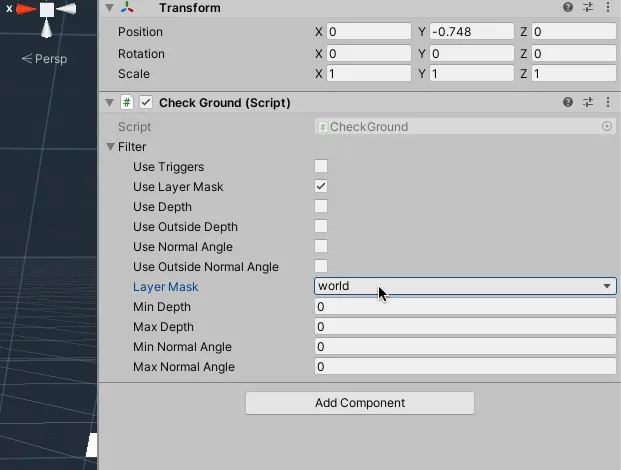
For example, let’s say that all of the environment objects in my scene are on the same layer, the world layer, and that I only want to detect collisions on that layer.
All I need to do is declare a public Layer Mask variable…
Like this:
public LayerMask worldLayer;Set it in the Inspector to match the world layer:
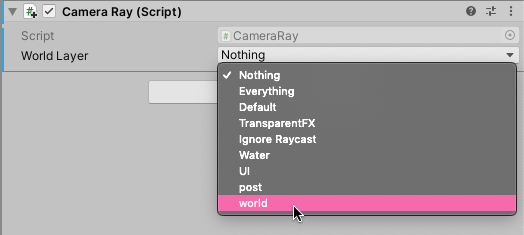
And then, in my script, pass the Layer Mask variable into the Raycast function.
Like this:
public class CameraRay : MonoBehaviour
{
    public LayerMask worldLayer;

    void FireLaser()
    {

        Ray ray = Camera.main.ViewportPointToRay(new Vector3(0.5f, 0.5f, 0));

        if (Physics.Raycast(ray, 10, worldLayer))
        {
            Debug.Log("You hit a wall, good job!");
        }
    }
}
In this case, I’m using an overload method that accepts a Ray, a Max Distance and a Layer Mask variable.
In order to use this version of Raycast I have to add all of those parameters in the correct order.
Otherwise, it won’t work correctly.
How to enter the layer number directly when using Layer Masks with Raycasts in Unity
Using a public Layer Mask variable is the easiest way to use Layer Masks with Raycasts.
However, if you want to do it all in scripting, and pass in the value of the Layer Mask directly, here’s how to do it.
If you’re anything like me, and because the Layer Mask parameter takes an int value, you might assume that you can just enter the number of the layer, for example, layer 9, in the Raycast function and that will work.
It won’t.
This is because, while the Layer Mask value is an int, Unity uses the binary representation of the integer to decide which layers will be checked and which will not.
Let me explain…
Imagine all of Unity’s 32 possible Layers as a row of zeroes, starting with the first layer (layer 0) on the right.
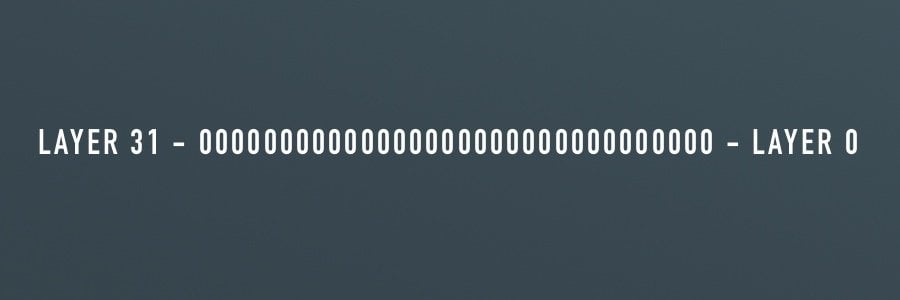
Now, let’s say that I want to check Raycasts against one of those layers.
For example, layer 9.
Layer 9 is tenth in the list, so if I change the tenth zero from the right to a 1, like this:
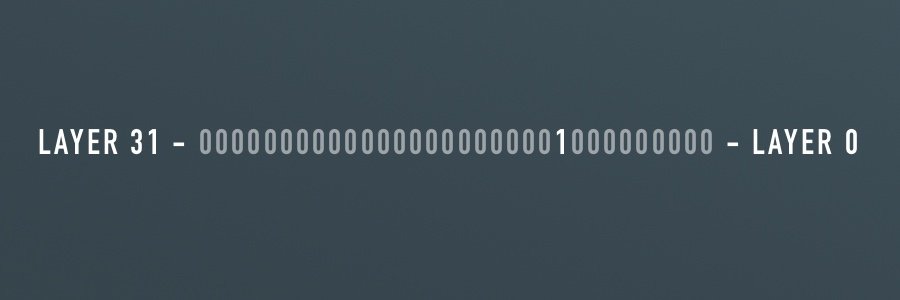
Changing the tenth digit from the right to a 1 represents the 9th layer.
Unity now knows that I only want to check Raycasts against layer 9.
Except that this is still a binary value. It’s still not the integer number that the Raycast function requires.
So how do you convert it?
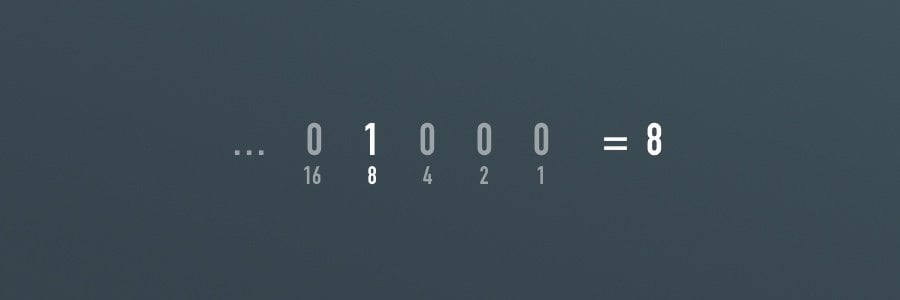
Binary numbers work by counting, from right to left, which multiples make up a number.
For example, the number 8, in binary, is 1000. Because it is made up, from right to left, of no ones, no twos, no fours and one eight:
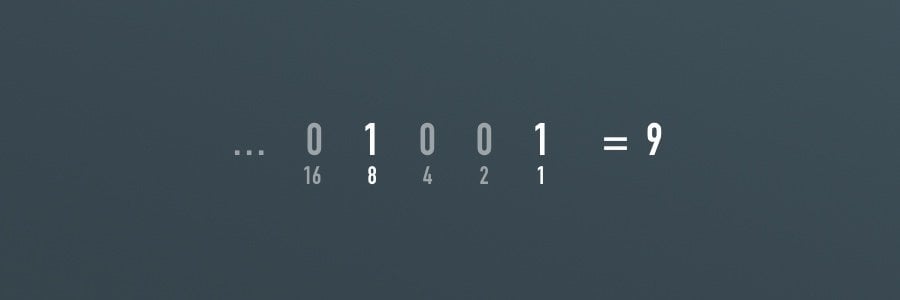
Whereas Nine, would look like this:
The binary value I’m using, when converted to an integer, is 512.
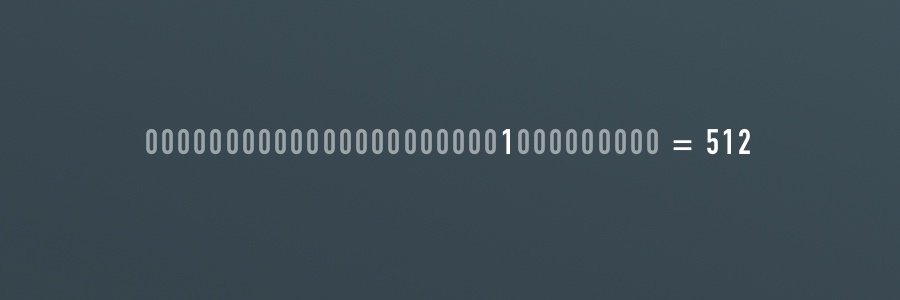
The decimal value for the 9th layer is 512.
Which I can add directly to the Raycast function to indicate that I want to check collisions on layer 9.
Like this:
if (Physics.Raycast(ray, 10, 512))
    {
        // Layer 9 was hit!
    }
I could even use the binary value to indicate multiple layers.
For example, layer 9 and layer 4:
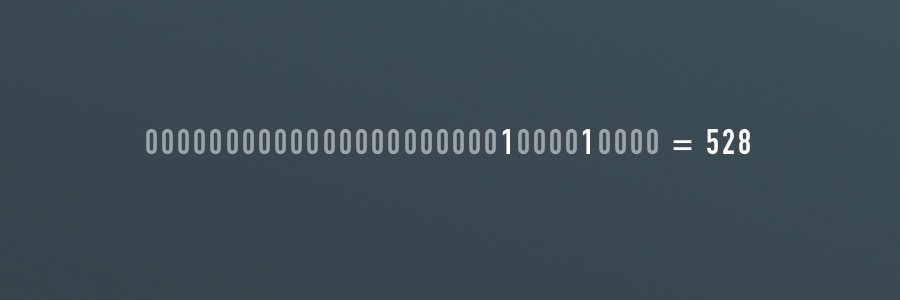
The decimal value for the 9th and 4th layers is 528.
Which works out to be 528.
if (Physics.Raycast(ray, 10, 528))
    {
        // Layer 9 or 4 was hit!
    }
How to convert an Int to a Layer Mask value
While converting a binary value to an integer works, it isn’t the most convenient method.
Especially if all you want to be able to do is enter the integer value of the layer you want.
Luckily there’s an easy way to directly add layer numbers in scripting.
The bitwise left shift operator.
The bitwise left shift operator (<<) moves the bits of a binary value to the left by a defined amount.
Why is this useful?
It allows you to quickly enter a Layer Mask value without having to check what it would be in binary first.
To use it, simply shift the bit values of the number 1 over by the number of the layer you want to use.
For example, to enter layer 9, I’d simply shift 1 by 9.
Like this:
if (Physics.Raycast(ray, 10, 1<<9))
    {
        // Layer 9 was hit!
    }
This works best when you want to identify a single layer to detect collisions on.
But what if you want to detect collisions on all of the layers in a game except one, how could you do that?
Detect Raycast on all layers except for one
Just like when using a Layer Mask to limit collisions to a certain layer, It’s possible to invert the Layer Mask value so that it detects collisions on every layer, except for one.
This can be done with the bitwise NOT operator.
The bitwise NOT operation use the tilde symbol (~) and will flip every bit in a value, essentially inverting it.
For example, if I want to detect collisions on every layer, except for the world, I can simply invert the Layer Mask value.
Like this:
public LayerMask worldLayer;

void FireLaser()
{
    Ray ray = new Ray(transform.position, transform.forward);

    if (Physics.Raycast(ray, 10, ~worldLayer))
    {
        // Something other than the world was hit!
    }
}
If you’re adding the Layer Mask directly to code using the bitwise operator, you’ll want to place it in parentheses first, so that the bitwise operation is carried out before inverting the value.
Like this:
Ray ray = new Ray(transform.position, transform.forward);

        if (Physics.Raycast(ray, 10, ~(1<<9)))
        {
            Debug.Log("something else was hit");
        }
While layers can be incredibly useful for including or excluding entire categories of object, you may still find yourself needing to exclude specific colliders from being hit.
For example, you may not want Raycasts to hit trigger colliders in the world but it may be that placing them on a separate layer just isn’t an option.
Luckily, there’s an easy way to exclude or include trigger colliders from receiving Raycast hits.
How to ignore trigger colliders when using Raycast
By default, Raycast will hit triggers, meaning that if a Raycast impacts a trigger collider, it’ll behave in the same way as hitting any other collider.
It’s possible to change this behaviour, either globally via a project setting or on a per Raycast basis.
How to disable all Raycast Trigger collisions
The easiest way to disable all Raycast trigger collisions is to simply turn them off.
Open Project Settings, select the Physics menu (or Physics 2D menu if you’re working in 2D) and uncheck Queries Hit Triggers.
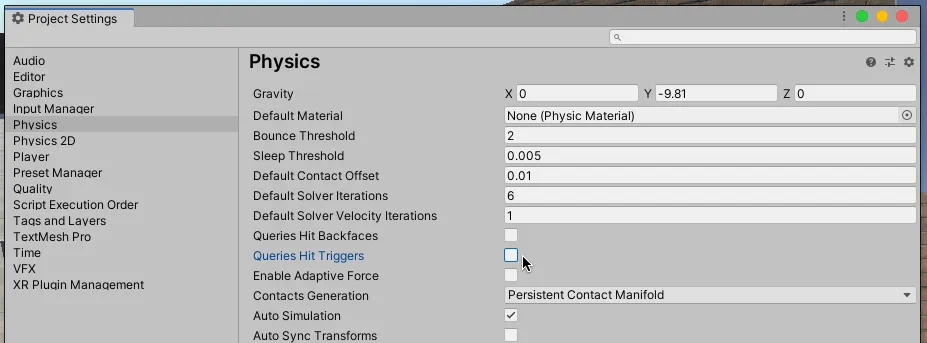
If you don’t want Raycasts to collide with any triggers, just turn them off!
Now, by default, Raycasts will ignore all trigger collisions.
Even with this setting turned off it’s still possible to override the behaviour of individual Raycasts using the Query Trigger Interaction parameter.
Like this:
void FireLaser()
    {
        Ray ray = Camera.main.ViewportPointToRay(new Vector3(0.5f, 0.5f, 0));
        if (Physics.Raycast(ray, 10, worldLayer, QueryTriggerInteraction.Ignore))
        {
            // Whatever you hit, it wasn't a trigger
        }
    }
In this overload method, I had to enter a Ray, max distance and Layer Mask in order to use the Query Trigger Interaction feature.
You might also have noticed that Query Trigger Interaction isn’t a true or false boolean value.
Instead, it’s an enum, which is essentially a set of named values, allowing you to choose one of 3 options:
Ignore – overrides the Raycast to ignore trigger collisions.
Collider – overrides the Raycast to accept trigger collisions.
Use Global – which defers to the default value set in the physics options.
Using the built-in functionality of Raycast’s overload methods is the easiest and the most appropriate way of filtering out objects that you don’t want Raycast to hit.
It allows you to completely ignore certain objects, or even entire layers of objects, that aren’t intended to be used with Rays.
Which is great for reducing the number of objects that could be hit.
But what if you want to hit more objects?
And what if you want to hit multiple objects all at once?
For example, if you want to create a weapon that can cut through multiple enemies or detect multiple objects using a single ray.
After all, the default Raycast function stops after hitting a target, so how can you fire a Ray that can pass through multiple objects?
Here’s how…
How to hit multiple objects using Raycast
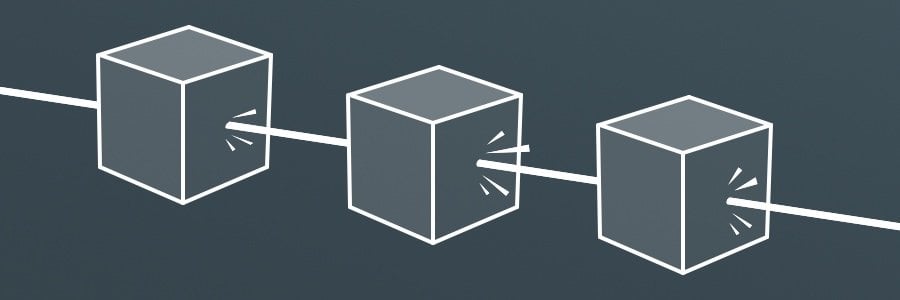
While Raycast is useful for identifying or colliding with single objects, sometimes you might want to use Raycast to detect collisions against multiple objects using the same Ray.
For example, you might want to create a weapon that fires through multiple enemies.
Or you might want to be able to detect and count how many objects are within a certain range.
For that, you’ll need to use Raycast All.
How to use Raycast All
Raycast All works a lot like Raycast, except that instead of hitting and returning only one object it can return multiple objects, storing them in an array.
To use Raycast All, you’ll need to declare an array of Raycast Hit variables and assign them when you call the Raycast All function.
Like this:
public RaycastHit[] hits;

void Update()
{
    Ray ray = new Ray(transform.position, transform.forward);
    hits = Physics.RaycastAll(ray);
}
Raycast All is useful for getting information about multiple objects using a single Ray.
For example, you could count how many colliders were hit by a Ray.
Like this:
int numObjectsHit = hits.Length;Or you could destroy all of the objects in a Ray’s path.
Like this:
public class CameraRay : MonoBehaviour
{
    public RaycastHit[] hits;

    void Update()
    {
       if(Input.GetMouseButtonDown(0))
        {
            FireLaser();
        }
    }

    void FireLaser()
    {
        Ray ray = new Ray(transform.position, transform.forward);
        hits = Physics.RaycastAll(ray);

        foreach(RaycastHit obj in hits)
        {
            Destroy(obj.transform.gameObject);
        }
    }
}
Raycast All works great for getting all of the objects that collide with a Ray.
There’s just one problem…
While Raycast All can detect multiple colliders, it retrieves them in an undefined order.
So, while it’s often helpful to think of Raycast All as a laser travelling through objects one by one, it doesn’t actually happen that way.
Instead, all of the objects that are intersected by the ray are detected at the same time, and the order in which they’re added to the array can’t be guaranteed.
This means that, for example, if you wanted to destroy multiple objects in a line by firing a ray through them, one by one, they won’t be destroyed in order along the Ray’s path.
Instead, it will more than likely happen randomly.
This isn’t necessarily a problem if you’re carrying out an action on all of the objects at the same time.
However, if you want to get the objects in order from the origin of the ray, you’re going to need to sort the results.
Here’s how to do that…
How to detect Multiple Raycast hits in order (by sorting the array)
There are a ton of different ways to sort array and list results in Unity.
However, in this example, I’m going to show you one of the simplest methods I’ve found to sort an array, without converting it to a list first.
For this to work, you’ll need to add the System Namespace to the top of your script:
using System.Collections;
using System.Collections.Generic;
using UnityEngine;
using System;
Then, once you’ve got the Raycast Hit results stored in an array, you can sort their order.
Like this:
void FireLaser()
{
    RaycastHit[] hits;
    Ray ray = new Ray(transform.position, transform.forward);
    hits = Physics.RaycastAll(ray);

    // Sorts the Raycast results by distance
    Array.Sort(hits, (RaycastHit x, RaycastHit y) => x.distance.CompareTo(y.distance));
}
This function basically determines how any two results (x and y) should be compared.
In this case, they’re being compared by their distance, which is a property of the Raycast Hit struct and is measured from the origin of the Ray to the point of impact with the collider.
Raycast All vs Raycast Non-Alloc
Raycast Non-Alloc is an alternative version of Raycast All that works in a similar way, except that it doesn’t generate any garbage.
This is because, while Raycast All returns a new Raycast Hit array each time it’s called, Raycast Non-Alloc stores its results in a fixed array, which limits the number of results it can return.
When you call it, the function returns an integer, equal to the number of colliders that the Ray hit, but no more than the length of the array it stores its results in.
This is useful, as knowing how many results were actually returned makes it easier to avoid referencing empty elements when the array isn’t full.
Like this:
RaycastHit[] results = new RaycastHit[10];

void Update()
{
    if (Input.GetMouseButtonDown(0))
    {
        FireLaser();
    }
}

void FireLaser()
{
    Ray ray = Camera.main.ViewportPointToRay(new Vector3(0.5f, 0.5f, 0));
    int hits = Physics.RaycastNonAlloc(ray, results);

    for(int i=0; i < hits; i++)
    {
        Destroy(results[i].transform.gameObject);
    }
}
So when would you use Raycast Non-Alloc?
Raycast Non-Alloc is generally a more efficient version of Raycast All.
However… just like Raycast All, Raycast Non-Alloc returns results in an undefined order.
This means that if you try to use Raycast Non-Alloc as a method for limiting the number of Raycast Collisions, for example, you want to build a weapon that fires through up to 3 enemies, you may not get the results you want.
Using Raycast Non-Alloc in this way will return 3 results, but there’s no guarantee that they will be the closest 3 results, even if you sort the Array.
While it might seem like a good idea to use Raycast Non-Alloc to limit collisions for performance purposes, this isn’t really why it’s efficient.
The main benefit of using Raycast Non-Alloc is to avoid repeatedly allocating new arrays, which prevents garbage and improves performance.
So, to use it effectively, you may actually find it’s better to use a large fixed array, one that’s big enough to accommodate the maximum number of results you’re likely to need at any given time, while using function features, such as Layer Masks and max distance, to filter the initial results for performance.
On balance, and depending on the type of results you want to get back, you may find it’s more convenient for you to use Raycast All.
And, in many cases, this will be fine…
However, if you find yourself using it frequently, or you’re calling it from multiple objects, you may be better off using Raycast Non-Alloc instead.
Other types of Raycast
While Physics.Raycast is one of the most common uses of Raycast, it’s not the only one.
In fact, there are several different types of Raycast style functions that each have their own unique benefits.
For example…
Physics.Linecast
Linecast returns true if a collider is detected between a defined start and end point. Essentially Linecast is a more straightforward version of Raycast, and is useful for creating simple lines of detection, for example, to create a tripwire.
Collider.Raycast
Collider.Raycast returns true when it hits the collider it’s called from.
This is useful when you only want to detect hits against one specific collider, such as the player, for example.
Collider.Raycast takes a Ray parameter, a Raycast Hit parameter and a max distance float
Like this:
Collider playerCollider;
if (playerCollider.Raycast(Ray ray, out RaycastHit hitData, float maxDistance))
    {
        // Hit the player!
    }
Physics.Spherecast
Spherecast works a lot like the standard Raycast except that, instead of projecting a thin line, it projects a sphere into the Scene.
Basically, this works like a thicker version of Raycast, where the sphere’s radius determines how thick, in units, the Ray is.
Spherecast is useful for determining if a specific sized object will fit into a space or for projecting a wider, shaped Ray into the world.
For example, a large laser beam, with a wide radius, that might be difficult to create with colliders or a standard Ray, could be easily created with Spherecast.
Functions that work in a similar way, but that use different shapes, include CapsuleCast and BoxCast.
Plane.Raycast
Plane.Raycast works by detecting a hit against an invisible plane in the Scene.
This method is incredibly useful for calculating an intersecting position against an infinitely large flat surface (such as a wall or floor).
It’s also very lightweight and simple to use, as it doesn’t need a Collider or even another Game Object to work.
You might use Plane.Raycast to create cursor interactions in world space. For example, by firing a ray from the mouse position and measuring where it intersects with the plane.
For more on Plane Raycast, try my article on getting the mouse position in world space in Unity.
Should you use Raycast in Fixed Update or Update?
In many cases, it’s better to use Raycast in Update, however, this largely depends on what you’re trying to do.
Typically, because Raycast is a Physics function, you might think to put Raycast in Fixed Update, which is called every physics step, instead of Update, which is called every frame.
Fixed Update is designed to perform actions in sync with the physics system, which will often run at a different frequency to Update.
If the game’s framerate is low, then Fixed Update may run faster than Update, being called several times during a frame. However, if the game’s framerate is high, Fixed Update may not be called at all during a frame.
A typical use of Fixed Update is for continuous physics functions. For example, when applying force to a Rigidbody, doing it in Fixed Update means that the force is applied in sync with the physics system that is reacting to it.
However…
While Raycast is a physics function, what you’re doing with it may actually be more suited to Update.
Why?
A lot of the time, you’ll be using Raycast as a check.
For example, was something in the line of fire when I clicked the mouse button?
Was the player close enough to the ground when the jump button was pressed?
Is the player looking at the object they just tried to pickup?
All of these examples are dependent on a player input condition that’s designed to be used Update, and trying to put functions like that in Fixed Update is going to cause problems.
For example, in extreme circumstances where the framerate of the game is slower than the physics system, a click that’s measured on a per-frame basis will be true every time Fixed Update is called during that frame. This would mean that even though you clicked once, the action could be called multiple times.
Whereas, if the physics system is running much slower than the framerate, Fixed Update might not be called while the button is pressed, and the click may not be recognised at all.
Instead, even though Raycast is Physics-based, placing the mouse click condition in Update, where it would normally be, solves this problem:
void Update()
    {
        if (Input.GetMouseButtonDown(0))
        {
            FireLaser();
        }
    }

    void FireLaser()
    {
        Ray ray = new Ray(transform.position, transform.forward);

        if (Physics.Raycast(ray, 10, worldLayer))
        {
            Debug.Log("You shot a wall!");
        }
    }
This works because the Raycast is a one-time event, that’s simply reporting the state of the Physics system at the time of the check.
But what about continuous checks?
There may be times when you’re making constant Raycast calls to check for colliders.
So should they be made from Update, or Fixed Update?
Again, it depends on what you’re trying to do as a result of the Raycast check.
If the resulting action of the continuous check is something you would normally put in Update, then use Update.
This will keep the action in sync with the game’s framerate.
However,
If the resulting action is something you would normally place in Fixed Update, then it’s a good idea to use Fixed Update for the Raycast check and the resulting action.
For example, making an object hover by applying force to a Rigidbody when it gets close to the ground.
Like this:
public class FloatObject : MonoBehaviour
{
    public Rigidbody rb;

    private void FixedUpdate()
    {
        Ray ray = new Ray(transform.position, Vector3.down);
        if (Physics.Raycast(ray, 2))
        {
            FloatUp();
        }
    }

    void FloatUp()
    {
        Vector3 forceAmount = new Vector3(0, 20, 0);
        rb.AddForce(forceAmount);
    }
}
Both the Raycast check and the hover action are designed to work with Physics steps so, in this scenario, you’ll get more consistent results by using Fixed Update.
How to use Raycast in Unity in 2D
Raycast is a physics-based function, meaning that, depending on which version you use, it derives from either the Physics Class or a related class, such as the Collider Class.
However…
In Unity, the 3D and 2D physics engines are separate, meaning that, if you want to use Raycast in 2D, you’ll need to use a different version of Raycast that derives from the 2D physics engine and its classes. For example, Physics2D.Raycast or Collider2D.Raycast.
Otherwise, it won’t work.
Like this:
void Update()
{
    if (Physics2D.Raycast(transform.position, Vector2.down))
    {
        // Something was hit!
    }
    else
    {
        // Something was not hit!
    }
}
Raycasts in 3D vs Raycasts in 2D
Generally, the 2D versions of Raycast work in a similar way to the standard, 3D versions, but with a few key differences.
For example, while many versions of Raycast return a boolean value (which returns true if the Ray hits something and false if it doesn’t), this isn’t the case with the 2D versions of Raycast.
Instead of returning a boolean, Physics2D.Raycast returns a Raycast Hit 2D value.
If the Raycast hits a collider, the function will return Raycast Hit 2D information. If it doesn’t hit anything, it returns null, which is why it’s still possible to use Physics2D.Raycast in an if condition, even though it doesn’t return a boolean value.
However, this does mean that, unlike the 3D version, where you would normally save hit data using the out keyword, if you want to access information about what was hit, you’ll need to declare a Raycast Hit 2D variable first.
Like this:
private void Update()
{
    RaycastHit2D hitInfo = Physics2D.Raycast(transform.position, Vector2.down);

    if (hitInfo.collider)
    {
        Debug.Log("Hit " + hitInfo.collider);
    }
    else
    {
        Debug.Log("Hit nothing!");
    }
}
Collider 2D Raycast ignores its own collider
Just like the 2D version of the standard Raycast function, the 2D version of Collider.Raycast works differently to its 3D counterpart.
Unlike the 3D version of Collider.Raycast, which takes a Ray parameter and looks specifically for the one collider that it’s called from, Collider2D.Raycast fires a ray from the collider it’s called from and looks for other colliders to hit (while ignoring its own).
Collider2D.Raycast has an integer return type, which is equal to the number of colliders that were intersected by the Raycast, storing the results in an array.
Which means, to use Collider2D.Raycast, you’ll need to declare and initialise an array to hold the results.
To create a Raycast Hit 2D array, you’ll need to declare and initialise it in your script. This is because the Raycast Hit 2D data type won’t appear in the Inspector so, unlike other arrays, you won’t be able to set the length of the array manually.
Like this:
RaycastHit2D[] hits = new RaycastHit2D[10];This will create a new Array with a length of Ten.
The length of the array determines how many Colliders can be counted by the Raycast function.
So, for example, if you initialise the array at ten, even if the ray intersects 12 colliders, the integer value that you get back will be capped at ten.
Like this:
public class CheckGround : MonoBehaviour
{
    public Collider2D playerCollider;
    public int numCollidersHit;
    RaycastHit2D[] hits = new RaycastHit2D[10];

    private void Update()
    {
        numCollidersHit = playerCollider.Raycast(Vector2.down, hits);
    }
}
Collider2D.Raycast works in a similar way to the Non-allocating version of Raycast All. Except that, in 2D, Raycast All Non-Alloc will also detect colliders that overlap the ray’s origin.
Which can be inconvenient if you’re calling the function from an object with a collider that you want to ignore.
Instead, Collider2D.Raycast ignores its own collider and looks for others, without generating any garbage.
This is because it reuses the same fixed array instead of making a new one each time.
There’s also an alternative version of Collider2D.Raycast that stores its results in a List instead of an array:
public class CheckGround : MonoBehaviour
{
    List<RaycastHit2D> hits = new List<RaycastHit2D>();
    public Collider2D playerCollider;
    public ContactFilter2D filter;

    private void Update()
    {
        if(Input.GetMouseButtonDown(0))
        {
            int objectsHit = playerCollider.Raycast(Vector2.down, filter, hits, 10);

            for (int i=0; i < objectsHit; i++)
            {
                // Do something!
            }
        }
    }
}
This is useful when you want to limit the garbage allocation of the Raycast function but you don’t want to place a limit on the number of objects that can be detected, as the List will be resized, but only as needed when the function is called.
The 2D version of Raycast All sorts its results
Unlike the 3D version of Raycast All, which stores results in an undefined order, the 2D version of Raycast All sorts its results by distance from the origin.
This is useful if you want to, for example, destroy objects in a line or affect multiple objects based on their distance from the Ray’s origin, without needing to sort the array.
Use Contact Filters for advanced filtering in 2D
Unlike the 3D version of Raycast, which relies on manually setting a Layer Mask or trigger settings in the function’s parameters, Raycast in 2D allows you to use a Contact Filter 2D parameter to easily include or exclude certain objects from being hit.
It can also be declared publicly, meaning that you can apply the settings you want directly in the Inspector.
Like this:
Contact Filters allow you to set multiple filtering options.
It can then passed into any overload methods of Raycast that support using Contact Filters.
Such as this one:
public class CheckGround : MonoBehaviour
{
    public ContactFilter2D filter;
    RaycastHit2D[] hits = new RaycastHit2D[10];

    void Update()
    {
        if(Input.GetMouseButtonDown(0))
        {
            int objectsHit = Physics2D.Raycast(transform.position, Vector2.down, filter, hits);

            for (int i=0; i < objectsHit; i++)
            {
                Destroy(hits[i].transform.gameObject);
            }
        }
    }
}
If, however, you want to use an overload method of Raycast that requires a Contact Filter, but you don’t actually want to use a Contact Filter, you can do that too.
Simply declare a Contact Filter variable and use the No Filter function to prevent the filter from excluding any results.
Like this:
ContactFilter2D filter;
RaycastHit2D[] hits = new RaycastHit2D[10];

void Update()
{
    int numCollidersHit = Physics2D.Raycast(transform.position, Vector2.down, filter.NoFilter(), hits);
}
Now it’s your turn
Now I want to hear from you…
How are you using Raycasts in Unity?
What’s your best Raycast tip that you know others will find useful?
And how will you use the information on this page in your own project?
Let me know by leaving a comment below.

John French writes all of the Unity tutorials for Game Dev Beginner, and specialises in deep-dive guides teaching game development basics.

Comments
Taking the intermediate 3D Unity course from Udemy for RPG, the instructor just tells us to use the raycast method for point & click to move a character to a location or to fight with the enemy. His explanation of the raycast method I found rather cursory and thus a bit confusing. I very much enjoyed reading your comprehensive explanation that I can now use in many other ways than I was taught in the Udemy course. You explain things very plainly and I am not confused. However, I don’t like all of the advertising. That is what makes reading your explanations very irritating to my eyes and I constantly lose focus.
Thanks Mark! And thank you for your feedback regarding the ads. They make this free for everyone, so they’re important, but user experience is very important to me too so I appreciate the feedback and I’ll review my placement settings.
WHy is it that when using multiple raycasts the rays don’t rotate correctly with the object. Code below.
public class RaycastForCollisions : MonoBehaviour
{
public float sensorLength = 5f;
public float sensorPosOffset = 5.639f; // this is half of the collider length when it’s facing world forward
public float frontSidePosOffset = 1.5f;
public float frontSensorAngle = 30f;
void Update()
{
CheckForCollisions();
}
private void CheckForCollisions()
{
Vector3 startPos = transform.position + (transform.forward) + transform.up;
Vector3 direction = transform.forward;
Ray ray = new Ray(startPos, direction);
RaycastHit hit;
// origin, direction, hit info, maxdistance
// center raycast
if (Physics.Raycast(ray, out hit, sensorLength))
{
//Debug.Log(“Center HIT”);
Debug.DrawRay(startPos, direction, Color.red);
}
else
Debug.DrawRay(startPos, direction, Color.green);
// right side raycast
startPos.x += frontSidePosOffset;
if (Physics.Raycast(ray, out hit, sensorLength))
{
Debug.Log(“Right HIT”);
Debug.DrawRay(startPos, direction, Color.red);
}
else
Debug.DrawRay(startPos, direction, Color.green);
// right side angular raycast
//Vector3 angularDirection = Quaternion.AngleAxis(frontSensorAngle, ds.rb.transform.up) * ds.rb.transform.forward;
//if (Physics.Raycast(origin, angularDirection, out hit, sensorLength))
//{
// Debug.Log(“HIT”);
// Debug.DrawRay(origin, direction * sensorLength, Color.red);
//}
//else
// Debug.DrawRay(origin, direction * sensorLength, Color.green);
// left side raycast
startPos.x -= frontSidePosOffset * 2;
if (Physics.Raycast(ray, out hit, sensorLength))
{
Debug.Log(“Left HIT”);
Debug.DrawRay(startPos, direction * sensorLength, Color.red);
}
else
Debug.DrawRay(startPos, direction * sensorLength, Color.green);
//left side angular raycast
//angularDirection = Quaternion.AngleAxis(-frontSensorAngle, ds.rb.transform.up) * ds.rb.transform.forward;
//if (Physics.Raycast(origin, angularDirection, out hit, sensorLength))
//{
// Debug.Log(“HIT”);
// Debug.DrawRay(origin, direction * sensorLength, Color.red);
//}
//else
// Debug.DrawRay(origin, direction * sensorLength, Color.green);
}
}
Hi, what are you trying to do and what’s going wrong with it? At first glance, it looks to me like you’re checking for one raycast? Ray, which doesn’t appear to change throughout?
Hi John, thanks for taking the time to unpack this area and explain it so clearly! As a Unity beginner, this was exactly the level of detail I needed to get a confident start. Thanks! : )
You’re welcome Tim!
Hi John, fantastic post. IT is the ultimate guide for the raycast on Intenet. Now I am struggling with a question:
I am showing up a text UI when the raycast detects a specific object by tag. How do I trigger to hide the text UI when I am not looking at that object.
Currently, I am using an “else” to call the hide text UI function. But sometimes, it won’t be triggered.
if (Physics.Raycast(ray, out hitInfo, maxDistance:3))
{
ShowUI();
}
else
{
HideUI();
}
I kind of understand why this code won’t work. Since the distance is 3, when I suddenly move my view away from the target object to somewhere else, say sky, it may not trigger the ray at out. It won’t get into the “else” block.
Is there any appropriate approach for this?
Thank you!
Hi Aaron, the Raycast function usually returns a bool, so you should get to the else block if there’s nothing to hit, or what you hit doesn’t match the parameters of the Raycast function. So, if I’m remembering this right, this should work. Where are you checking the tag? The hitinfo variable probably doesn’t clear to null, so you will probably want to check for the tag inside the Raycast if statement. That way IF there’s a valid target, also check if it’s got the right tag. Hope that helps.
Amazing infos. I learned the layers very well according to the binary number system. Thanks Jhon…
You’re welcome!
Can you please make a blog on the Event system class, the pointer Event Data Class and Graphic Raycaster class? or Suggest some good resources (if you don’t have the time )
Things I need to achieve -1) Block the Raycast after hitting the Ui element
I used the Pointer Event Data for this purpose and I don’t know what the class is doing. I mean why don’t we use the Graphic Raycaster instead of pointer Event Data.
Thanks For your time to read this question.
Thanks for your suggestion, I’ll see what I can do.
Hi John I’m facing a slight problem, I want to be able to set the position of a line renderer to the raycast hit point when the raycast is not colliding with any object, I’m working in 2D by the way. Thanks
I believe RaycastHit2D.Point is the property that returns a hit position when something is hit but, if you want to find a position when nothing is hit then you could use whatever direction data you’re passing in to get a point on that line but, without a collision, you’re going to need to decide where that is. If you’re able to give me more details, email me at [email protected], let me know what it is you’re trying to do and I’ll try to help.
Thanks
I wanted to thank you for this article. It gaves me the basic knowledge to implement the raycast correctly. Specifically, I was facing an issue that you resolved talking about layermask and the possibility to disable the detection of the ray for triggers colliders. That has been possible because you’ve taken into account not just the basic usage but some specific ones that came really helpful!
You’re welcome, glad I could help!
Thank you, finally a great explanation
You’re welcome!
Hi John! Great article, very thorough.
One thing it was missing though, that I had to figure out myself, is how to set the layer of a particular object through scripting so that it isn’t hit by the raycast, while still letting the ray hit all the other objects in the environment. Most articles talk about defining your own layers, but then you have to assign them for each and every GameObject. If you can use Unity built-in functionality, that’s usually the better option so you don’t break things. In hindsight it’s pretty simple, but I’ll put the code pattern here for posterity.
// Set the object layer to Unity built-in “ignore raycast” layer
specialObject.layer = Physics.IgnoreRaycastLayer;
// Send out rays that don’t see the special object
if ( Physics.Raycast(ray, 10, ~(1<<Physics.IgnoreRaycastLayer) ) )
{
// Some object was hit… but it wasn't specialObject!
}
// Can reset the specialObject back to the default layer if ray logic is over
specialObject.layer = 0;
Thanks for the feedback Matt, great tip.
Thanks so much for this! I can’t describe how useful this blog was for me and you wrote in in such simple language. Also you went to explain other important topics in such good details. Truly amazing and its all for free! Keep up the good work!
You’re welcome!
Thanks for good explanation.
You’re welcome!
I really want to know what collider.raycast exactly do 😀 i am trying to run it on my script and does not show any result in debug 😀 Can you explan or expand your article for it?
In 3D, collider.Raycast checks for the collider it is called from only, in 2D collider2d.Raycast checks for multiple other colliders, but ignores itself. Email me at [email protected] if you want me to take a look at your code
Best explanation…. Great tutorial dude….
Thank you! Glad it helped
using UnityEngine;
public abstract class MouseRaycastDetector : DuongMonoBehaviour
{
[SerializeField] protected Camera mainCamera;
[SerializeField] protected GameObject quad;
protected bool isDragging = false;
protected RaycastHit hit;
protected Vector3 targetPosition;
protected Ray ray;
protected override void LoadComponent()
{
this.LoadCamera();
this.LoadQuad();
}
private void LoadCamera()
{
if (this.mainCamera != null) return;
mainCamera = GameObject.FindGameObjectWithTag(“MainCamera”).GetComponent();
}
private void LoadQuad()
{
if (this.quad != null) return;
quad = GameObject.FindGameObjectWithTag(“Quad”);
}
protected void QuadRaycaster()
{
if (Input.GetMouseButton(0))
{
/*Ray */ray = mainCamera.ScreenPointToRay(Input.mousePosition);
if (Physics.Raycast(ray, out hit))
{
if (hit.collider.gameObject == quad)
{
isDragging = true;
targetPosition = hit.point;
}
}
}
else isDragging = false;
}
}