The Random Audio Container is a new type of audio resource in Unity that allows you to create randomised audio sequences as assets in your project.
It’s available in Unity 2023.2 and higher, and makes it possible to pull sound effects from a list, randomly, with common variations, such as volume and pitch, already applied, without using a script.
This is extremely useful, as it means that, instead of managing the randomisation of sounds in a scene, you can do it in an asset instead.
Which makes more sense, as it means that randomised audio effects, such as dialogue tones, footsteps, music playlists, gunfire and more, will exist in your project as ready-made audio resources, instead of a configuration of scripts and settings that you need to add to your scene.
So how does it work?
How the Random Audio Container works
To start using the Random Audio Container, you won’t need to install anything new using the package manager, but you will need to be using Unity 2023.2 or higher.
You’ll then be able to create a new Random Audio Container in your project.
The container is an asset, not a component, meaning that, to make one, you’ll need to use the Create Menu, by right-clicking in your project window, and selecting Audio > Audio Random Container.
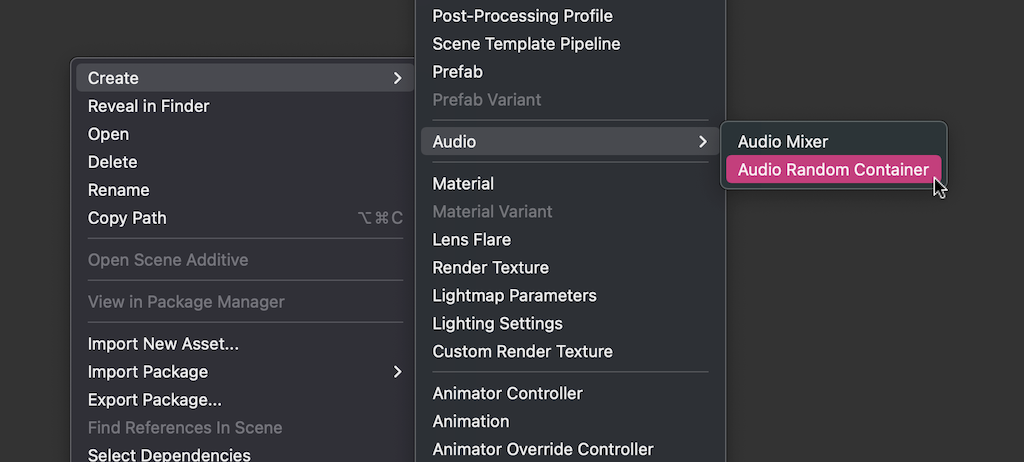
The Random Audio Container is an asset, meaning that to add one to your project, you’ll need to use the Create menu.
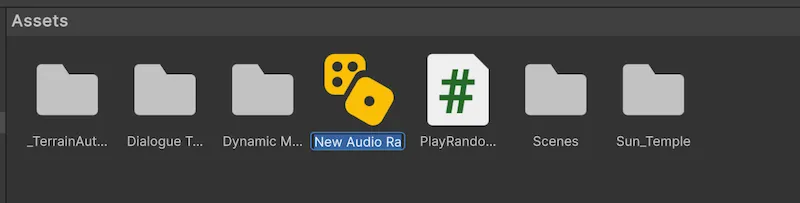
This will create a new container in your project’s assets.
It’s best to think of this asset as a special kind of Audio Clip.
It can be passed to an Audio Source as an Audio Resource, in the same way that you’d normally set an audio source’s clip.
It can then be played as if it’s an audio file, by using Play on Awake, or the standard Play Function.
Except that, instead of playing one file, it can play one of many.
Exactly how it picks an audio clip, when it plays it, and what it does to each sound, is controlled inside the random audio container asset.
Double-clicking the container will open the edit window, allowing you to add clips and change how the asset plays back.
Which looks like this:
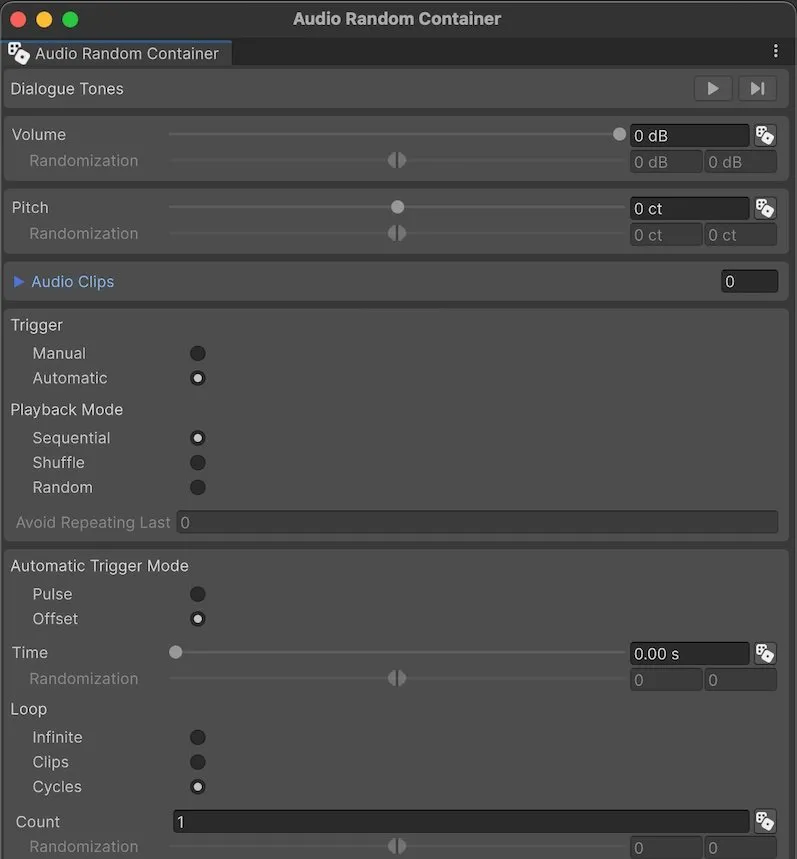
At this point, you’ll be able to add a selection of clips to the random container’s Audio Clips section.
This works like adding elements to an array, and will act as the pool of clips that the container will draw from.
Individual clips can be disabled, using their checkbox, or their base volume can be reduced by a number of decibels.
This can be extremely useful when triggering round-robin sounds, such as footsteps, as there are, typically, always one or two sounds of the set that will end up sticking out for being too loud.
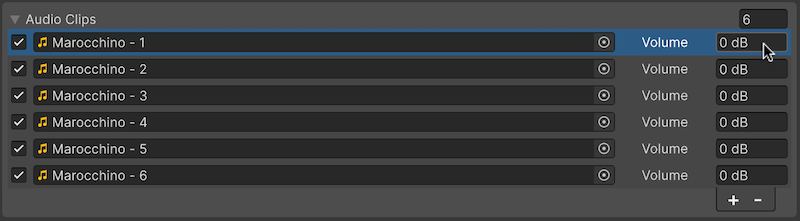
Being able to modify the volume of a sound can be surprisingly useful, as variation sets will almost always have that one sound that sticks out too much.
Being able to reduce the volume of a sound, without needing to go back and change the original sample, can save a lot of time.
Exactly how a clip is chosen, and when it’s played, depends on the Trigger and Playback Mode.
For example, you can choose to play each clip in order, one by one, or you can play them shuffled, meaning that the clips are out of order, but each one will be played without being repeated.
Alternatively, you can trigger the sounds randomly, with an optional Avoid Repeating setting to prevent recently played clips from being chosen again too soon.
Exactly when a sound is played will depend on the Trigger Mode.
Manual Trigger Mode will trigger a clip whenever the Audio Source is played using the Play Function.
You might choose this for synchronised sounds that draw from a random selection, such as footsteps.
Whereas Automatic mode will trigger the playback of clips in one of two different ways, Pulse and Offset, depending on the Automatic Trigger Mode settings.
Pulse will trigger a sound at fixed time intervals, which can be set using the Time slider.
Each sound will be played on top of any other sound that’s still playing, without interrupting it, in a similar way to Play One Shot.
You might use this to create automatically repeating sounds, either rapidly, such as for a dialogue tone, or less frequently, to create randomised ambience.
While Offset will play each clip back to back with an optional delay, where the Time slider represents how long after a clip finishes before the next one should start.
Value Randomisation
Most values in the Random Audio Container editor window can be randomised within a specified range.
This works by enabling randomisation on the value you want to vary by clicking the Dice Icon.
You’ll then be able to apply an amount of randomisation below or above the original value using the Randomisation Slider.
Like this:

Keep in mind, however, that the slider values represent the difference relative to the original value, not the absolute possible range.
Meaning that randomising the volume of a clip by -3db to 0db means that it could play up to three decibels quieter than whatever its original base volume was.
As a result, the range of the slider must always include zero, in the center, where no change is applied.
The Loop settings decide how long the selection of clips should play for, and how to determine when they’re actually finished.
For example, you could have the sounds play infinitely, only stopping them when the Stop Function is called on the Audio Source itself.
Alternatively, you can limit the playback of the container to a specific number of Clips.
While a Cycle represents the full playlist of clips, allowing you to stop playback once everything has played once, twice or a random number of times.
In both cases, how many clips or cycles you play is determined by the Count value.
Random Audio Container best practice
The Random Audio Container is ideal for creating randomised, sequenced sounds and music without having to write a script.
Which, since it’s something you’re likely to do in almost every game you make, can be extremely useful.
But…
There are a couple of drawbacks to the random container system.
For example, while it’s possible to use random audio containers to rapidly fire sounds, doing so will still increase the number of voices in use in the same way as using multiple audio sources or by overlapping voices using Play One Shot.
It’s also not possible to modify any part of the random audio container type using a script, meaning that you’ll have to set up each asset exactly how you want it, ahead of time, in the editor.
And, while it can be useful for all kinds of randomised audio and sequencing, it’s generally not suitable for tightly synchronised dynamic music, such as stitching audio clips back to back seamlessly, for example.
This is because the timing calculations that are used to measure when each clip is due appear to be update-based, using float time values, which can cause clips that are meant to be played together seamlessly to be triggered early or late instead.
As a result, unless the system is updated in the future, if you need precisely timed dynamic music, you will typically need to use Play Scheduled instead, which runs directly off of the highly accurate Audio DSP time, and is independent of frame rate.
For more information about the random audio container, try Unity’s official documentation pages here.
Now it’s your turn
Now I want to hear from you.
How will you use the random audio container in your games?
Will it replace a system you’re already using?
Or do you feel like it’s more trouble than it’s worth?
Whatever you think of it, let me know by leaving a comment.

John French writes all of the Unity tutorials for Game Dev Beginner, and specialises in deep-dive guides teaching game development basics.

Comments
Your articles are very helpful! Thank you for your contribution to the development of the Unity community!
You’re welcome Alex! Happy to help.
Thanks for this information. This is definitely a Great asset to use. These Articles were hidden gem for me
You’re welcome! Happy to help!
Awesome content!
Thank you!