There are a lot of different ways you could make a background for your Unity project.
You could use the default skybox, you could cover the backdrop of your game with objects or scenery, or you could use a solid colour.
But what if you want to use a 2D image for your background?
While there’s no built-in method for displaying an image in the background of your game, one simple way to achieve the same effect is by using a Canvas element that’s set to display an image behind the contents of your camera.
In this article, you’ll learn how setting a background image in Unity works, the different ways to do it and how to create moving background layers that pan across your screen with perspective.
So how, exactly, do you set a background image in Unity?
How to add a 2D background in Unity
When you first load up a new project, the background you’re likely to see in your scene view, and in the game, is the default Skybox.
That is, you will if it’s enabled.
If it’s not, as may be the case when starting a 2D project, you’ll see a Solid Colour in the background instead.
What you see behind the scene is determined by the camera’s Clear Flags, which is the instruction of what a camera should show in the empty space of your project.
For example, if you want to change the background to a colour, simply set the camera’s clear flags to Solid Colour and choose the colour you want to use.
Or, if you want to change the Skybox that’s being used, make sure that the clear flags setting is set to Skybox and choose a new one in the Environment panel of the Lighting window.
However, there is no built-in option to display an Image in the background.
Meaning that, if you want to create your own custom backdrop, it will need to be an element in the scene that the camera can actually see.
While it is possible to literally place an image in the background of your scene, that sits behind the objects in your game, doing it this way will mean that the objects in your world may intersect with your backdrop.
Also, if you’re using a perspective camera, it may mean that you’ll need to increase the size of the background as you move it further away.
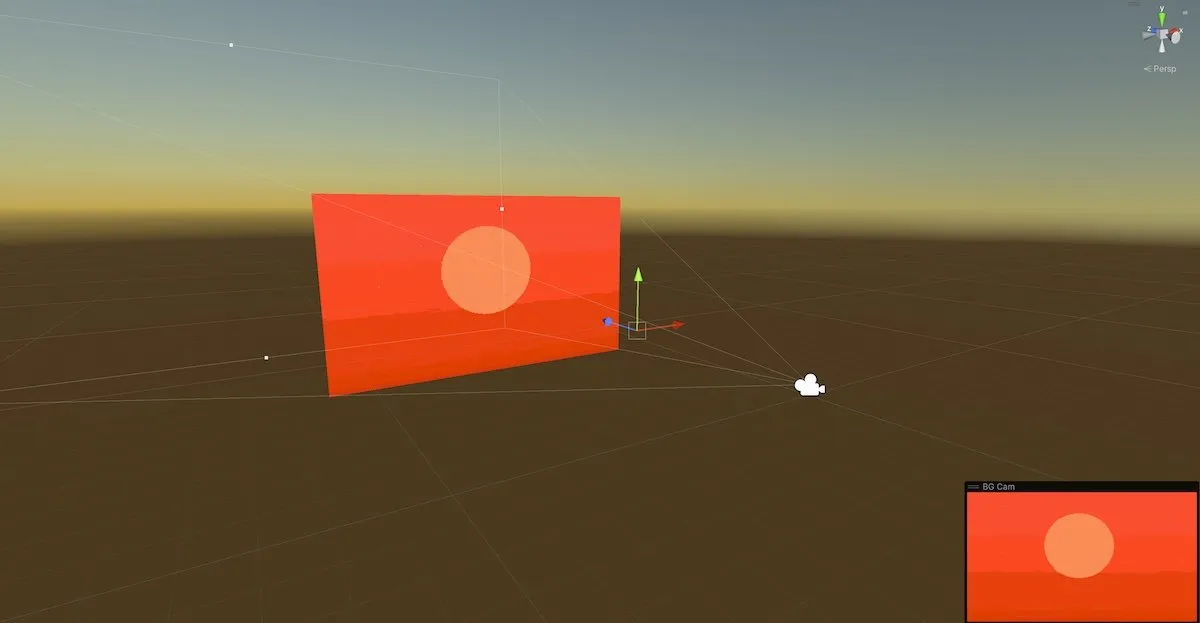
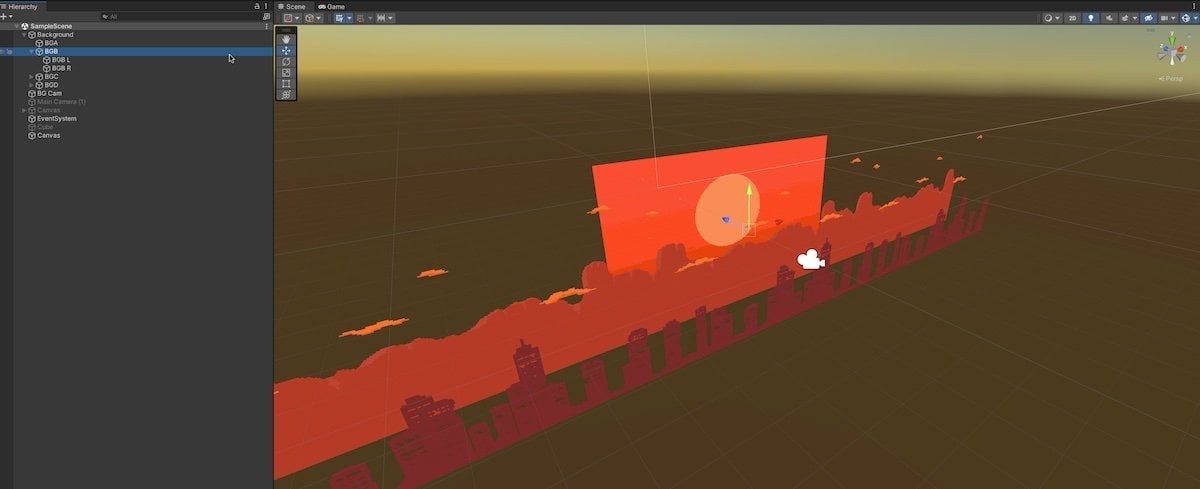
An easy way to make a background image is by simply creating a sprite that’s a child of the camera.
An alternative method is to create a static image that is always in view of the camera by using a Canvas element to display it.
A Canvas is typically used to create user interfaces and menus, and will render images and elements in front of the game scene at all times.
However, it’s also possible to use a canvas to place elements behind objects in a scene.
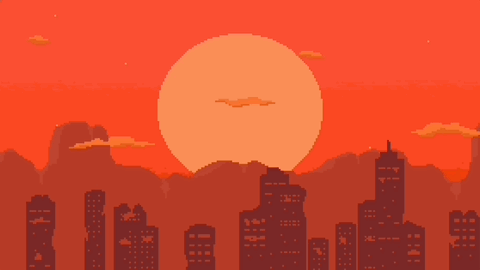
For example, you could create a canvas containing a background image element.
Like this:

And then stretch that image so that it covers the entire canvas area.
Like this:
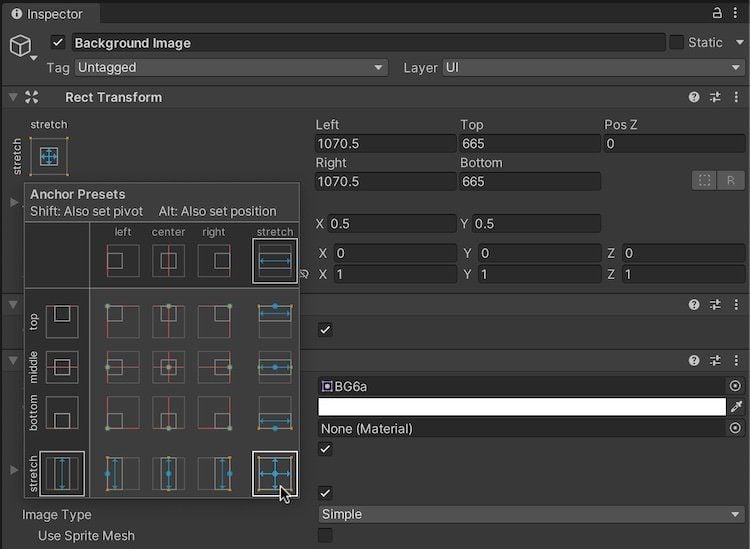
Holding Alt, or Option on a Mac, will allow you to stretch an element so that it fills its container, while holding Shift will also set its pivot point. Holding both allows you to centre and stretch a sprite to fill the canvas.
This will stretch or squeeze the image to fit into the game window no matter what size it is.
Which is useful, as it means that your background will always be covered up.

Stretching the background image allows you to always cover the screen, but may warp your image if the aspect ratio of the device is different to the image.
However, if this warps your image in a way that you don’t want it to, you’ll need to select the Preserve Aspect checkbox, which will force your image to its original proportions, filling either the full height or width of the screen, depending on its size.
Generally though, unless you’re certain that your game’s screen will always match the background’s proportions, or if you can accommodate different aspect ratios with alternative images or a secondary backdrop that sits behind your primary one, you will probably want to allow the image to stretch, so that it can cover your background completely at all times.
However, by default, creating an image like this will cause it to be displayed in front of your game scene, not behind it.
This is because, the canvas’ Screen Space mode is normally set to render as an Overlay, which is typically how you would want a menu to work.
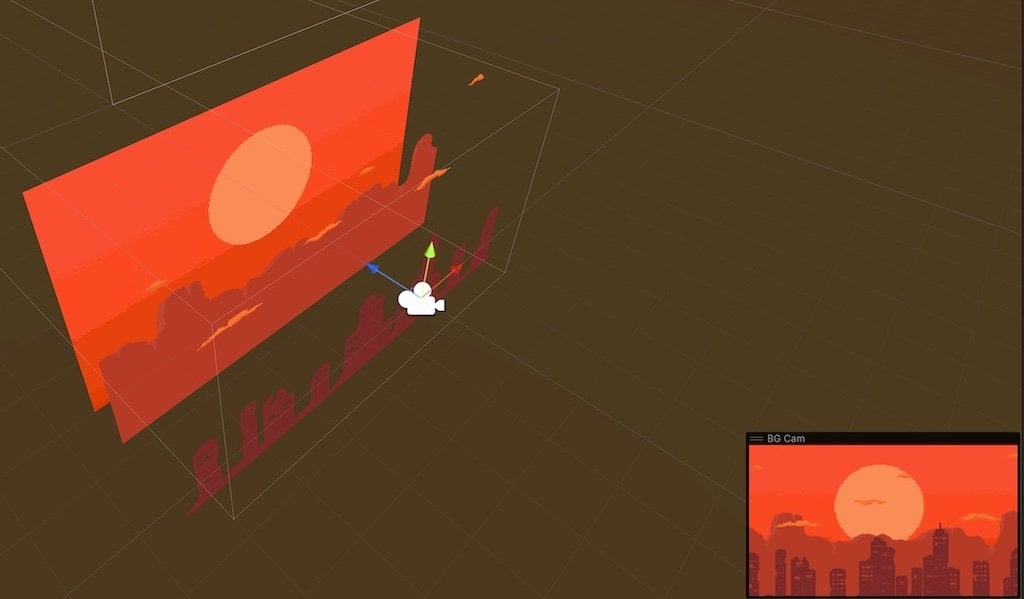
To change it, select the Screen Space Camera render mode instead, and select the camera in the scene that you want to render the image.
Like this:
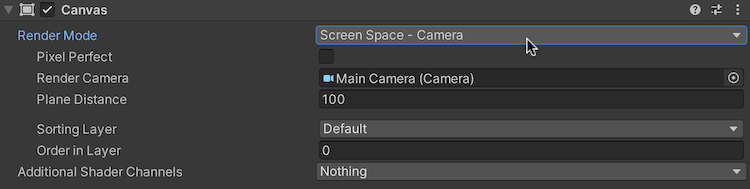
Selecting the Camera Screen Space render mode will cause the canvas to be rendered by a camera in the scene.
This will cause the targeted camera to render the canvas elements with other objects in the scene depending on the value of the Plane Distance, which is how far from the camera the background will be rendered, or 100 units by default.
While this setting doesn’t affect the visual display of the background itself, it will affect how other objects in the scene, that are being rendered by the same camera, interact with the background, as objects that are further than the plane distance will disappear behind it, as if it was a real object.
Which can be useful if you want your background to look like it’s in the world, even when it’s not.
How to make a background gradient in Unity
Unlike setting a solid colour for your camera’s background, there’s no built-in feature for creating a gradient background instead.
However, it is possible to create your own gradients using the Image Method.
This works by creating an extremely small image, just a few pixels in size, where each pixel represents a stop in the gradient.
Like this:
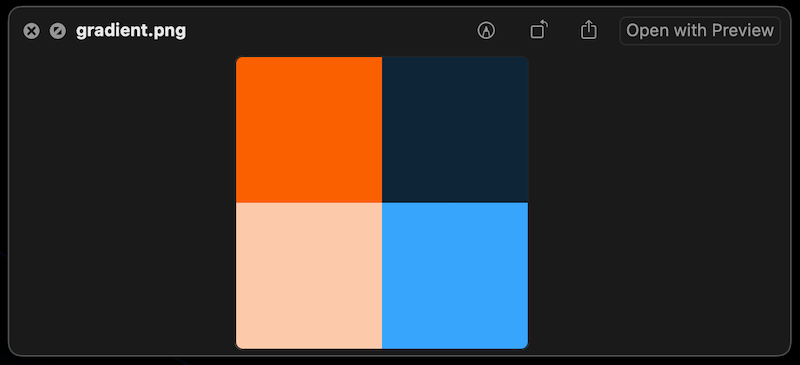
This image is 4 pixels large and takes up only 12 bytes in Unity.
Then, by using that image as your background (making sure to keep Bilinear Filtering enabled) the image that’s presented will automatically be smoothed out across the screen.
Like this:
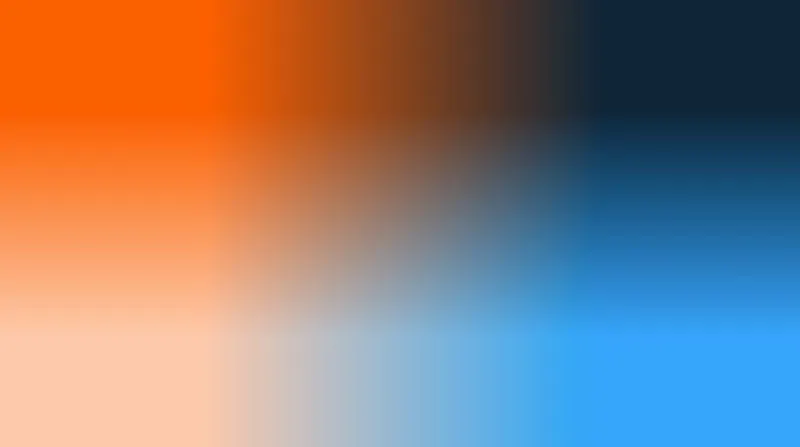
The built-in texture filtering creates a gradient using an extremely small image file.
The image method can be useful for creating a static background that’s rendered behind your scene and that’s permanently fixed to your camera’s position.
But what if you don’t want your background to be attached to your camera?
What if you want it to pan across your screen as the player moves, using multiple layers that shift with perspective?
How to make a parallax background in Unity
A Parallax Background is an effect in 2D games where flat background layers are moved at different speeds behind a scene to create the impression of perspective.
It generally involves moving each layer with the camera by a variable amount, depending on how far away it’s supposed to be.
For example, the closest layers in the background may not move with the camera very much at all.
The camera will simply pan past them.
While layers that are further away from the camera, such as the sky, or distant scenery may follow the camera much more closely, and appear to move more slowly, giving the impression that they are further away, as a greater amount of movement distance is required to pan the layer out of view.
This effect is automatic with a Perspective camera, which will account for an object’s distance when rendering it.
Orthographic cameras, however, which are commonly used in 2D games, do not render perspective, meaning that it’s not possible to look past an object by moving to the side of it.
As a result, the parallax effect can be used to create false perspective where different layers are physically moved in relation to the camera to make them appear as if they are further away.
So how does it work?
First, unlike the image method, which used a canvas, you’ll need to create sprites inside your scene for each of the layers that you want to use in your background.
This is because each layer is going to need to adjust its position in relation to the camera using Units, not pixels and, as a result, it will need to be in the scene and not in the UI.
Because each layer will need to move in direct relation to the position of the camera, they need to be in the scene, not on a canvas.
Next, space out your layers so that they appear in front of each other correctly.
When using an orthographic camera, the actual distance of each layer doesn’t really matter, but it’s important that each layer is placed in its correct order so that you can see them all.
Next, you’ll need to manually move each layer with the camera by a variable amount.
This can be done by storing the start position of the layer and then adding the camera’s position to it every frame.
Like this:
Vector3 startPosition;

    public Camera cam;
    public float modifier;

    void Start()
    {
        cam = Camera.main;
        startPosition = transform.position;
    }

    void Update()
    {
        Vector3 camOffset = cam.transform.position * modifier;
        transform.position = startPosition + new Vector3(camOffset.x, camOffset.y, 0);
    }
Normally, this would lock the background to the camera’s position.
But by scaling the movement amount by a value of 0 to 1, it’s possible to specify how much each layer should copy the camera.
For example, at 0, the layer will not copy any of the camera’s movement at all.
Whereas at 1, the layer will completely match the camera’s movement, as if it’s attached to it.
Choosing a value in between will cause the layer to move by a proportionate amount meaning that, if each of your layers is given a different modifier value, you can create perspective.
Each layer copies the camera’s movement by a different amount, creating perspective.
However, there’s a problem with this method.
Moving further left or right causes the closer layers to move out of view of the camera.
So how can you endlessly loop your parallax background, so that it’s always visible?
How to create an infinitely scrolling background in Unity
It’s possible to create an infinitely looping background by measuring the distance between the image object and the camera.
Then, if it’s further away than its own width, the start position, which is the point the offset is calculated from, can be moved closer to the camera to match.
To do this, you’ll need to get the width of the sprite in units, which can be found by reading the x value of its Renderer’s Bounds.
Like this:
float width;

void Start()
{
    width = GetComponent<SpriteRenderer>().bounds.size.x;
}
Then, when the sprite is further away from the camera than the width value, its start position can be adjusted, moving its origin closer to the camera.
Like this:
Vector3 startPosition;

public Camera cam;
public float modifier;

float width;

void Start()
{
    width = GetComponent<SpriteRenderer>().bounds.size.x;
    cam = Camera.main;
    startPosition = transform.position;
}

void Update()
{
    Vector3 camOffset = cam.transform.position * modifier;
    transform.position = startPosition + new Vector3(camOffset.x, camOffset.y, 0);

    if ((cam.transform.position.x - transform.position.x) > width)
    {
        startPosition += new Vector3(width, 0, 0);
    }

    if ((cam.transform.position.x - transform.position.x) < -width)
    {
        startPosition -= new Vector3(width, 0, 0);
    }
}
Then, as each background layer moves completely out of view, it’ll be moved closer to the camera by the value of its own width.
However, before this happens, the background will be able to move almost fully out of view of the camera.
As a result, to give the appearance that it’s infinitely looping round, you’ll need to duplicate the background sprites as children (without a movement script), so that each moving background has an attached duplicate either side of it.
This extends the background enough so that it can loop in either direction without revealing its edges.
Each moving background has been duplicated to extend it left and right, allowing it to loop.
Now it’s your turn
Now I want to hear from you.
How are you managing the background in your game?
Are you using UI images, in-game objects or a different method?
And what have you learned about creating backgrounds in Unity that you know someone else will find useful?
Whatever it is, let me know by leaving a comment.

John French writes all of the Unity tutorials for Game Dev Beginner, and specialises in deep-dive guides teaching game development basics.

Comments
Every single article you write improves my skills, and my game. This one is no exception. Thanks for taking the time to put these together.
Thanks Justin! You’re welcome!