
A billboard in Unity is the process of representing a two-dimensional sprite in a three-dimensional space.
It typically involves forcing the sprite to rotate with the camera so that, just like in a 2D game, the camera is unable to view the sprite with any perspective.
This creates a 2D object that can be viewed from multiple angles, in a 3D space, but without appearing as a flat 3D surface.
It’s a technique that was extremely common in early 3D games, where complex models, such as enemies, trees, or smaller items, such as pickups and ammo, would be rendered as a 2D sprite in the 3D world.
Today, however, while billboards are still used for performance reasons, such as for distant foliage, using them up close is generally more of a stylistic choice, and they’re typically used to achieve a particular type of retro look or art style.
In this article, you’ll learn the different methods for making your own billboard sprites in Unity and the differences between them, so that you can choose the approach that works best for your project.
So, how can you create a billboard in Unity?
How to create a Billboard in Unity
There are, generally, three different ways to create a billboard sprite in Unity.
- You can use a Billboard Script, to physically rotate the sprite in your scene, so that it faces the correct direction.
- You could use a Billboard Shader, which changes the appearance of the sprite using the GPU.
- Or, you can use a ready-made billboard tool, such as Unity’s built-in Terrain Tree Billboards, the Billboard Renderer component or an Imposter System.
Which method you use depends on how you want to use billboards in your game but, generally speaking, the simplest, and easiest, way to create a basic billboard is with a script.
How to write a Billboard Script in Unity
A billboard sprite is, essentially, a sprite that always faces the camera.
So, to make your own billboard, all you really need to do is turn a sprite so that it faces towards the camera’s position.
In Unity, it’s possible to rotate an object towards another object with the Look At function, which can be used to turn a sprite towards the position of the main camera (which is the first camera in the hierarchy with the Main Camera Tag).
Like this:
Camera mainCamera;

void Start()
{
    mainCamera = Camera.main;
}

void LateUpdate()
{
    transform.LookAt(mainCamera.transform);
    transform.Rotate(0, 180, 0);
}
In this script, the main camera reference is cached in Start, to avoid needing to get a new reference every frame, while calling the Look At function in Late Update means that camera is likely to have already moved before the sprite looks towards it.
You may have noticed that, after being turned to face the camera, the sprite is rotated an additional 180 degrees.
This is because you’d typically look at an object in a 2D project from the back, with its forward axis facing away from the camera.
However, when using the Look At method, the sprite turns to face the camera meaning that, unless you flip it yourself, the sprite will appear to be the wrong way round.
Creating a billboard by turning a sprite to face the camera works, but there is a problem with this method.
While objects at a distance will have the appearance of 2D sprites, they will noticeably turn towards the position of the camera as they get closer.
This means that objects positioned close to the side of the camera, but that are still in view, will appear to be turning to face you, giving them a sense of perspective and revealing them as flat 3D surfaces.
Which may not be a bad thing.
After all, depending on the type of effect you’re going for, having billboard sprites that appear to look at you, may be exactly what you want.
For example, this particular kind of billboarding can work well with dense foliage, as the sprites will appear to surround the camera as they get closer.

Using the Look At method means that objects will turn to look towards the camera which, depending on the kind of effect you want, might be a good thing or a bad thing.

In the game, because each sprite is turning to face you, this can give the appearance that you’re surrounded by the billboards when close to them.
However, if this isn’t the effect you want, and if you want the sprite to appear as a 2D object in a 3D scene, in the same way that 2D particles do, for example, you’ll need to use the Rotation Method instead.
The Rotation Method involves rotating the sprite to match the rotation of the camera, instead of turning towards its position.
Like this:
Camera mainCamera;

void Start()
{
    mainCamera = Camera.main;
}

void LateUpdate()
{
    transform.rotation = mainCamera.transform.rotation;
}
This method simply sets the rotation of the sprite’s transform to the same rotation of the camera that’s looking at it, meaning that the sprite’s forward direction will always be the same as the camera’s forward direction.
The Rotation Method matches the rotation of the camera instead of turning towards it, meaning that all of the sprites will face the same way.
This creates a visual effect similar to the type used in older games, where complex models were often represented by 2D sprites.
This, generally, creates a more convincing 2D effect as, just like in true 2D projects, the blue axis of the camera and of all of the sprites in the scene, both face forwards.
Matching the rotation of the camera with a Parent Constraint component
This method of creating a billboard sprite basically involves copying the rotation of the camera so that the sprite faces it correctly at all times and, generally, the simplest and easiest way to do that is using a script.
However, it’s also possible to copy the movement and rotation of another object using a Parent Constraint component instead.
The purpose of the parent constraint component is to allow an object to move and rotate with another object as if it’s a child, but without physically connecting the two.
This can be useful for placing an object in a player’s hand, for example, but without needing to actually include the object in the player’s own game object hierarchy.
It can also be used to create a billboard sprite, by copying the rotation of the camera’s transform, just like when using the Rotation Method.
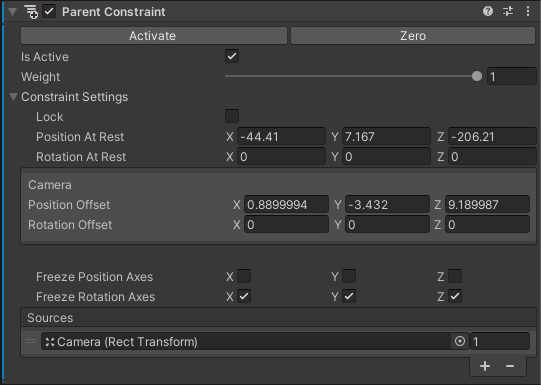
The Parent Constraint component can be used to copy the movement and rotation of another object.
The Rotation Method can be useful if you want the object to appear 2D at all times, no matter how close you get to it, and generally works best for small objects, such as pickups, or to otherwise achieve the more traditional, retro look of 2D sprites in a 3D world.
In both cases, however, depending on the type of object that you’re representing, you may want the option to limit the rotation of the billboard around one, or more of its axes.
So how can you?
How to lock the X and Z rotation of a billboard sprite
While you will, typically, always want to turn a billboard sprite around its Y-Axis, there may be times when you don’t want to rotate the sprite around the X or Z axes.
For example, tall billboard sprites, such as trees, or posts, will appear to turn off of the ground when viewed at a vertical angle.
Locking the X-Axis to Zero, or to its original rotation, will display the billboard with a vertical perspective.
Like this:
Camera mainCamera;

void Start()
{
    mainCamera = Camera.main;
}

void LateUpdate()
{
    Vector3 newRotation = mainCamera.transform.eulerAngles;

    newRotation.x = 0;
    newRotation.z = 0;

    transform.eulerAngles = newRotation;
}
This will cause the object to turn around the Y-Axis, but not the X or Z axes, connecting it to the ground, but allowing it to turn as the camera moves around it.
Why lock the Z-Axis as well?
When locking the X-Axis like this, it’s likely that you’ll also want to lock the Z-Axis in the same way since, if you’re locking the X-Axis to anchor the object to the floor, you probably also want to avoid spinning the object off of it again, if the camera is tilted.
Locking the X and Z axes of a tall sprite prevents its base from rotating off the ground when looking up, down, or when tilting the camera. The drawback is that you’ll be able to see the flat edge of the sprite when viewing it from a vertical angle.
While this method can be useful for displaying tall billboard sprites as connected objects, it does allow the player to view the sprites as flat surfaces from a vertical angle.
This is especially noticeable when using the Rotation Method, and particularly when the sprite is close to the camera’s side. This happens because the sprite is, essentially, looking past the camera, not at it.
While, normally, the sprite’s orientation hides this, when locking the X and Z axes, it’s possible to see which way the sprite is turning by looking down at it.
As a result, depending on the type of object you’re trying to display, and how you want it to appear, you may find that the Look At Method can be useful for displaying as much of the object as possible from all angles while still locking its X and Z axes.
Using Billboard Shaders in Unity
While it can be extremely easy to create a billboard sprite using a script, it’s also possible, and in some cases, preferable, to use a Billboard Shader instead.
The difference between the two methods is that the Script Method will use the CPU to physically turn the object so that it’s in view of the camera, while the Shader Method will use the GPU to change how the object is seen by the camera, but without actually turning it.

The Shader Method involves changing how an object looks, without physically turning it.
- Want to make your own Billboard Shader? Try this GitHub example.
But which method is better?
In my own, limited, testing, both methods appeared to be about as efficient as each other, with the exception that billboards created using the Shader Method were not processed when out of view of the camera, improving performance overall.
However, to be able to even compare the performance impact of each method involved displaying around 20,000 billboard assets all at once, at which point, you’re more likely to experience slowdown as a result of the sheer number of game objects in the scene, regardless of what they’re doing.
Put simply, while it can be more efficient to create billboards using a shader instead of a script and, depending on your workflow, more appropriate, chances are, if you’re making a large number of billboard objects, you may want to consider using DOTS as a starting point anyway or, if you’re using billboard objects on Terrain, Unity’s built-in Billboard Tools.
How to use Unity’s built-in Billboard Tools
Unity provides a built-in billboarding system that is designed to help manage performance and efficiency when placing a large number of objects on terrain.
Typically, the system is designed to be used with trees and foliage but, technically, there’s nothing to stop you from using it for other types of objects as well, so long as they’re added to a terrain object using Unity’s tree placement tool.
This works because trees painted onto a terrain are automatically converted to billboards past a set distance, to save on performance.
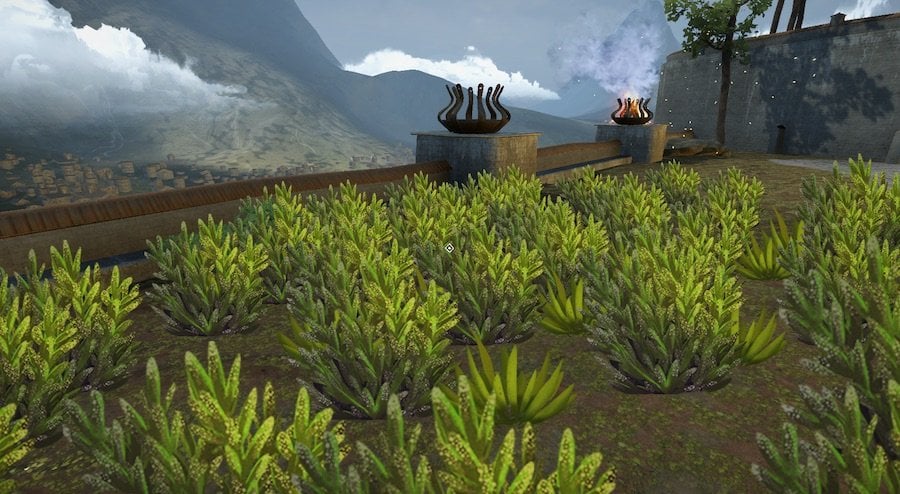
Which looks like this:
Unity’s terrain trees are automatically displayed as billboards past a set distance, as seen in this example, where the Billboard Distance has been set to the minimum value of 5 units.
However, while the billboard feature is designed for trees, it’s possible to use it with any kind of model, so long as you paint it onto the terrain as if it’s a tree.
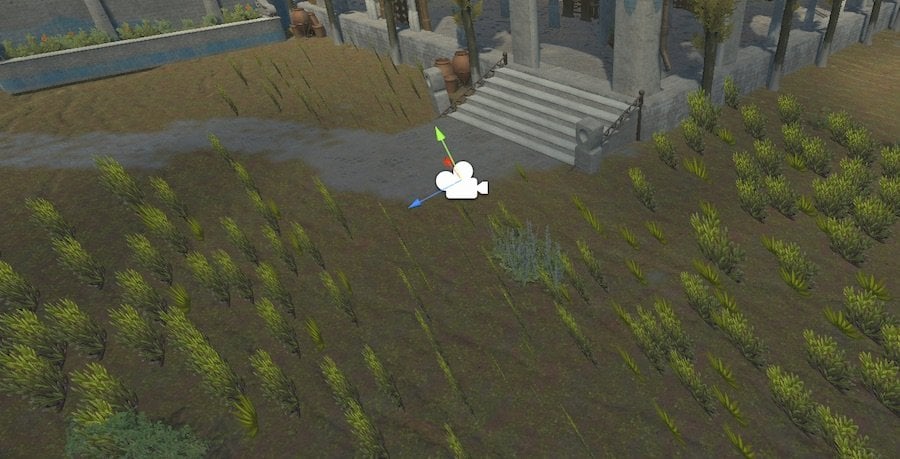
Such as these pots for example:

It’s possible to use other models in place of trees on terrain. Notice the pot models at the front, with the billboard renders behind.
However, while it works, it’s not a perfect system.
The display of the billboards can sometimes be temperamental, often requiring you to save or reselect the tree object to apply changes and, for any of this to work correctly, you may need to use one of the two Nature Soft Occlusion shaders on the tree object.
But, despite that, the resulting effect can be very convincing, objects can be set to smoothly shift into position as they become visible and the rendered 2D image even appears to accurately respect the angle of the object as you move around it, thanks to Unity’s default Imposter System.
Imposter Systems in Unity
An Imposter System is the method of swapping out complex meshes for simpler models and billboards at a distance, in order to improve performance when rendering a large number of objects.
Typically, this involves displaying a different mesh at defined distance values where, the further you are from the object, the simpler it becomes, ultimately becoming a flat billboard image, but that still presents the object with its correct 3D orientation.
Unity’s default imposter system will turn terrain trees into billboard sprites as soon as the Tree Billboard Distance is reached.
However, it’s also possible to optimise other models in your scene using an Imposter System Asset, such as Amplify Imposters, which can be used to optimise the rendering of models in your scene quickly and easily.
An alternative method for displaying a dynamic billboard that respects the angle it’s viewed from, but without needing to use terrain trees, is the Billboard Renderer component.
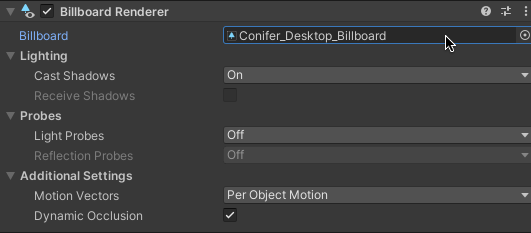
The Billboard Renderer component works with billboard assets, typically created using Speed Tree, to display a 3D object as a 2D sprite, but from different angles.
The billboard renderer component displays a 3D object as one of a set of 2D images, which are stored as a Billboard Asset.
This allows the object to be viewed from different angles, where each angle presents a different sprite.
Meaning that if you rotate the object, or move the camera around it, you’ll see the billboard switch to a different sprite to match the viewing angle.
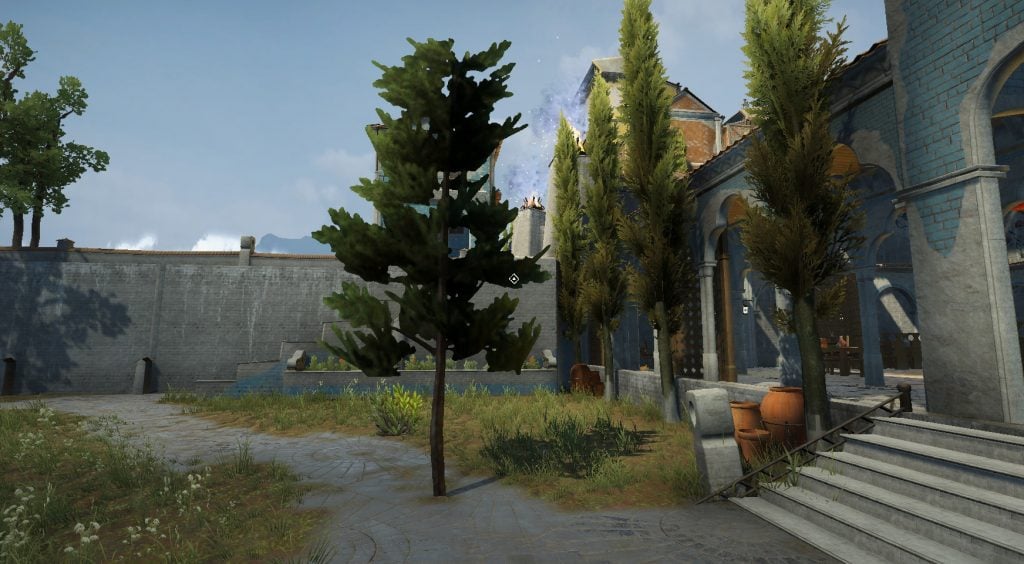
Billboard Renderers can be used to display a Billboard Asset from multiple angles, while also casting a realistic shadow against the ground.
Billboard Assets are typically created using Speed Tree creator tools, but can also be created using a script. It’s possible to generate your own billboard assets by using a Billboard Generator.
Like the Terrain Tree method, Billboard Renderers are, generally, designed to be used for performance reasons, allowing distant objects, typically trees and foliage, to be rendered with a similar level of visual detail but at a much lower performance cost.
While they’re designed to be used to render far-away objects as flat sprites, because they can cast a realistic shadow, and because they are able to show a 2D sprite from multiple angles automatically, there’s no reason why you couldn’t also use them up close, to render stylised 2D objects with a kind of 3D perspective.
Now it’s your turn
Now I want to hear from you.
How are you making billboards in your game?
Are you using a script, a shader, or Unity’s built-in tools?
And what have you learned about working with billboard sprites in Unity that you know someone else would find useful?
Whatever it is, let me know by leaving a comment.

John French writes all of the Unity tutorials for Game Dev Beginner, and specialises in deep-dive guides teaching game development basics.

Comments
I’m working on a game that extensively uses high-definition sprites that are billboarded towards the camera at all times. I’m entirely using the CPU-based game object model to handle it. I hadn’t considered a shader approach — it was interesting to learn about it but generally if there’s not a huge performance benefit I like to stick with actually rotating game objects just because it’s easier to see what’s going on in scene view.
This was a fantastic rundown. A few additional notes I’ve come across working with them:
– I had started by trying the built in “Look At” and “Aim” constraint component in Unity, but I found them a bit finicky. Specifically I had trouble understand what the constraint settings actually were doing. Freezing the axes and settings offsets didn’t work as I expected it would. Ultimately doing it myself in script proved way easier, even though I’m generally a proponent of not making more scripts if I can avoid it.
– I ended up doing a bit of a mix of the pure look-at and rotation options you outline here — my billboard sprites rotate to the average of the two approaches. I can weight the average if I want, but currently I have it set at 0.5 (using a lerp) between them.
– If you use an orthogonal camera you basically have to do the rotation approach, the look-at approach does not look right.
Sometimes it seems like these posts are cosmically aware of exactly what I’m working on in my project at a give time… 🙂
Thanks for the great tips Andrew, really happy to hear that you liked the article.
Using a billboard shader will almost always be a better solution than using an update script. A shader will run on the GPU and take advantage of heavy parallelization, while an update script runs on the main thread of the CPU.
It’s generally a good practice in game development to do as little processing as possible in the update functions of objects which you have a lot of instances of, so I’d be wary of putting billboard code inside of an update script.
Also, if you need to render over 20,000 billboards, before moving everything over to DOTS, I would look into using GPU instancing to render your objects.
Thanks for the tips!